


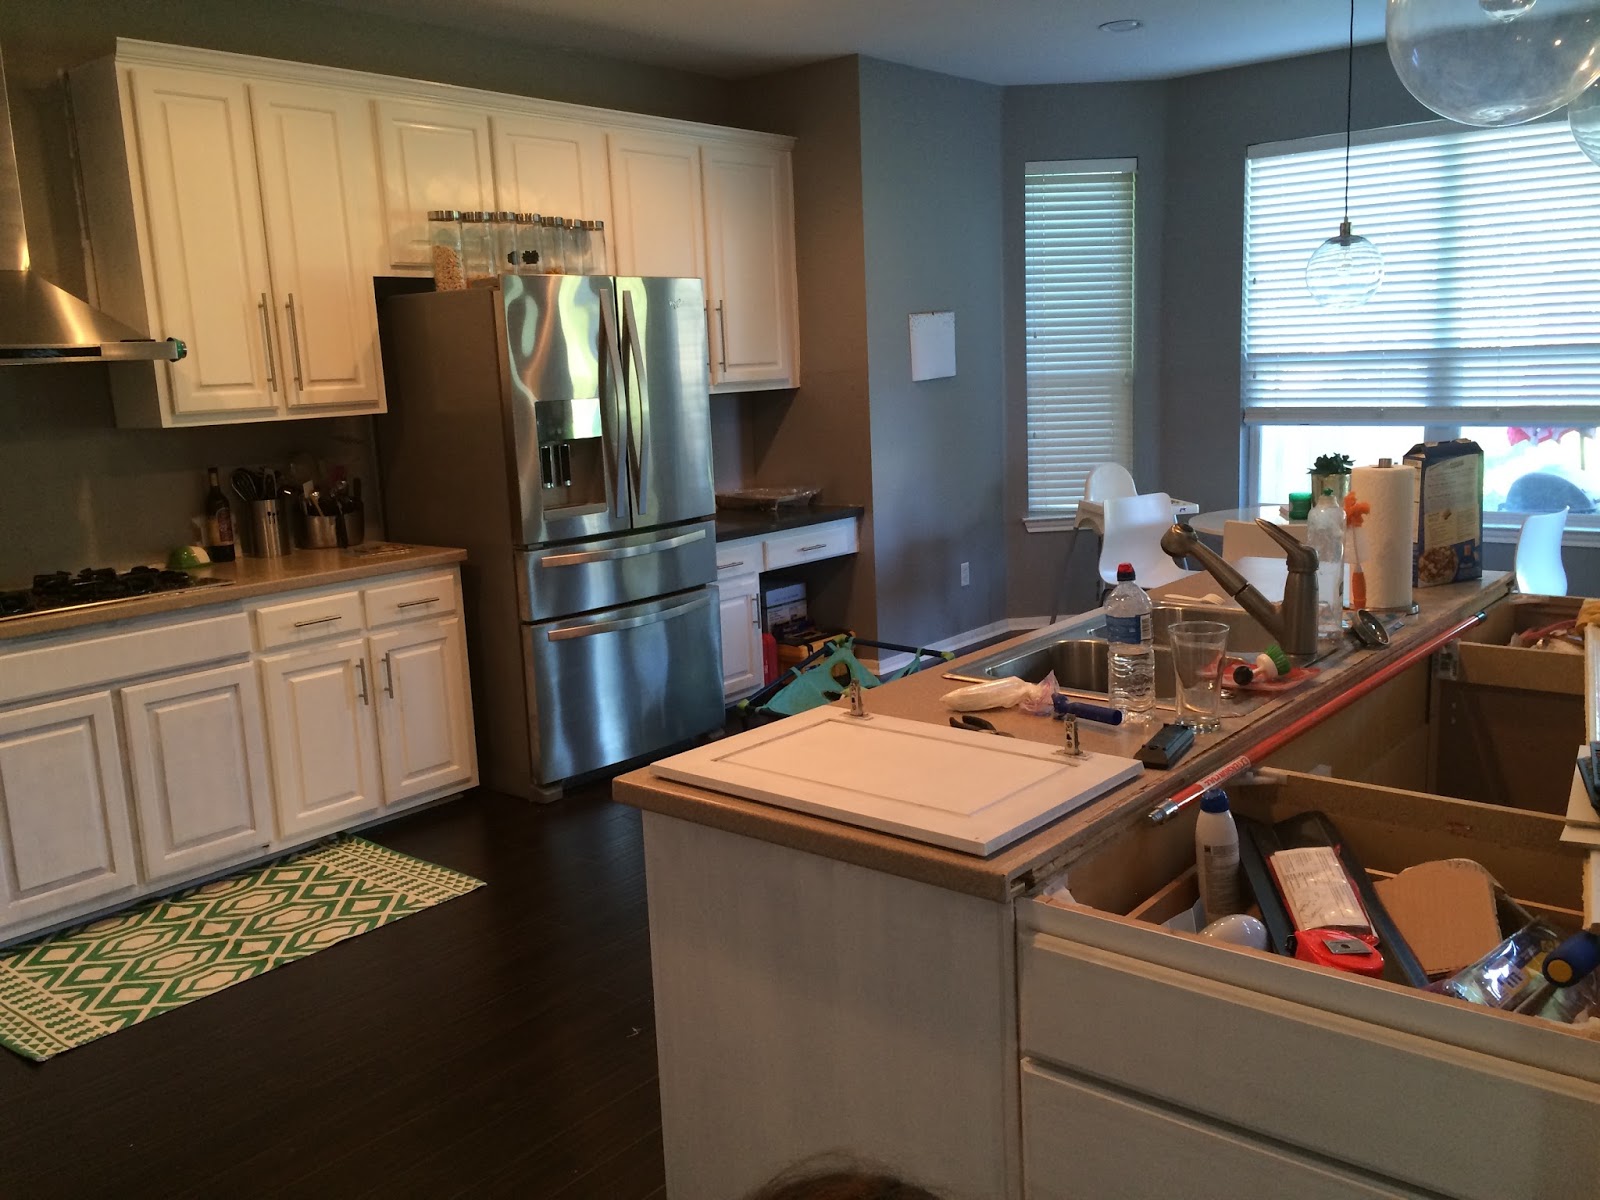
Here was our kitchen before we moved in.

The previous owner did upgrade some of the items in this kitchen (cherry stained cabinets and recessed lighting), but the dark cabinets and red walls were not my style. I really had my heart set on a light gray and white kitchen.
The first thing that I did was
paint the walls and ceiling. The walls were painted gray (Rocky Bluffs by Valspar) and the ceiling (which was a cream color) was painted white. Then we retrofitted the middle recessed light over the kitchen table with the hardwired West Elm globe pendant light.


After the counter install around the perimeter of the kitchen, the big “bring in the contractors” part of the reno began. I needed the contractor to remove the three arches between the kitchen and living room, remove the center island, and expand the area where the sink was into a large center island.
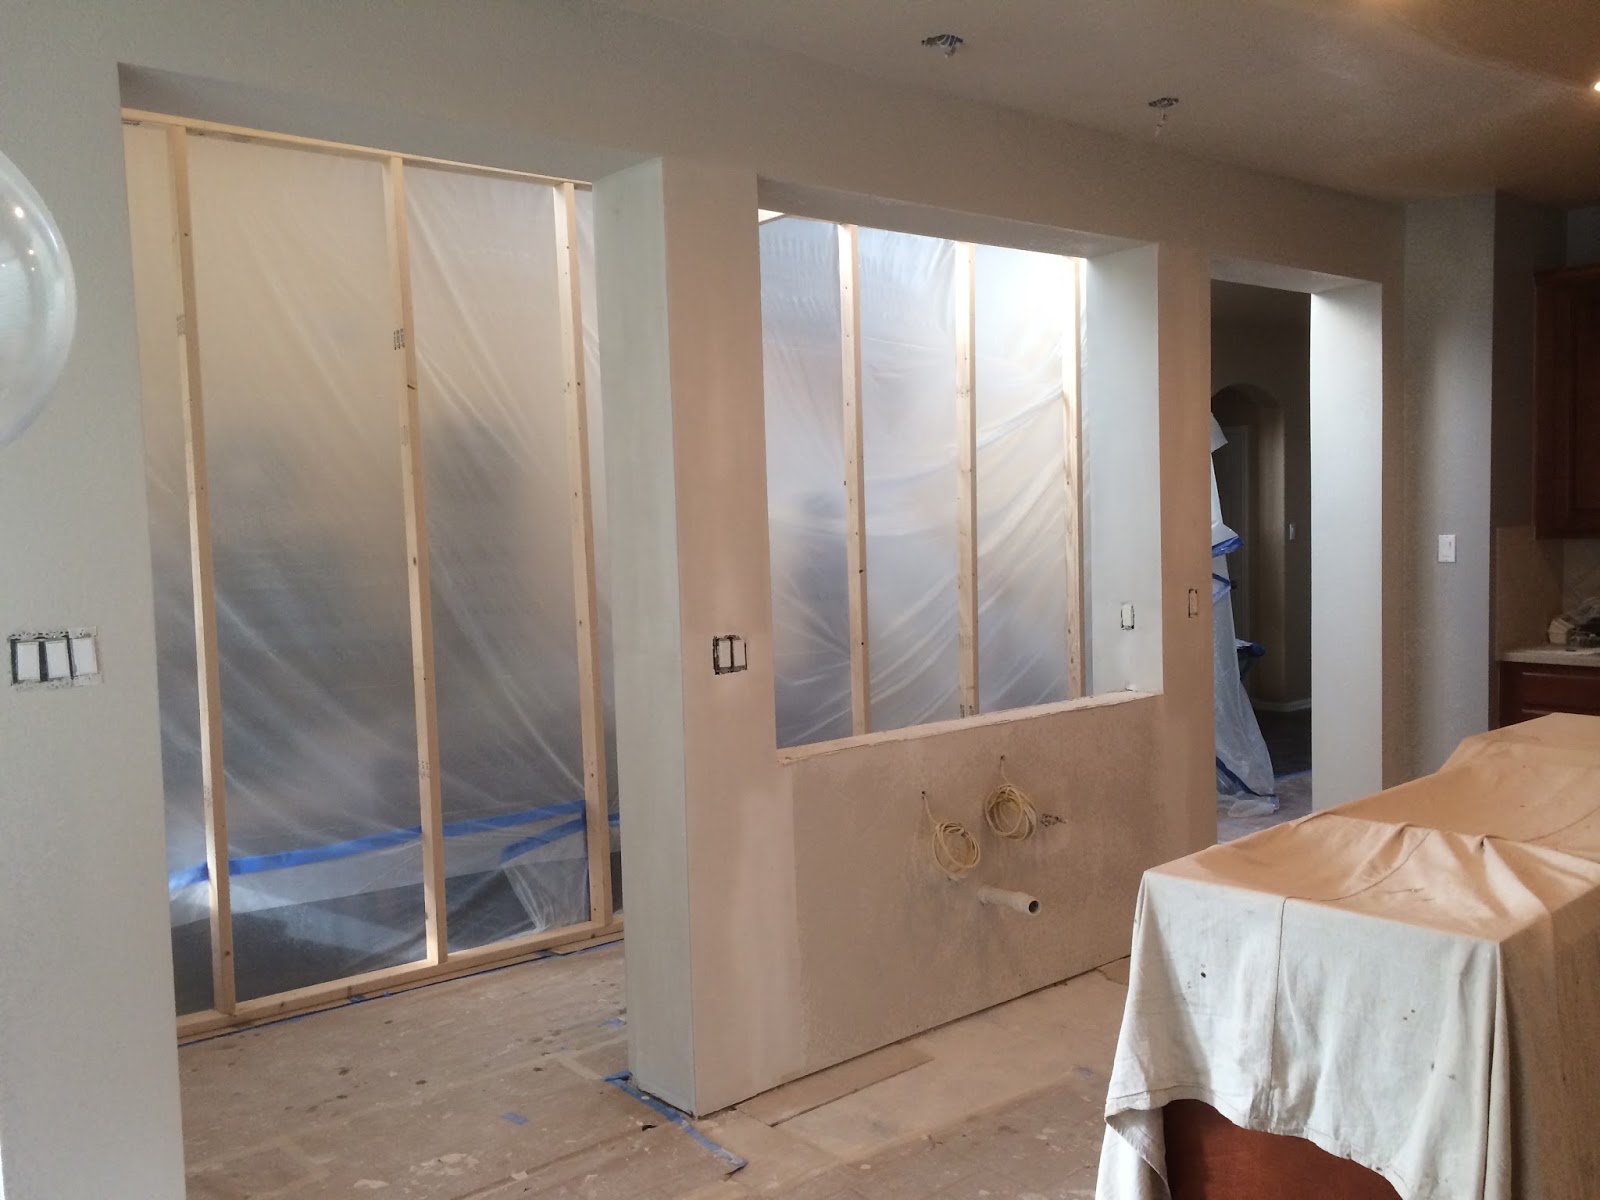
Here is an “in progress” shot of the space. The contractors put up a temporary wall to block off the kitchen from the rest of the house so that the dust and mess would be contained in the kitchen area. Then the began work removing the arches and squaring off the openings as well as lowering the bar top to counter height level (that is the opening you see in the middle). They also changed the one recessed light fixture that was over the sink into two light boxes for me so that I could install my two other West Elm globe pendants over the future island.
Here is the floor after the center island was removed and the electrical wiring pulled out.
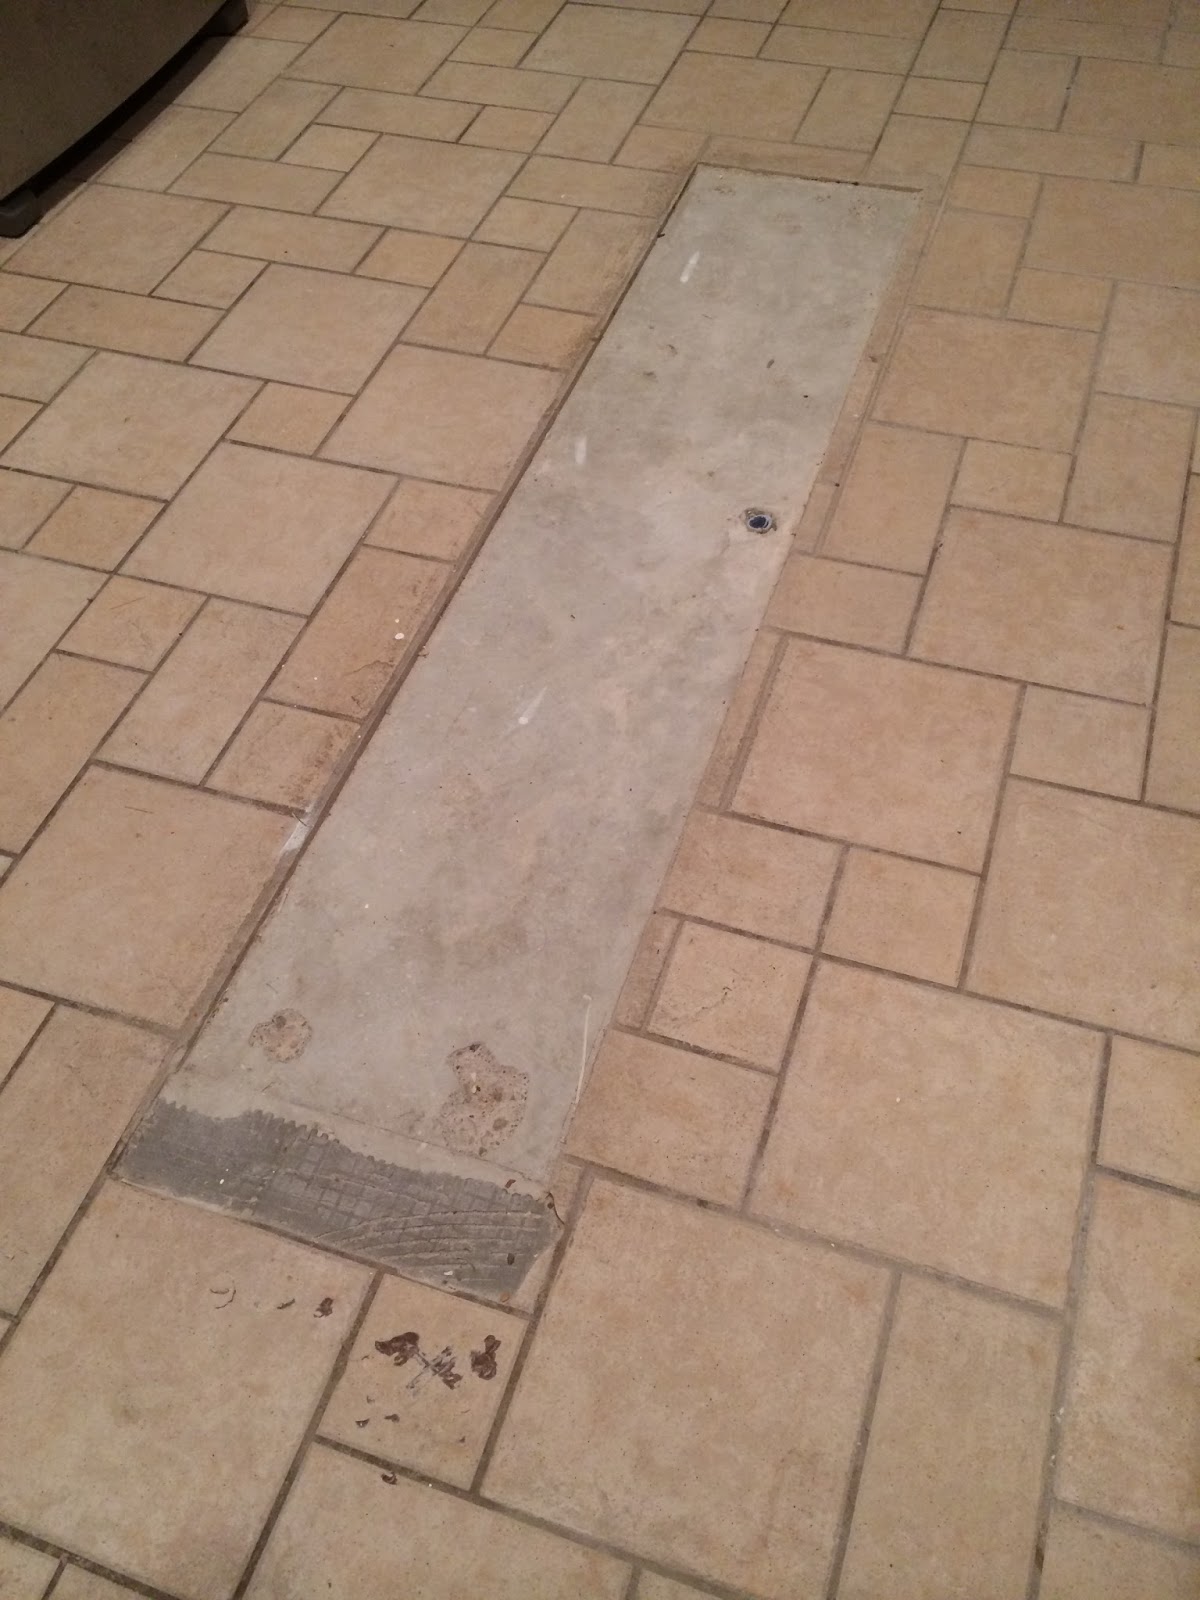
This area was later filled with concrete so that the laminate could be installed directly over the tile in the kitchen.
Once the contractors were finished, we had this configuration. Basically we moved the cabinetry that the sink and dishwasher were in against the wall out about 2 feet and inserted two three drawer units (one on each side) facing out. This entire space became our new island. Unfortunately we had to leave the columns (my initial plan was to remove these, but the vent line from the sink ran through one and would be too costly to change). We ended up getting the counter tops installed around the columns to make the island appear even larger. And here is the island once the center counter top went in.

As you can see, I went with gray cabinets (The same rocky bluffs as the walls, and the hardware hadn’t been installed yet) and a white quartz counter top. Basically the opposite of the cabinets and counter tops around the perimeter of the kitchen.
The next step was configuring the existing cabinetry to fit a free standing range. This was the configuration after we removed the old vent hood and the cabinetry directly above the stove top. This part was easy as it was just a separate piece that we could unscrew from the side cabinets and back wall. Then I installed the new exposed range hood in its place and purchased an extension so that it would go all the way to the ceiling.
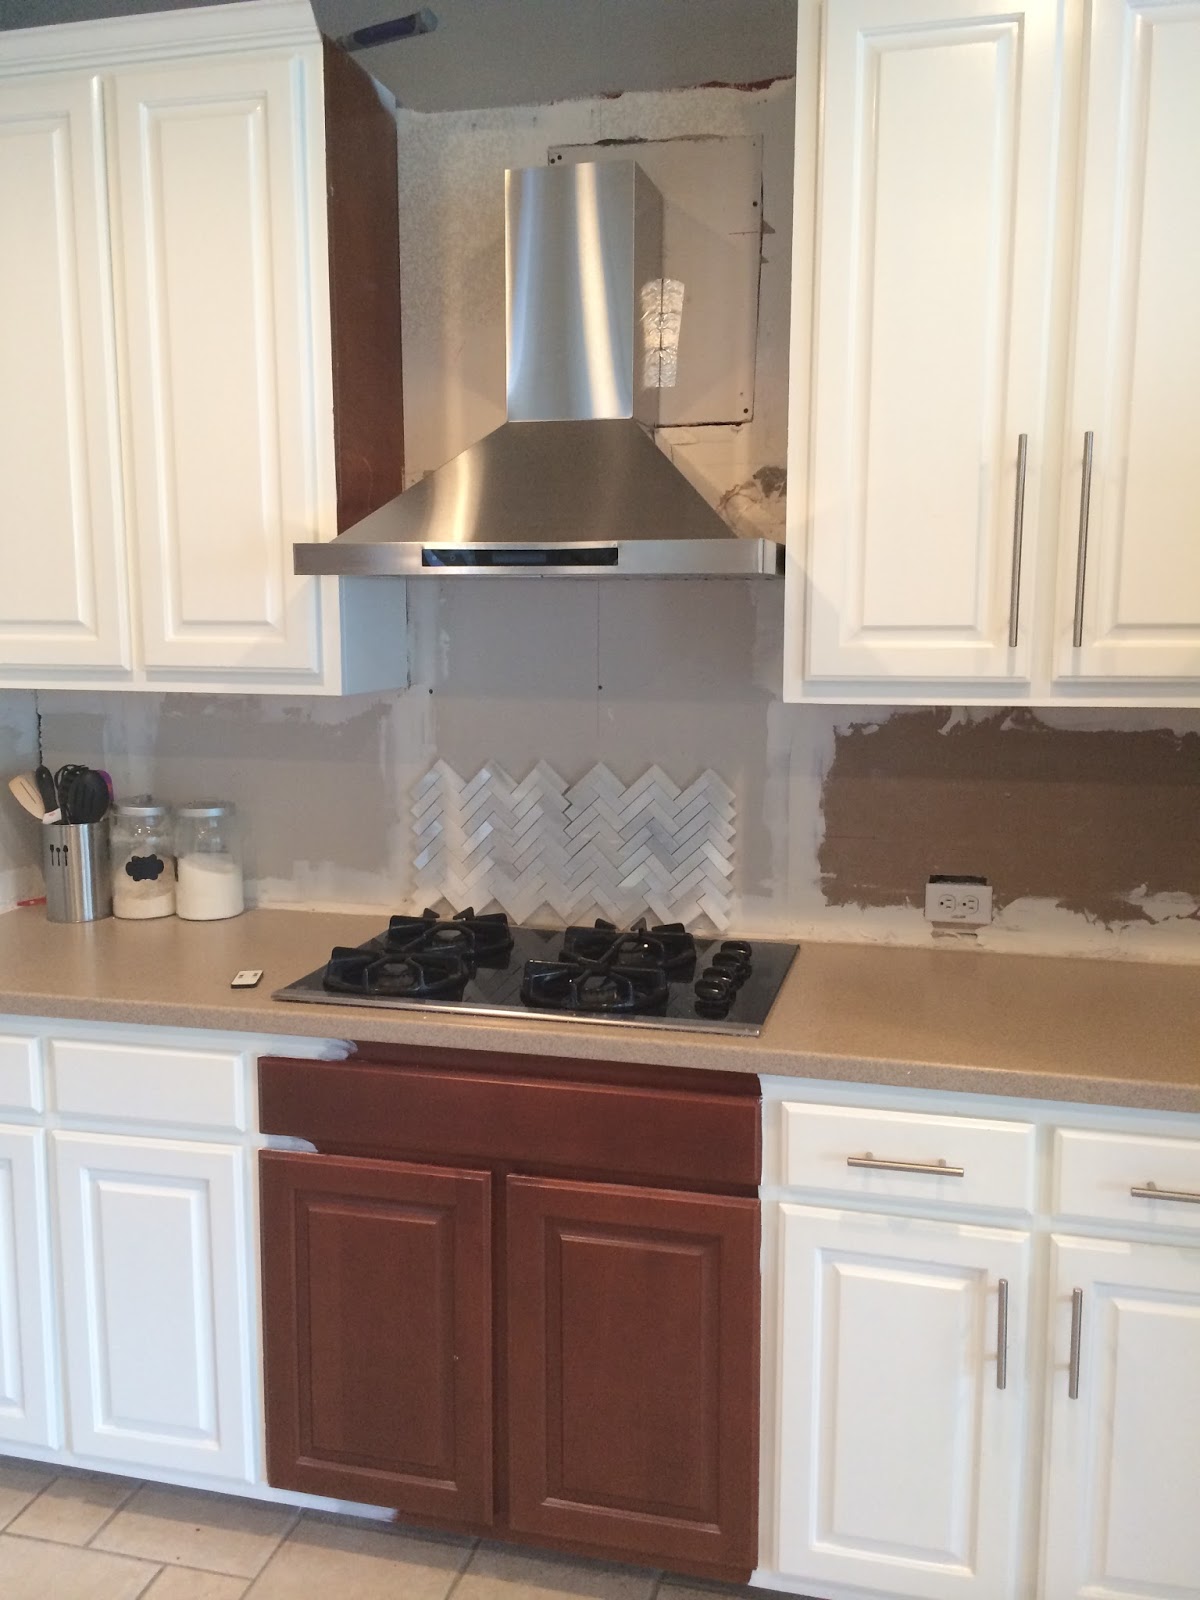
The tricky part was removing that unpainted section below the range top. That entire bottom piece is one whole unit, so we couldn’t just unscrew it like we did the top. What we ended up doing was using a saw-zaw to cut through the sides of the cabinetry right about were the paint stops on each side to create an opening large enough for a free standing range. We removed the doors and false drawer front and then sawed out the sides and bottom of the cabinetry to create the opening we needed. Only, when Lowes delivered the range, it was just too large height wise and the back of the range was just inches from the bottom of the hood. So I returned it and instead purchased a slide in range. These slide in ranges have the controls on the front and are seamless when installed flush against the counters. The best part is that it left a large space between the top of the stove and the hood so that the tile back there would be seen.
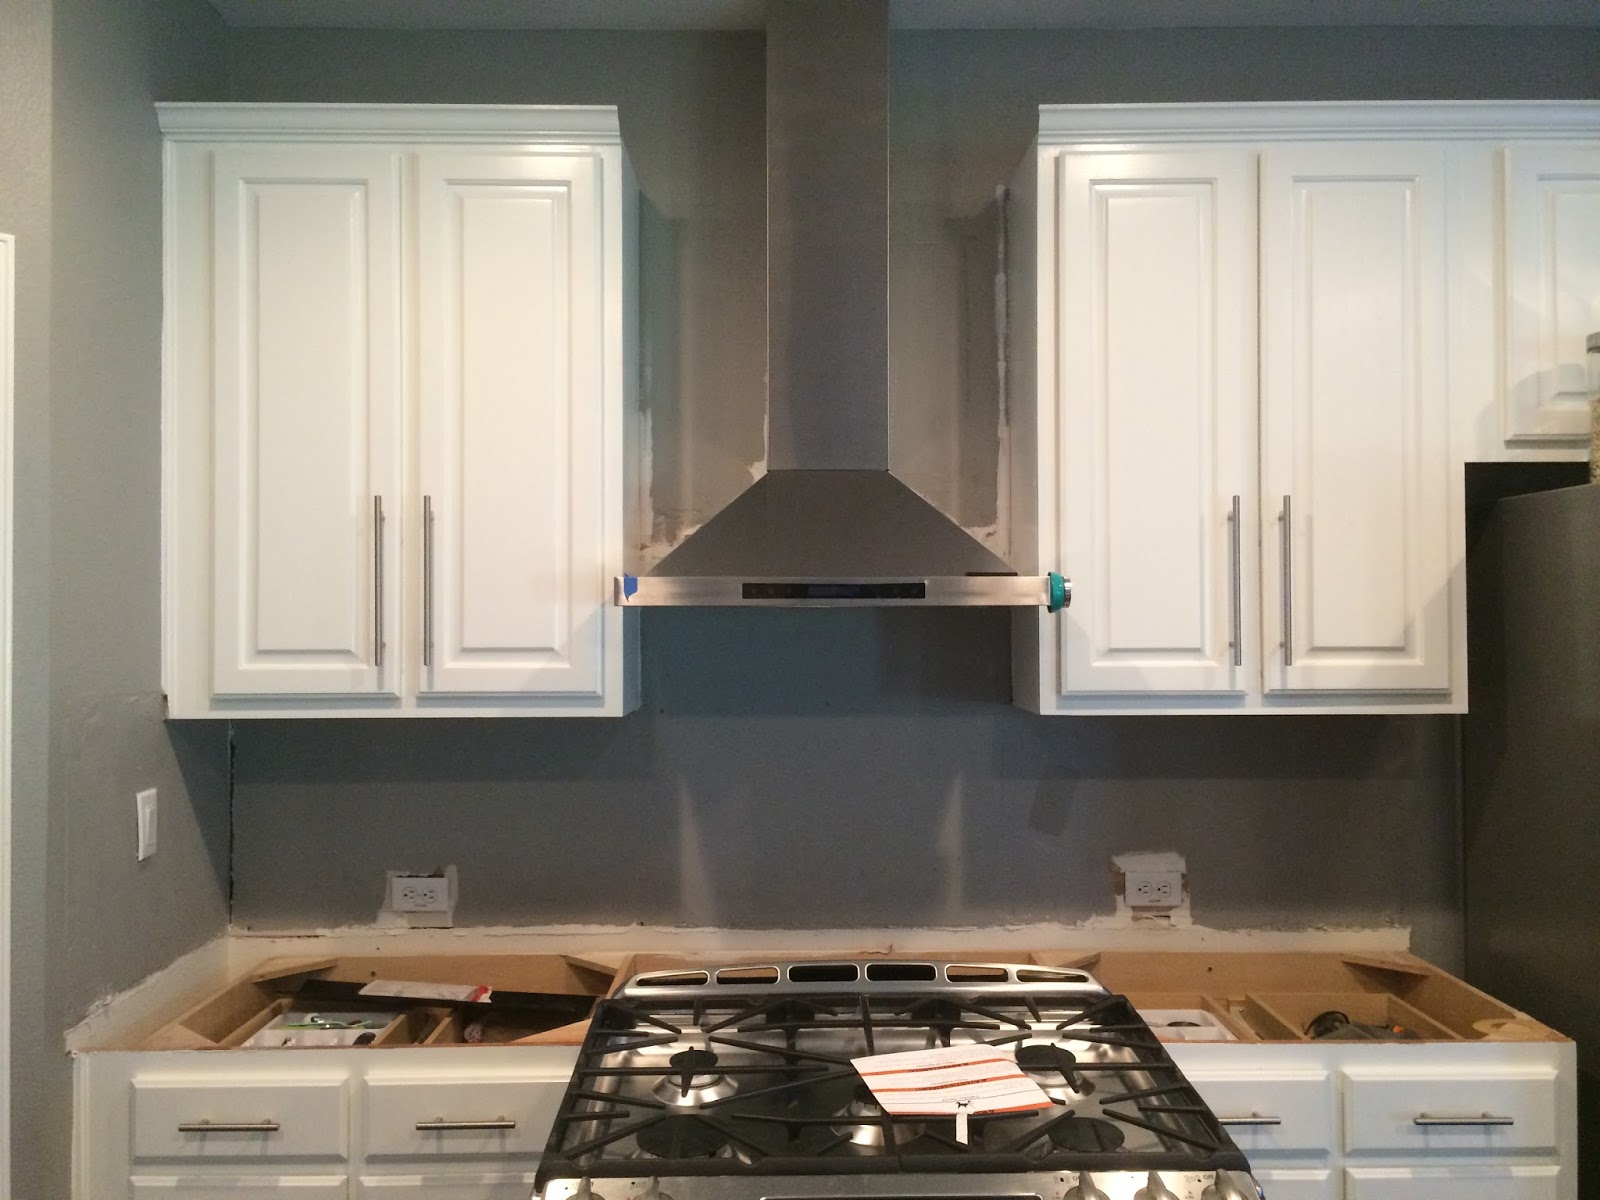
Here is the slide in getting installed right before the counter tops came. It seems this reno was just a bunch of juggling to make sure everything was installed in the correct order, which I am sure is true of most renovations.
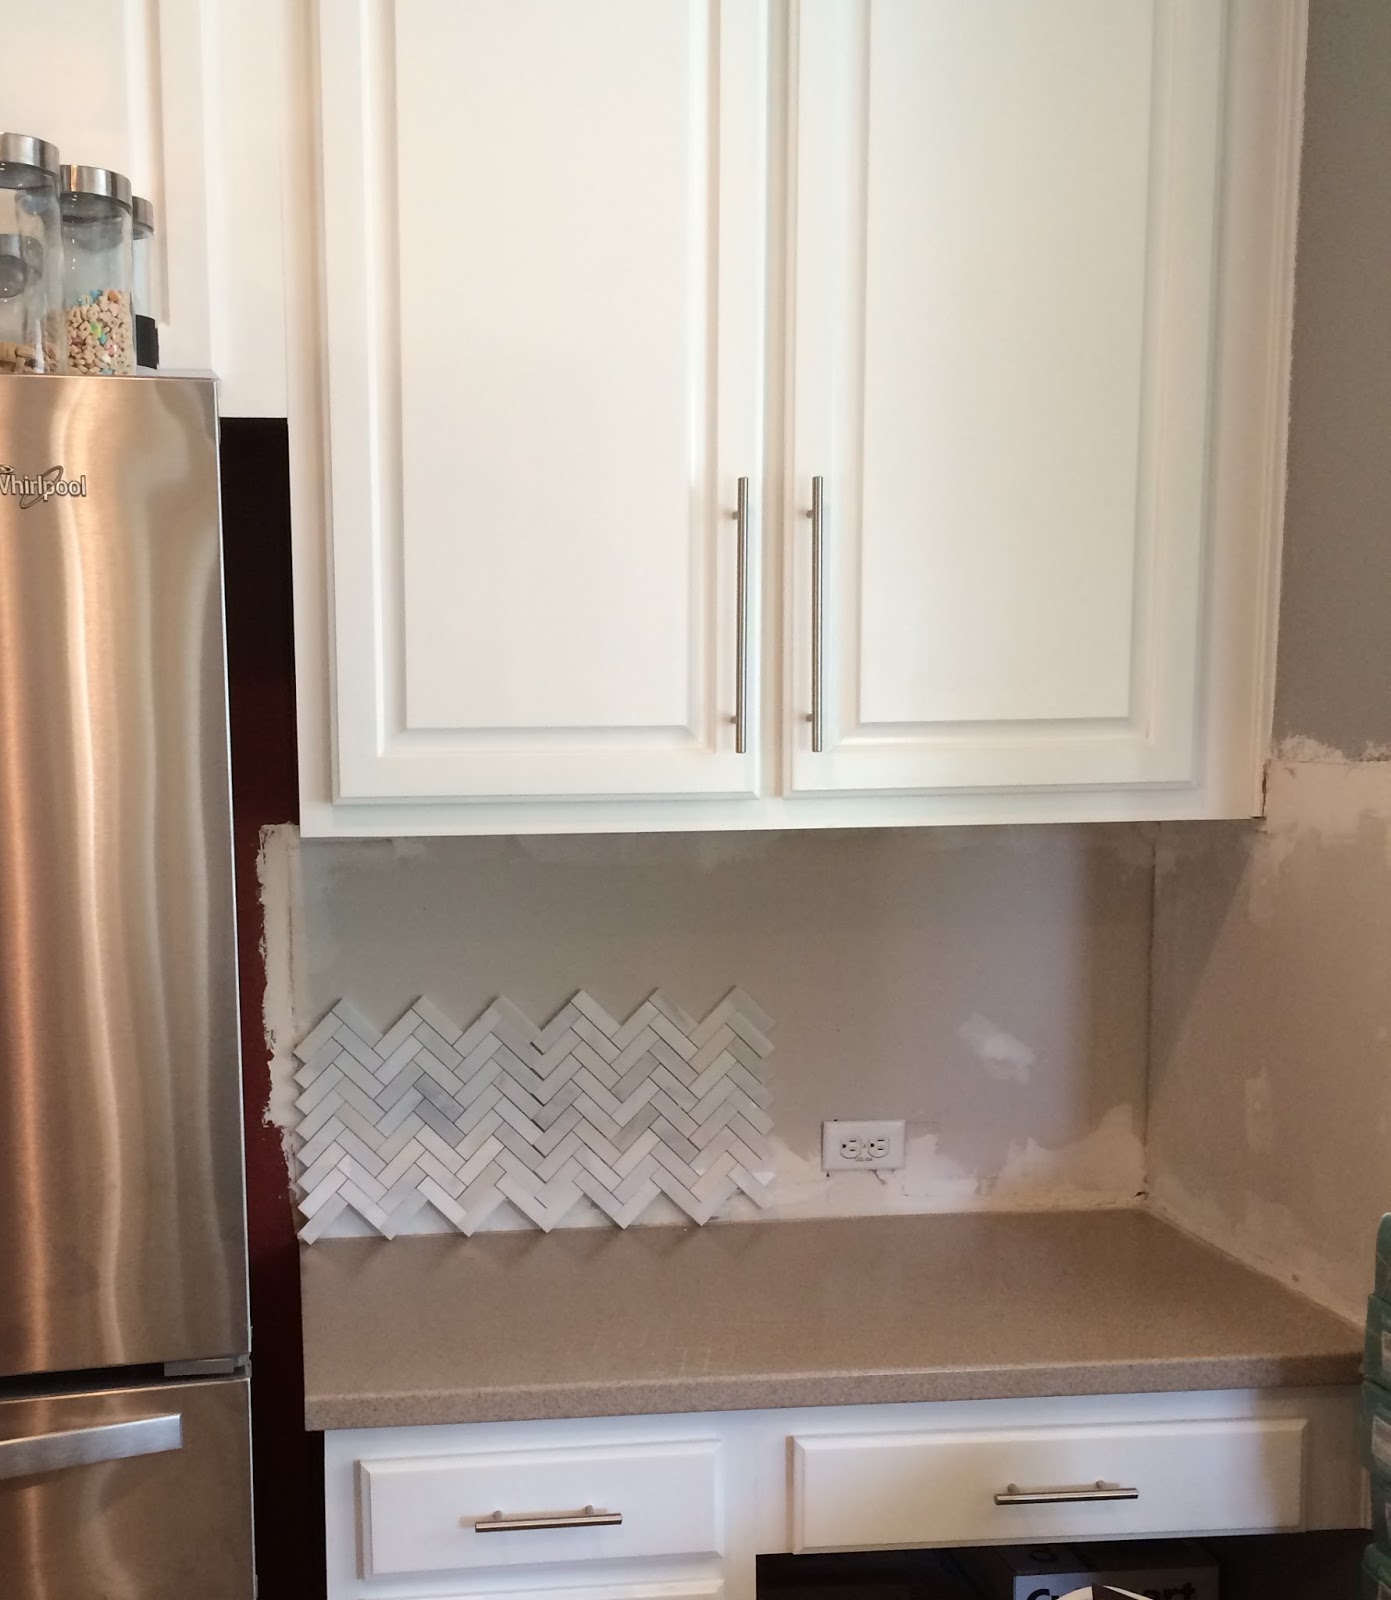
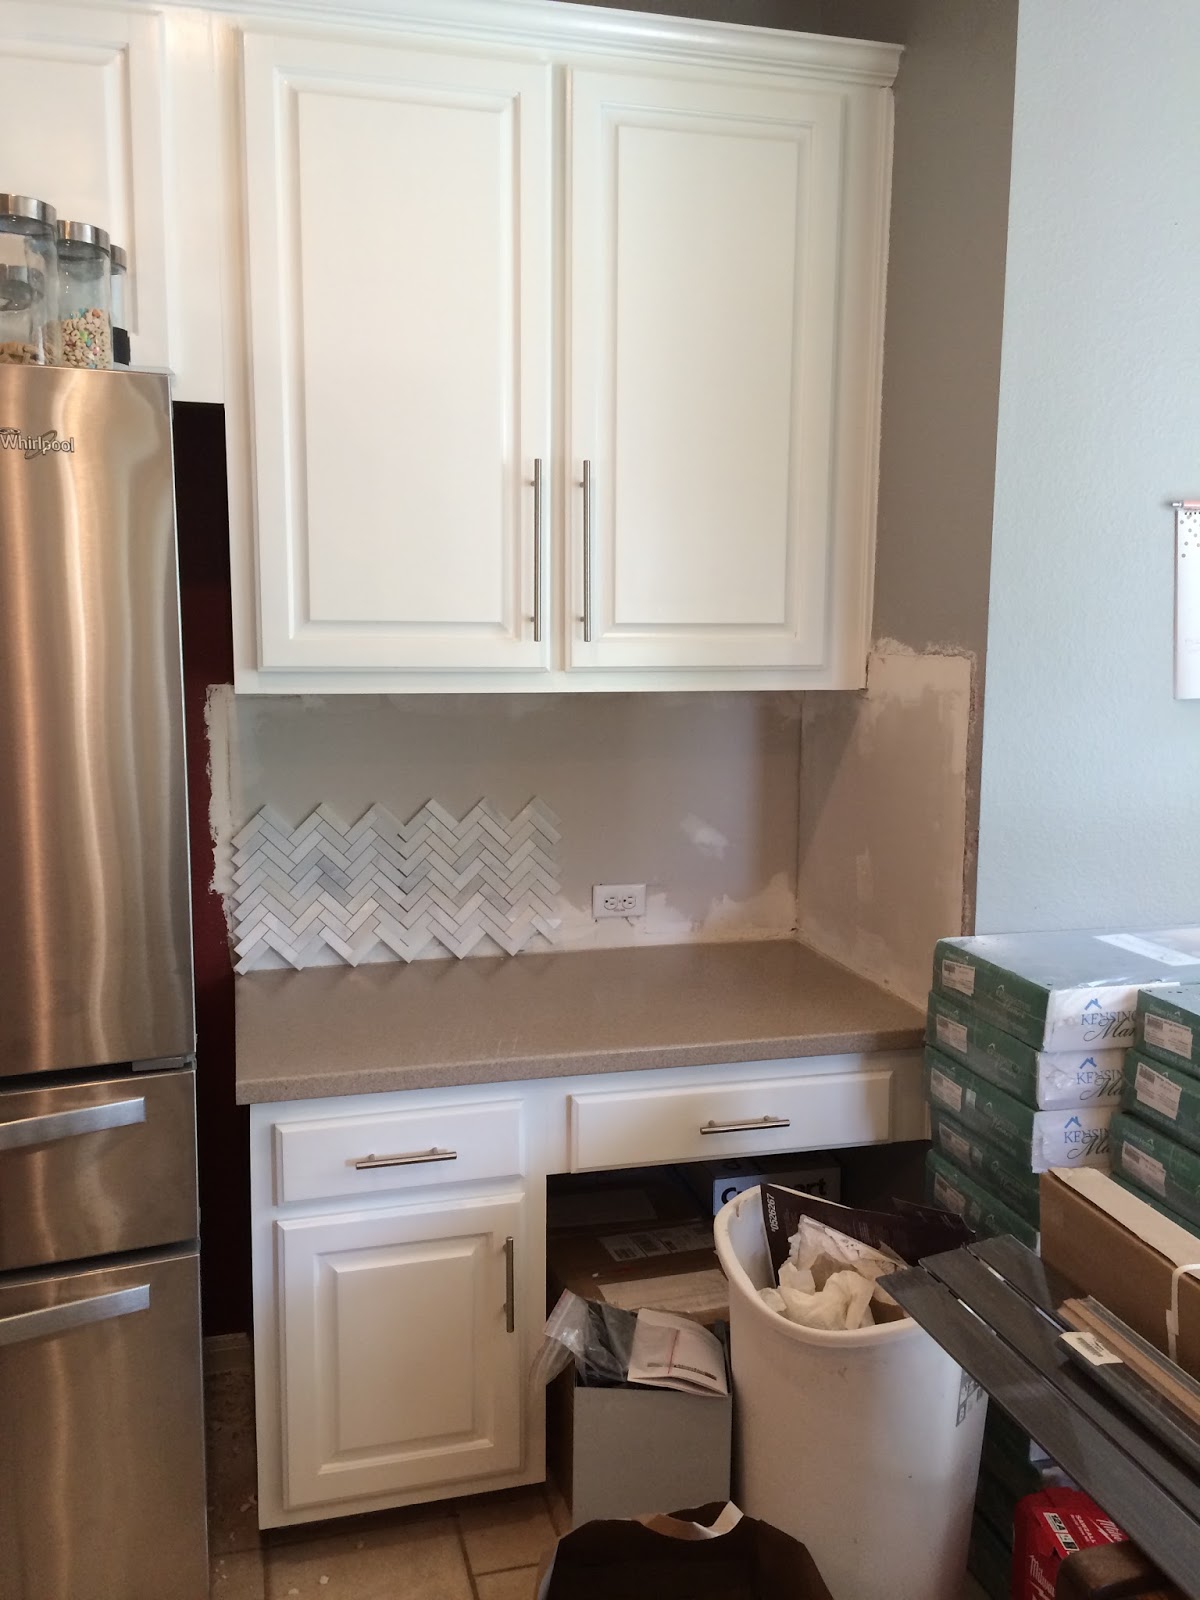
The final steps of the kitchen remodel were to have the flooring guys come back and finish installing the laminate throughout the kitchen (they had already done the rest of the house, but had to wait on the kitchen until the contractors reconfigured all the cabinetry), and to install the new backsplash. I went with a marble herringbone mosaic tile. I ended up installing the backsplash myself. I am not sure why I chose my first tiling project to be a herringbone mosaic, because that tile is a pain to install! But I finished it. Now it has been almost a year and I have yet to grout it. There is always something! Once I finally get up the motivation to grout the tile, the kitchen will officially be complete. I hope that will be soon.
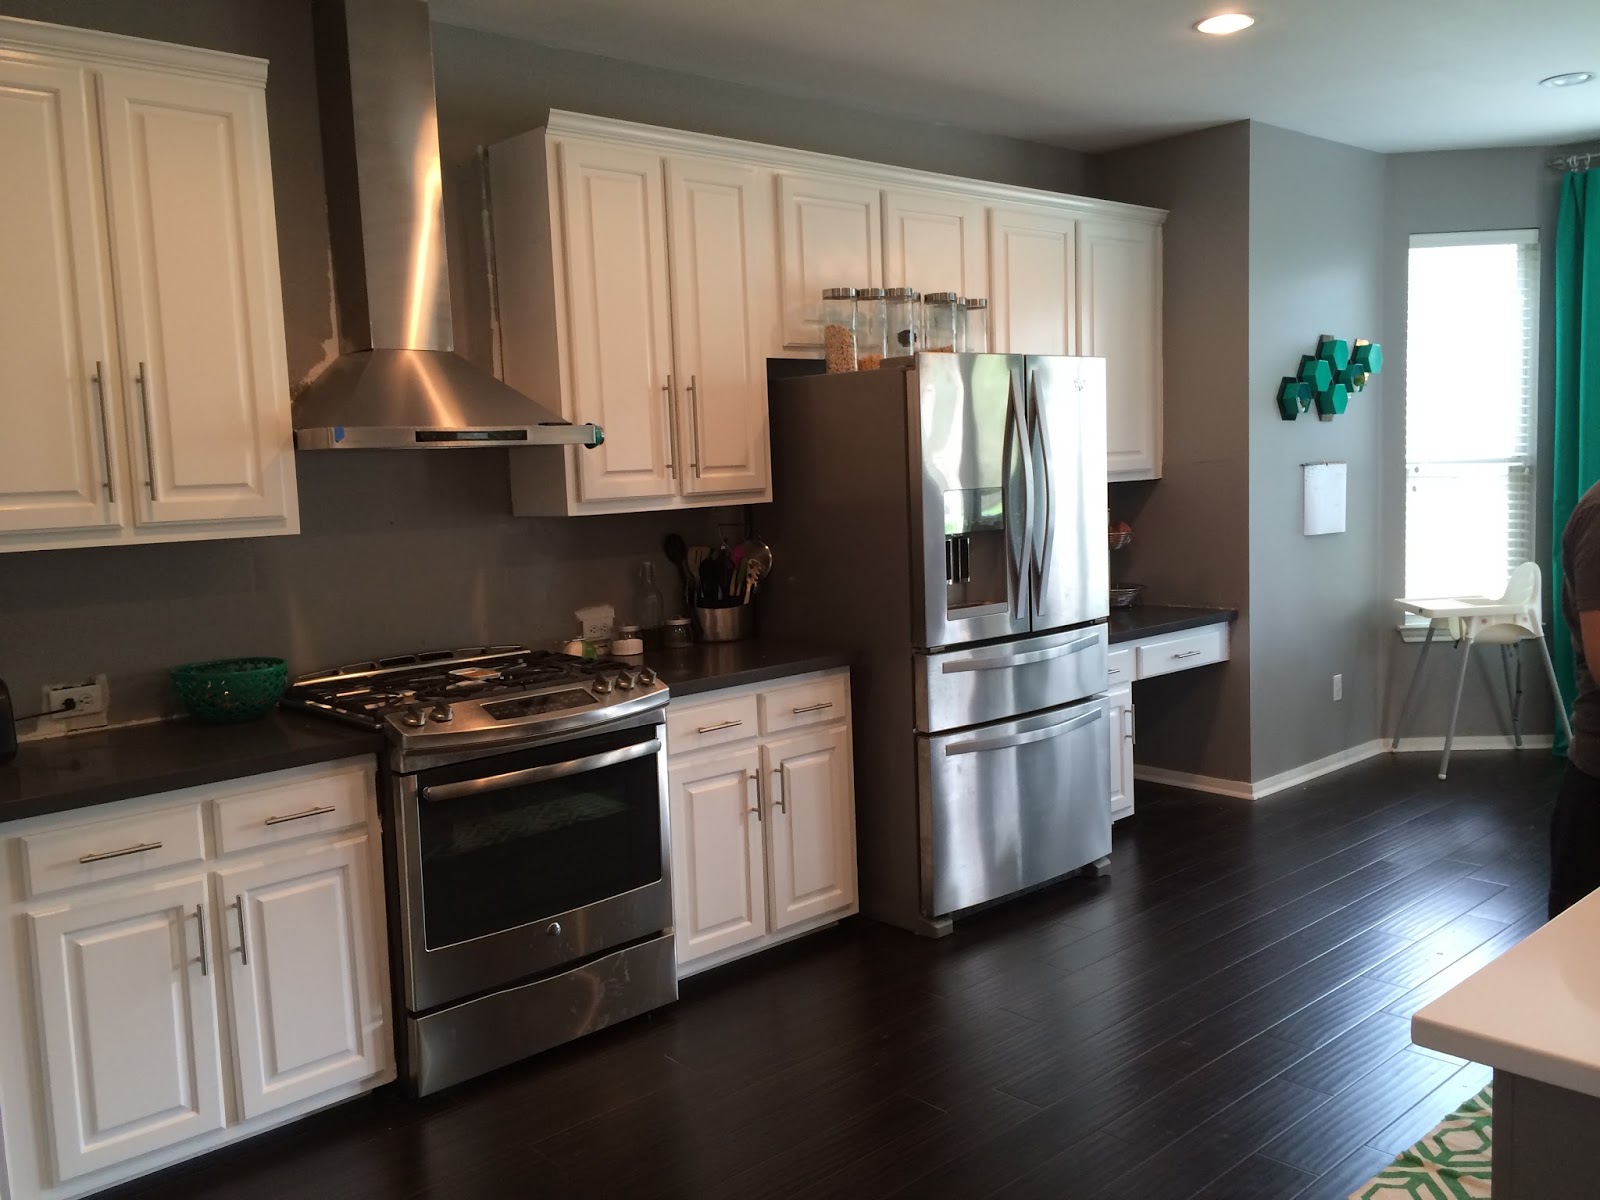
Here is the last shot for today. The kitchen is pretty much complete here, it is just waiting for the backsplash. Tomorrow I will show you the final after shots of the kitchen as it is now. Thanks for following along on the quick recap of our kitchen remodel.


December 18th, 2015 at 6:34 am
What a great kitchen! When I remodeled my kitchen, we hired someone to do it. While it went smoothly, it was expensive and kept being delayed. I've always wished that my husband and I had done some of the work ourselves to save money and time. You have inspired me to try some of it myself on our next project.
Essie Reed @ Valley Home Improvement