


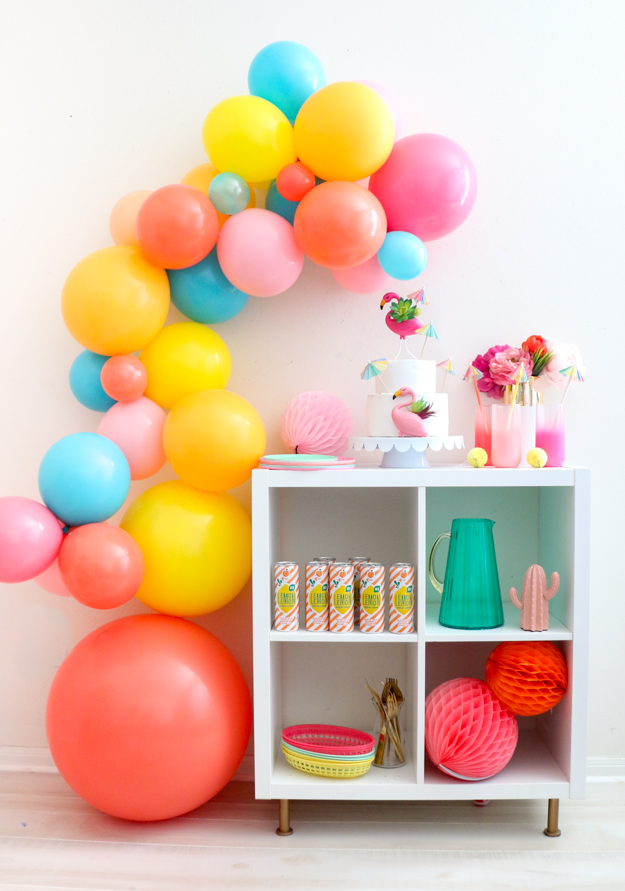
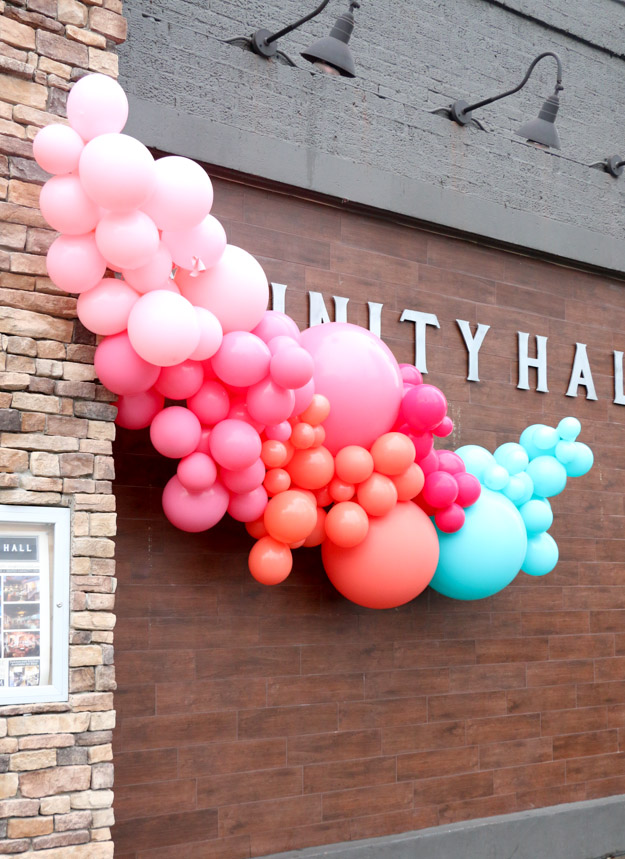
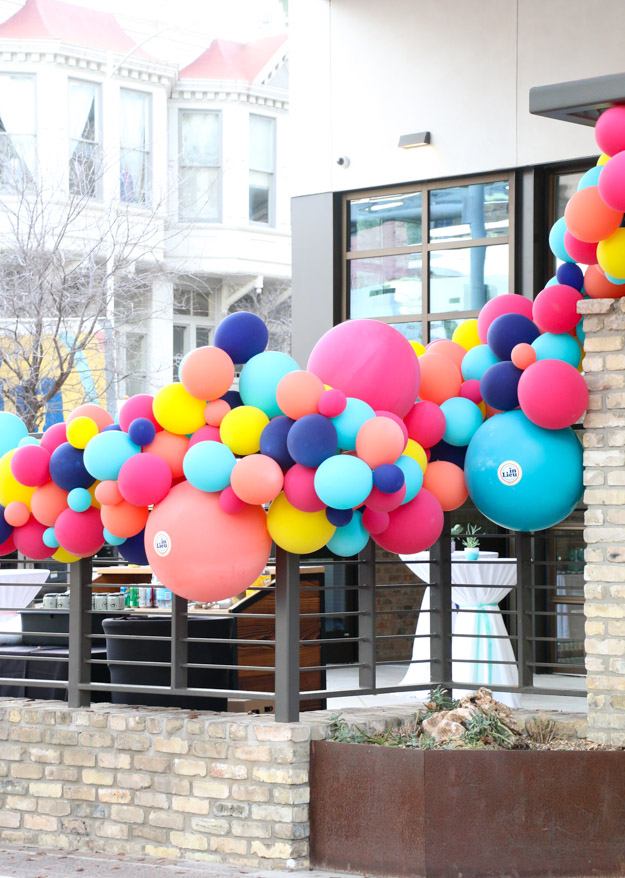
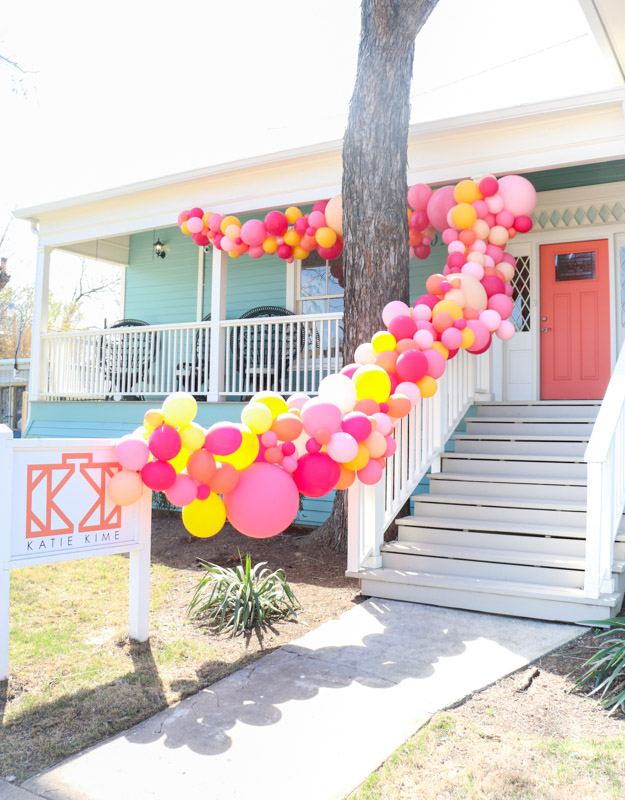
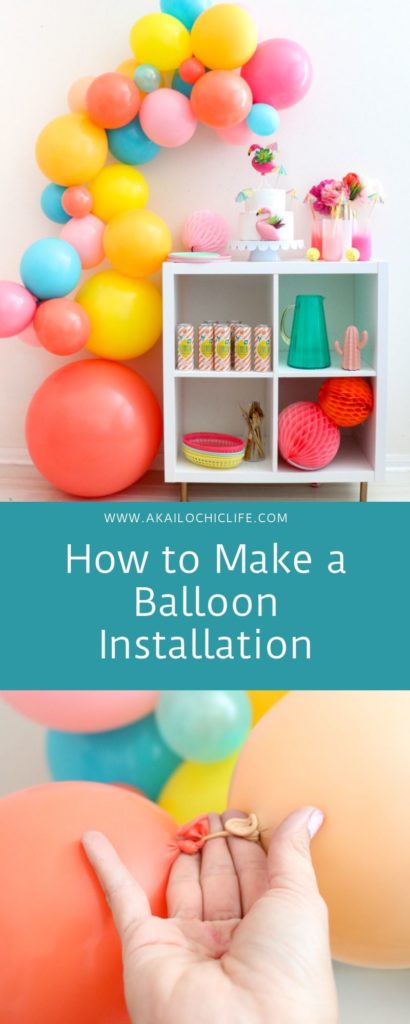
You all asked for it and I finally got around to photographing the steps for how to make a balloon installation. If you follow me on Instagram, you may have seen quite a few of the balloon installations I have been making around Austin as of late. Since I am not able to go to every city to make these for you all, I figured I would give you my tips and techniques for recreating them on your own. The process is really quite simple, it is just time consuming depending on the size of the install.
Materials:
–Latex balloons in a few different sizes and the colors you want in your arch (I prefer Qualatex)
–Low temp glue gun and sticks (the glue sticks are sometimes called multi temp)
–Balloon pump
–Command hooks
–Curling ribbon
How to Make a Balloon Installation
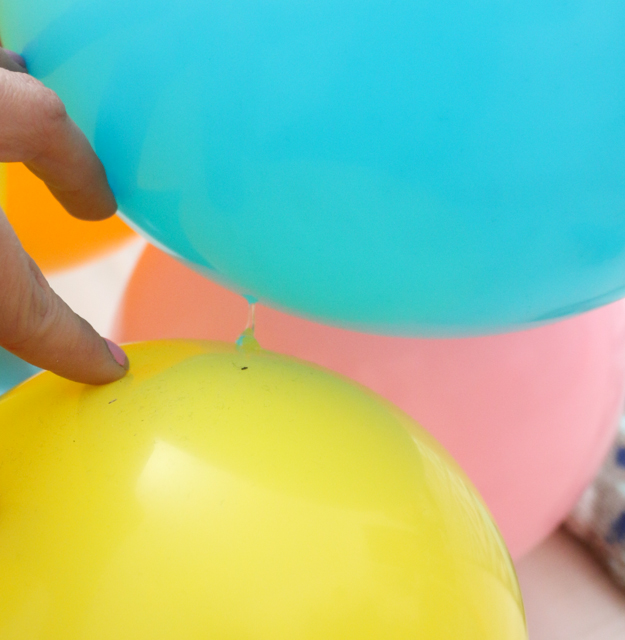
Begin by blowing up one balloon and tie it off. Then blow up a second balloon and when tying the knot, slip the knot of the first balloon in there to attach them to each other.
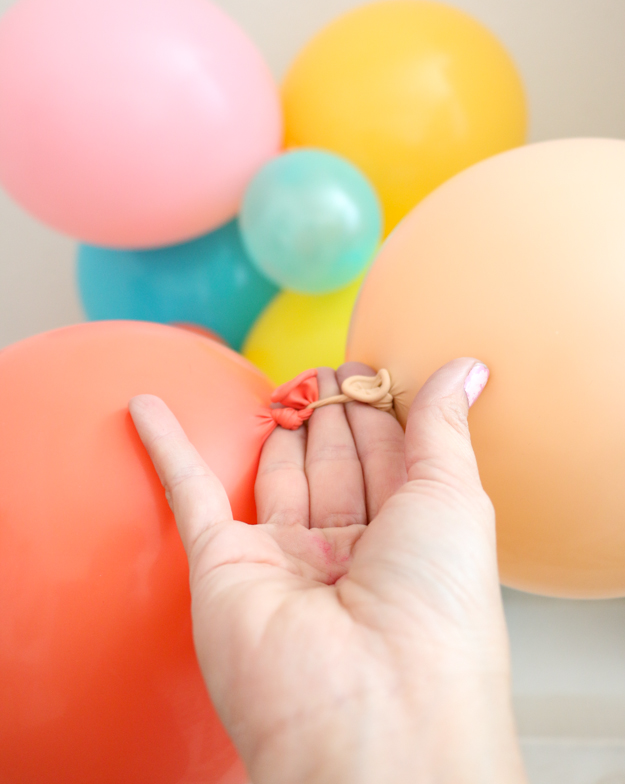
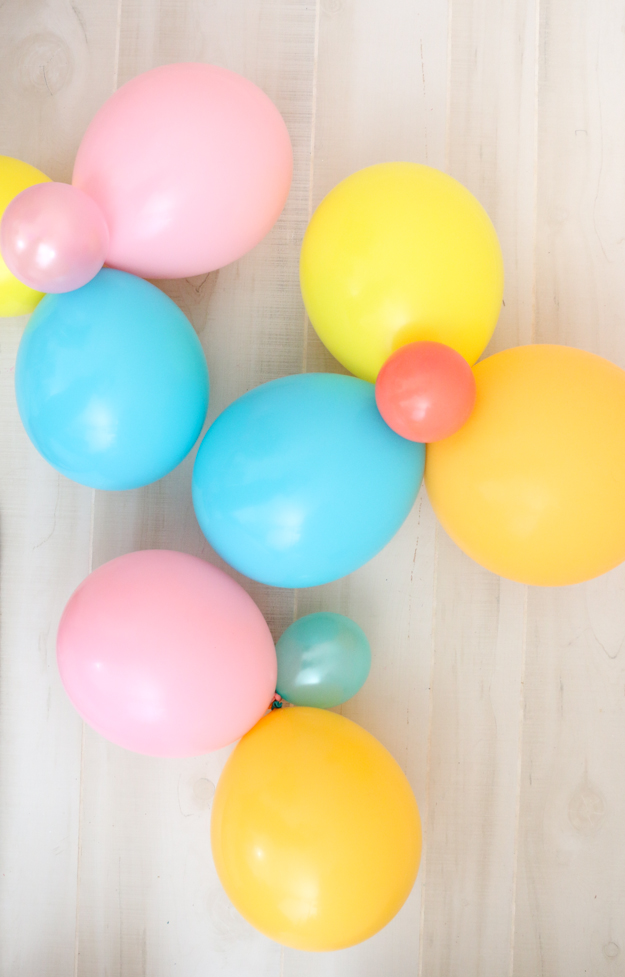
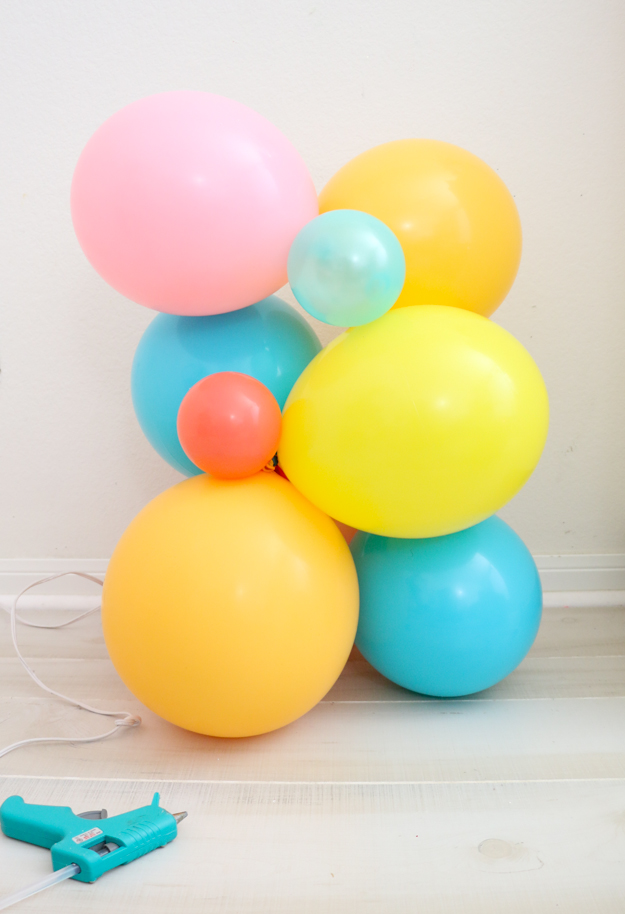
Repeat with 2-3 more balloons to create clusters of 4-5 balloons of varying sizes.
Once you have all your balloon clusters, it is start to assemble the freeform garland. To do this you will simply use the glue gun to attach the clusters to each other. Because you are using a low temp glue gun, the glue will not pop the balloons. Just add a dab of glue to one balloon and press a balloon from a second cluster onto it and hold in place until the glue is set (about 15 seconds).
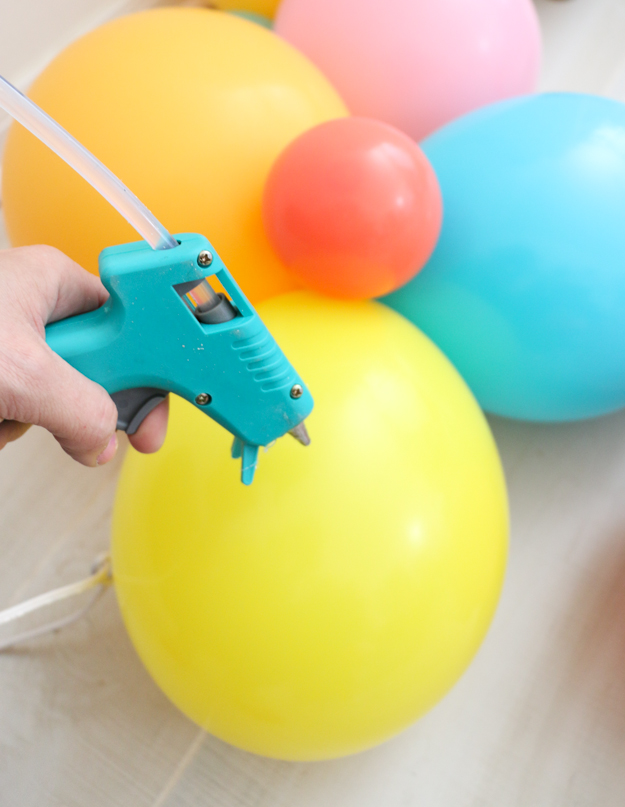
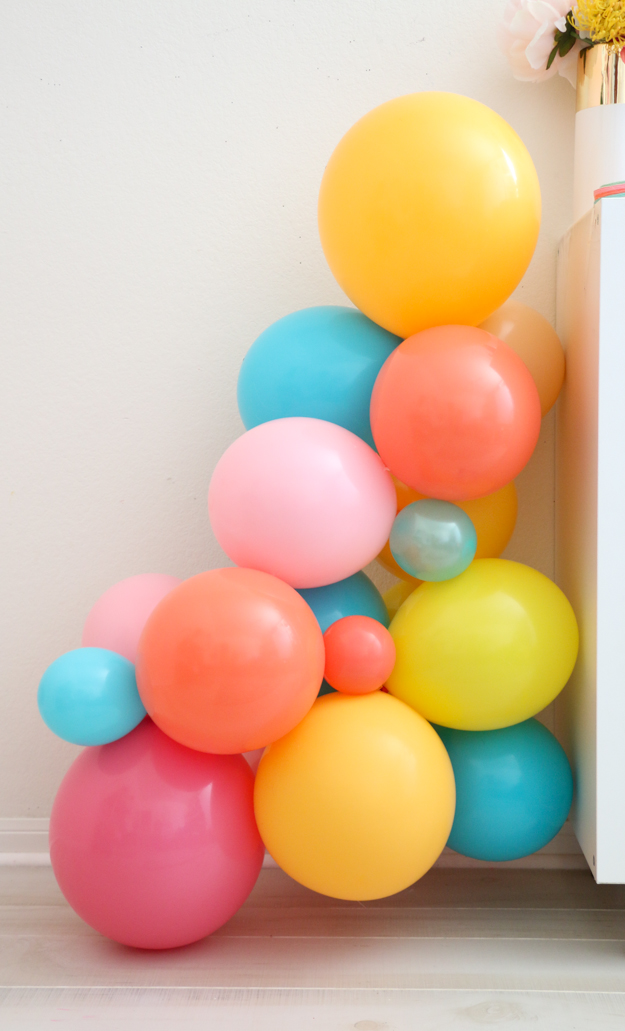
Repeat with the other balloons in the cluster making sure to secure the two clusters to each other in a few different spots. Then move on to your next cluster. As you go, add more balloons to one side and increase and decrease the side of the garland to give it an asymmetrical look.
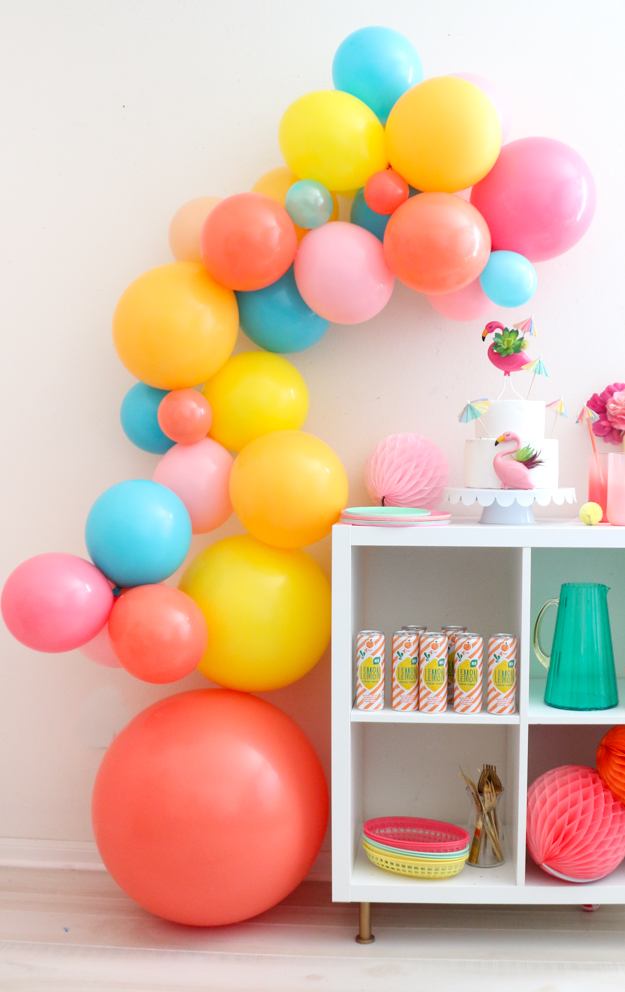
Depending on the size of your install, you can make this garland up to 10-12′. If your install needs a bigger balloon garland, just repeat the process to create a second garland. When you are ready to install to the wall, add command hooks along the path you want the balloons to take. Then, thread a piece of ribbon around one of the balloon cluster knots and tie to the command hook. Repeat with a few hooks across the length of the garland.
Once you have the main garland up, fill in with single balloons by gluing them in to fill in any gaps.
As you can see, each install is different. For this small dessert table garland, it only took me about 20-30 minutes to make. The larger ones, however, take around 4-5 hours if you are doing it all yourself.
Now that you know how to make a balloon installation, I expect to see tons of balloons from you all!


April 12th, 2018 at 3:01 pm
I love this!!! I would make them in my home and use tape, but it wasn’t very secure. I would come downstairs to find some balloons had fell down. Using low temp hot glue is genius. Thank you!!
April 12th, 2018 at 10:48 pm
Yes! The low temp glue works wonders!
April 12th, 2018 at 4:32 pm
Omgosh! I never would have thought there was a glue gun involved with these!!! Do they hold together in the wind if they are outside?
I gotta plan a party and make one ASAP!
April 12th, 2018 at 10:46 pm
Yes! The glue gun is by far the best method I’ve found for keeping them together both inside and out.
April 13th, 2018 at 1:21 am
This is great. Thanks so much for sharing. Can’t wait to try for my daughter’s birthday party
April 13th, 2018 at 4:37 pm
Thanks so much for sharing!! How far in advance can you make them?
April 17th, 2018 at 5:19 pm
If they are inside, they will last a few days. So I would say you could make them 2-3 days ahead of time.
April 17th, 2018 at 2:41 pm
[…] A Kailo Chic Life e Andreia […]
April 22nd, 2018 at 5:27 am
Thank you for sharing!!
April 29th, 2018 at 8:13 am
Thanks for the tutorial! I always wondered how this was done. So fun!
May 1st, 2018 at 10:22 pm
What colors from Qualatex did you use?? Obsessed with this color scheme!
May 8th, 2018 at 9:25 am
Coral, Caribbean blue, light pink, yellow, goldenrod, rose pink, and blush.
May 5th, 2018 at 8:56 am
Thanks for the tutorial! Quick question how do you avoid the balloons exploding especially when you have the installation is outside?
May 8th, 2018 at 9:22 am
You can really avoid it entirely, just try to not have them rest on something that is rough or could pop them. Otherwise, they should hold up for at least a day outside.
May 8th, 2018 at 7:39 am
Where do you get your balloons, especially the large one, what size is it? Love it!!!!
May 8th, 2018 at 9:16 am
They are qualatex brand and I buy them from bargainballoons.com. The big one is a 36” balloon.
September 9th, 2018 at 1:06 pm
This is such a great tutorial!! How long do these installations last for? How far in advance could I blow up the balloons?
September 21st, 2018 at 7:49 am
If they are staying indoors, you can blow them up a few days in advance. If they are being displayed outside, they will only really last a day or two.
January 14th, 2019 at 9:38 am
What did you use to attach the balloon garlands to the exterior of the buildings? Help! 🙂
January 21st, 2019 at 10:04 am
I use exterior adhesive hooks. Like 3M strips made for Christmas lights. Then I just tie the arch to the hooks.
May 31st, 2019 at 4:27 pm
I’m going to try this for my daughter’s second ond birthday. Can’t wait
July 21st, 2019 at 12:00 pm
I usually make mine with fishing line, have you tried that method and feel like the low temp glue works better? I have never tried the glue but I will have too now!
Bless you for sharing your tips and tricks! ha!
August 2nd, 2019 at 1:25 am
Hi! Can I ask how you secure the garland to the wall? Do you use command hooks on outside walls as well?
Thank you!
December 18th, 2019 at 10:23 am
[…] Step 7. If desired, make a balloon arch to attach to the backdrop. We love this one from Kailo Chic. […]
September 22nd, 2020 at 11:04 am
I LOVE your balloon installations! Your color palettes are always so bright, cheerful and unexpected! I’m in total awe of your color sense!
September 28th, 2020 at 8:05 pm
Thank you so much!