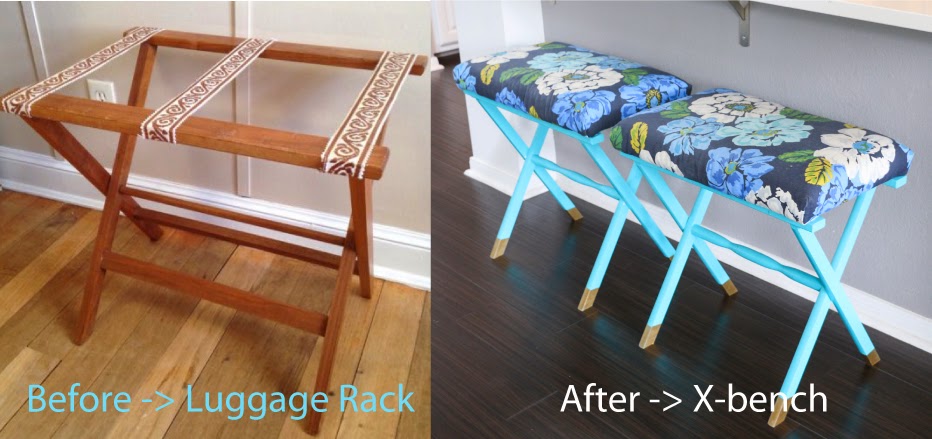
A year or so ago, I went to the local Habitat ReStore with my mom to scour for diamonds in the rough. The only thing I ended up getting during that trip were two luggage racks that looked a little like the before picture below. They had probably close to 200 of those things for $2 a piece and it seemed that every person walking out of the store had a few under their arm. I’m not sure what anyone else did with theirs, but I had a vision to turn them into an x-bench.
The first thing I did was remove the ribbon straps. They were just stapled on to the bottom of the bench, so I did my best to remove the staple and free the strap. There were a few that were just too difficult to remove, so I used a utility knife to cut as close as possible around the staple to free the strap. Once that was done, I needed to determine what height the finished bench should be. Figuring this out helped me size the top of the soon to be bench. Taking the width measurement and depth measurement, I went to Home Depot to get some MDF board for the cushion bottom. I went with a 3/4″ MDF board because I needed it to be strong enough to hold an adult. I had them cut it to size for me in the store.
The next stop was Joann fabrics for some foam padding, batting, and fabric for the cushion portion of the bench. I can’t remember the exact height of the foam, but I think it was about 2″. I got foam, batting, and fabric to cover the two MDF boards, with a little extra just in case.
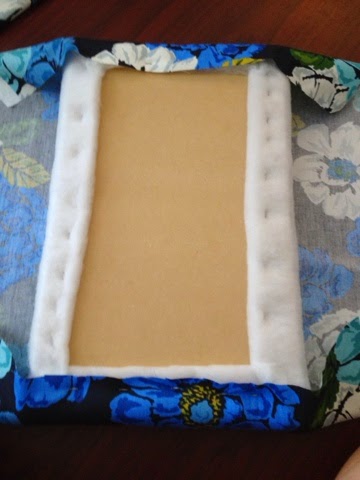
Sorry I don’t have pictures of the above steps, but here you can see the MDF panel, foam, and batting laid out and ready to be stapled.
I used my staple gun to staple the batting onto the MDF panel. I did one of the long sides first, then the other long side pulling it taught as I went to ensure a smooth surface. Next came the shorter sides one at a time. To finish the corners, I cut off the excess batting, and then stapled the loose material down. This part doesn’t have to be very clean as the fabric will cover it, but you don’t want any lumpy batting areas to mess up the final look.
After the batting was fully stapled down, it was time for the exterior fabric. I chose a pretty blue floral home décor weight fabric. You definitely want a heavier duty fabric like a canvas or décor weight so that it can withstand heavy use. I used the same process to attach the fabric, starting with the short side this time.
When it came time for the corners, I tucked one side of the fabric under the other and stapled it down, then folded the top piece over and stapled it.
Once the fabric cushions were complete, it was time to paint the wood luggage rack frame. I again used spray paint (this time in seaside gloss by Rustoleum). The wood on my luggage rack was raw (unfinished), so there was no need to sand it or use a primer.
After painting the frames, I felt they needed a little something extra, so I taped off the bottom of the legs and used gold enamel paint to give the bench a dip dyed look.
All that was left after the paint dried was to screw the luggage rack frame to the MDF cushion. I drilled pilot holes first because the wood was thick, then in went the screws and I was done!
I had planned on selling these benches originally, but I just fell in love with them after they were complete, that I couldn’t part with them. As far as cost, I think they ended up using about $40 in materials each, but if you use coupons at the fabric store or choose a less expensive fabric, you could definitely cut that cost a bit. And in case you can’t find a luggage rack, I saw quite a few on Ebay.
I think they turned out well and they go perfectly at my new kitchen counter.


