


To make your own triangle shelves, you will need
two pieces of 1″ by 4″ wide by 8′ long wood boards. I went with pine select because I liked the grain on them and I knew that I wanted to leave some of the wood raw. If you want to paint the whole shelf a solid color, you could go with a cheaper wood. But these pine ones were only $10 each, so I got 5 triangles for only $20.
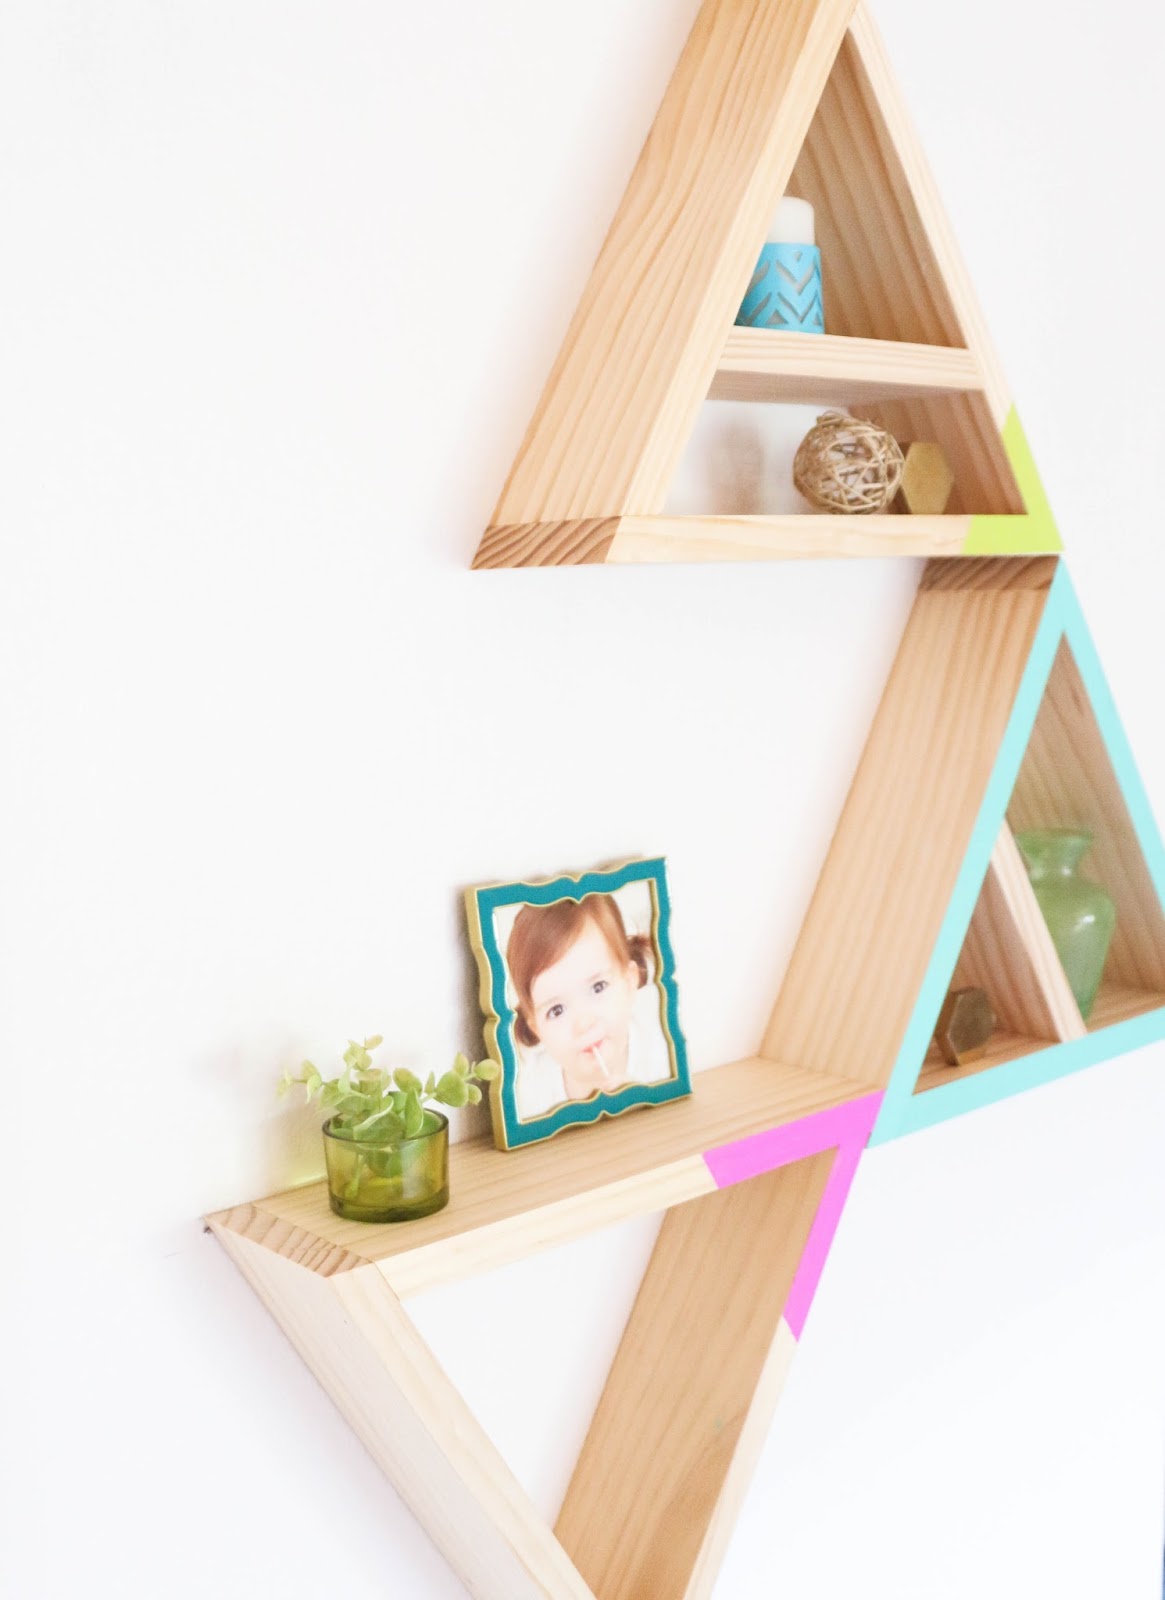
To begin you will need to cut your pieces of wood into 12″ long rhombi with 30 degree angles (12″ being the longest side). This is the part where the miter saw comes in very handy!

Once you have 15 of these bad boys cut, you are ready to either stain, paint to assemble as is. I wanted the natural wood look, so I went ahead and stained them with natural wood stain to just give them some stain protection and then began the assembly process.
First we glued two of the pieces together with Gorilla wood glue and laid them on our workspace to dry. Because of the angle we could figure out a good way to clamp them, but were able to get a pretty good bond by just holding them together for 30 seconds before letting them dry.


As you can see above the gluing of the triangles is done so that each piece has one end that overlaps the next piece and this continues all the way around. Once the first corner was dry (I waited about 30 minutes), I went ahead and glued the third piece on to each triangle. And used my 1′ piece of scrap wood to add shelves to two of the triangles. Again attached by the glue.


Now some of the corners where not completely flush all the way across, but some light sanding and some wood filler helped bridge the gap so to speak.
Once the shelves were completely dry (overnight), I used painters tape to mark off corners and painted them using my Martha Stewart acrylic craft paint. Once the paint was dry I added some picture hanging braces to the backs using finishing nails and then mounted them on the wall in the playroom in the patterned I liked best. The wall that I put them on was pretty narrow, so I had to do more of a vertical installation.


