


Do you remember those fun little spin art machines from when you were a kid. I loved to spend all day spinning and dropping paint onto the pieces of paper. I recently came across a Melissa and Doug brand spinner set at Home Goods (like this one here

It turns out that it worked and made some pretty cute cookies. Yesterday I even had Jennifer over for a play date and the kids all took turns spinning their cookies and dropping icing on them for some fun patterns. Here are all the details to make your own super fun spin art cookies!
First you will need a spin art machine. The manual one I had worked fine and wasn’t a big investment, but a battery operated or plug in version might have worked even better. Then you will need some sugar cookies and a batch of royal icing. I like to use this recipe for royal icing by Alton Brown.


Once you have your icing and cookies, go ahead and dip the cookies in the icing (or pipe it on) to cover your cookies with a base layer of white royal icing. While the base coat dries, you will want to mix up your colors using what ever food colors you prefer. I went with neon pink, orange, and blue for our first go around. Once your colors are mixed you will need to add a slight bit more egg whites to your mixture to thin it out a bit. You are looking for the icing to fall off the spoon in a thin line. You need the mixture to be thin enough that when you drip it on the cookies it will be able to spread. Once you think you have the right thinness, so ahead place the icing in some squeeze bottles and try out your first cookie. If the icing is too thin, mix a bit more powdered sugar into it, if it is still too thick add a bit more egg whites.

To spin your cookies, I used a clump of fondant or gum paste to hold the cookies in place in the spinner. Just make a ball of fondant and use it like glue between the cookie and the spinning plate. Once you are done with your cookie, the fondant should just peel right off and be ready to use on the next cookie. Here are some in process shots of my daughter and I decorating our cookies.


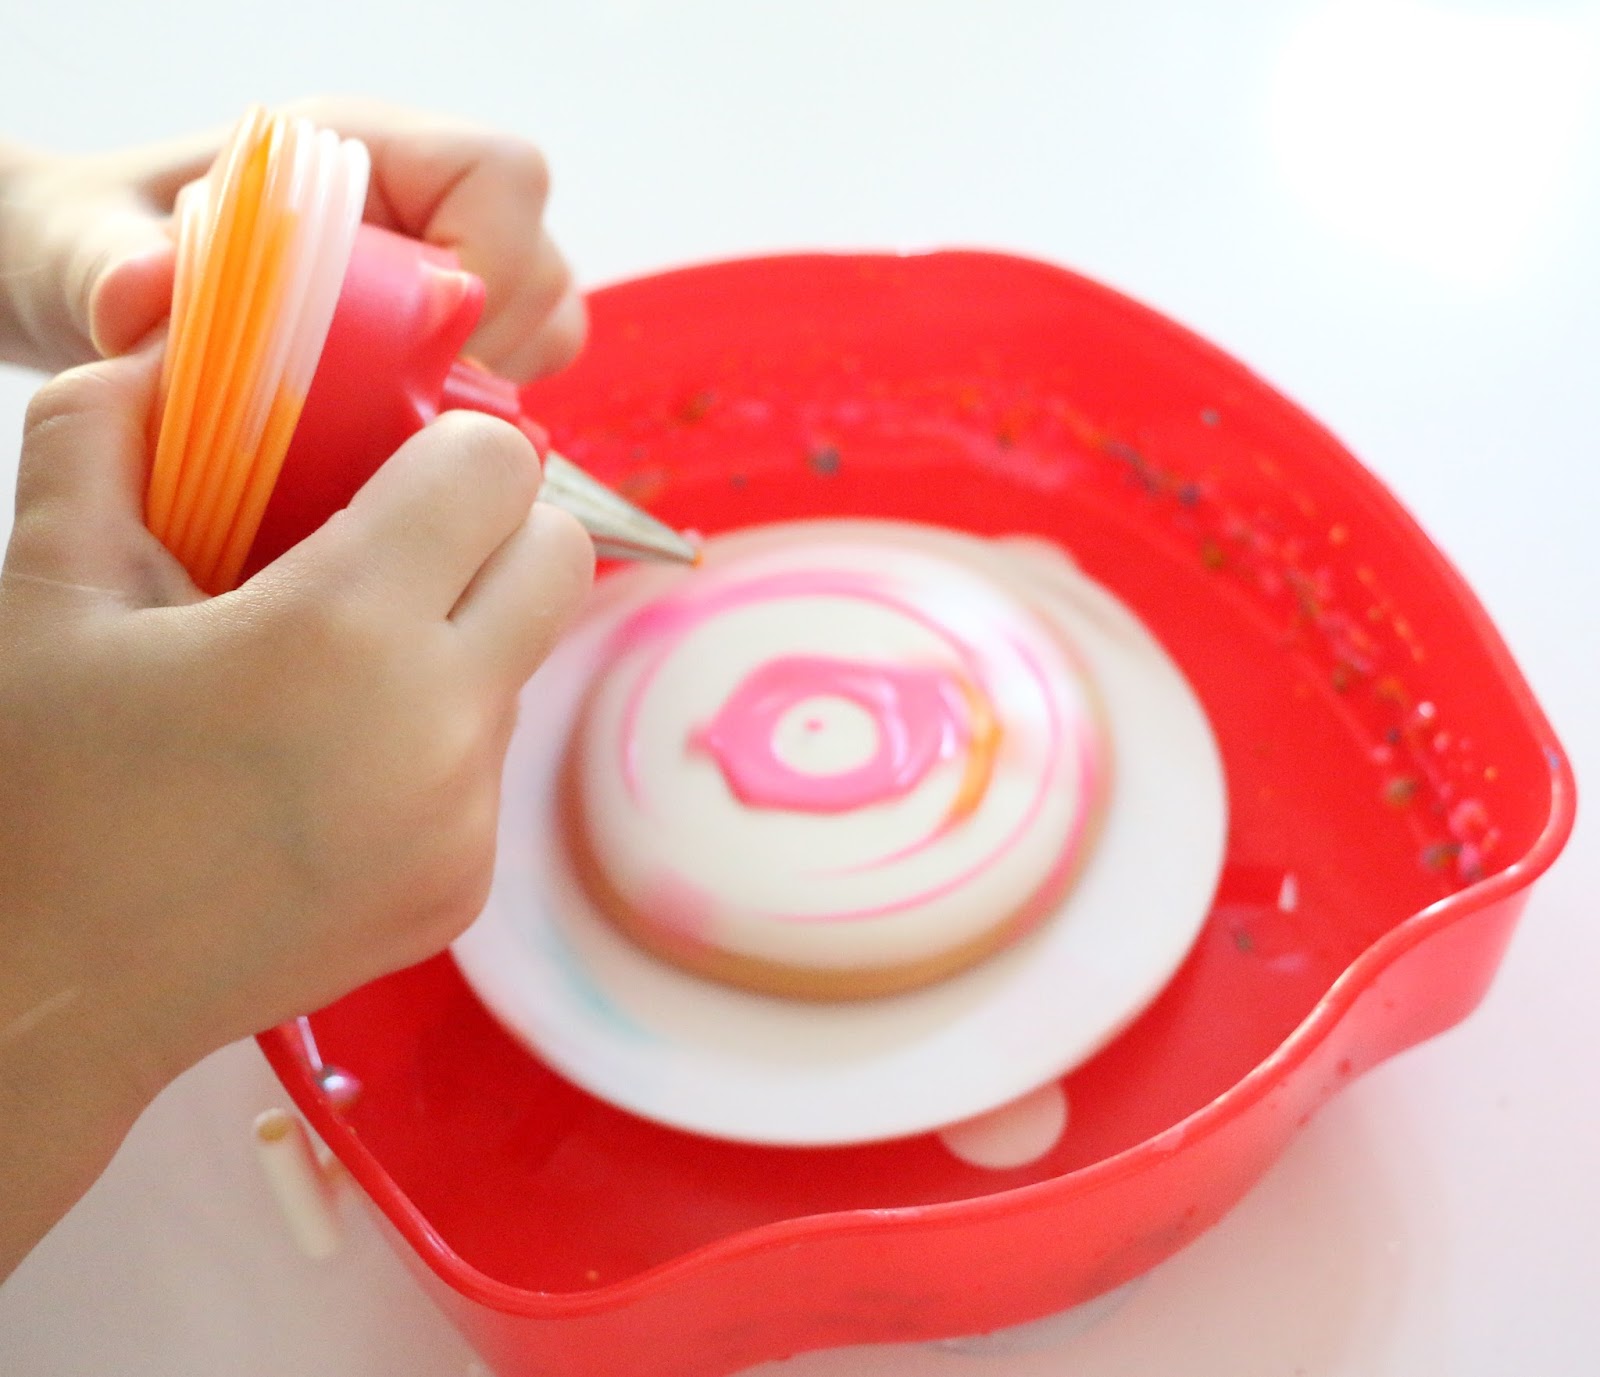
One tip to making your own is that you may want to have an extra set of hands available because this machine is a manual spinner and doesn’t have a very long spin cycle. I would spin the spinner while my daughter held the frosting bottle over the spinner. It would take 2-3 spins per color to get a good drippy look on the cookies. Some times I would even spin it another 1-2 times after the icing was on just to help spread the icing around a bit more.
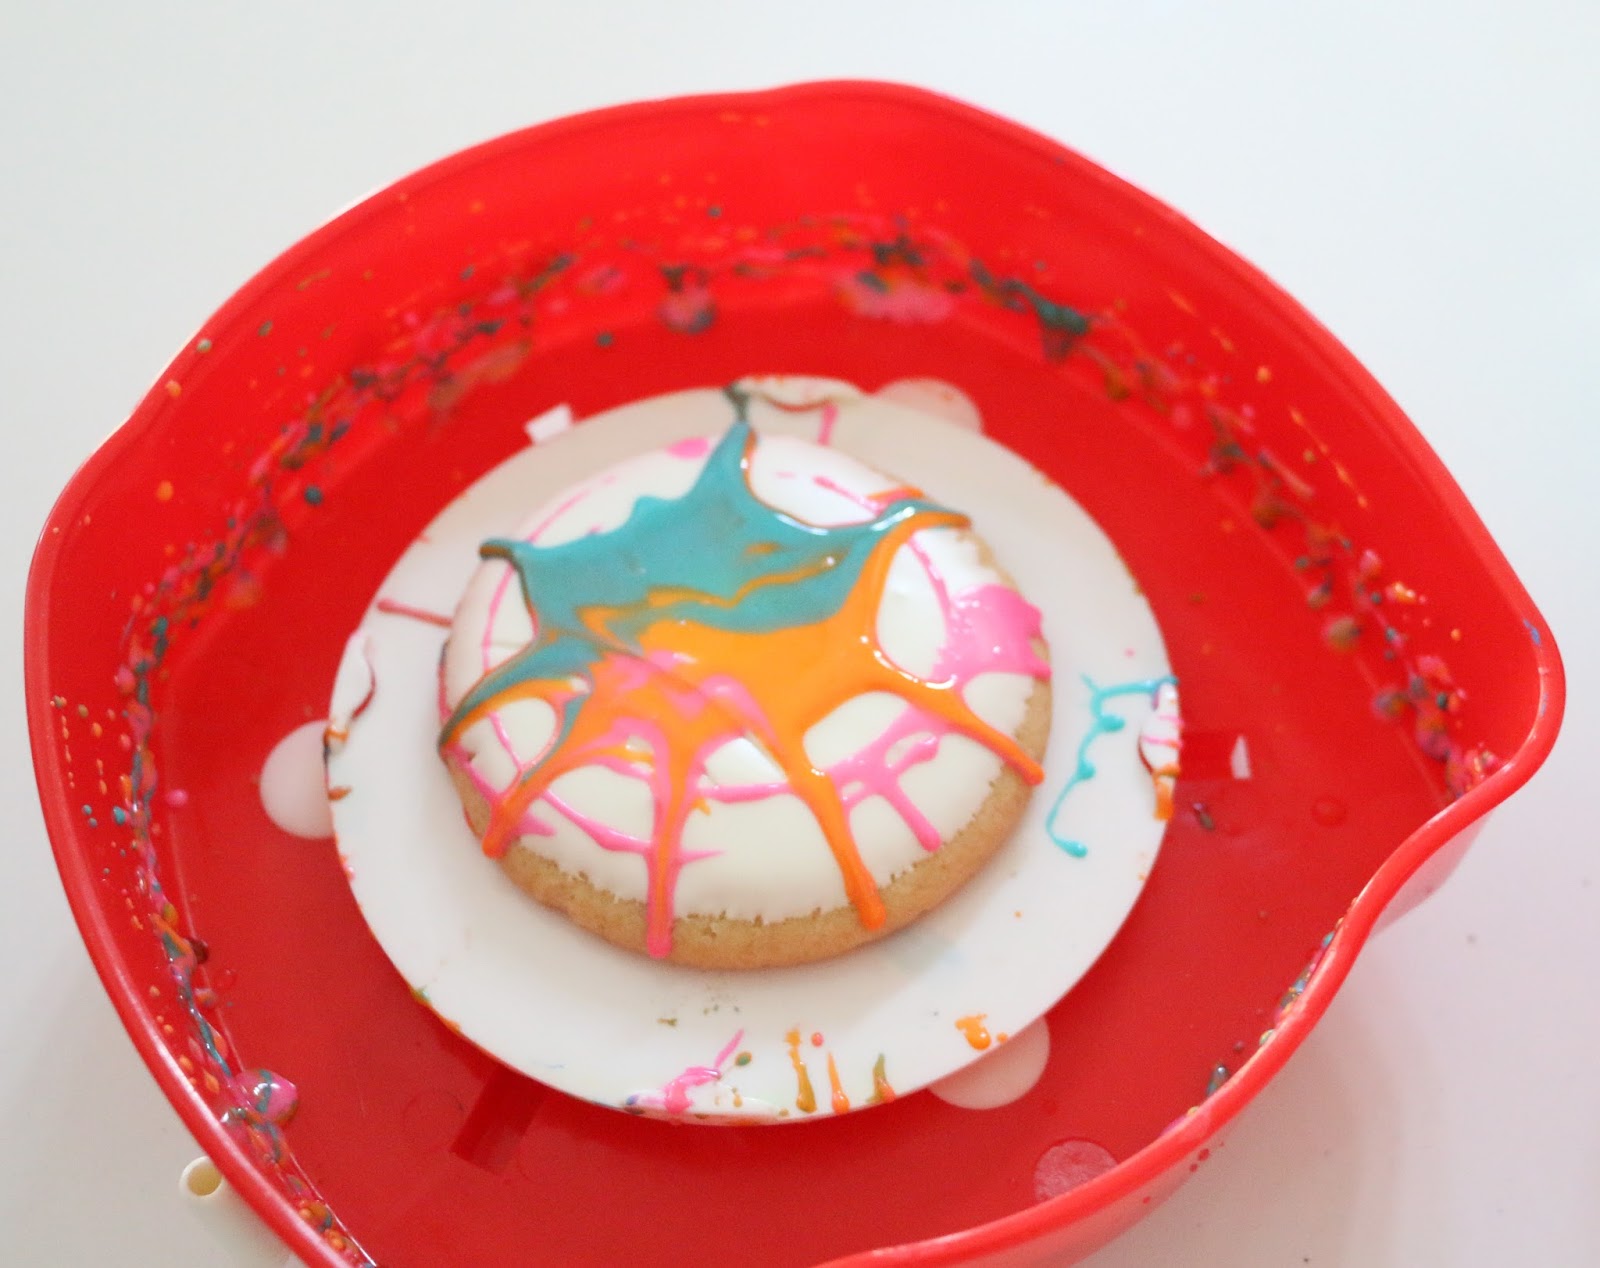
Once your cookie is complete, move it to a piece of parchment paper to let the icing dry and harden and move on to your next cookie. At yesterday’s playdate with tried our hand and some more colors and even threw a few Halloween cookies in there. It’s never too early to start planning the halloween treats right? I can’t wait to try some spider web spin art cookies when it gets closer to Halloween.


Now that was easy wasn’t it?! Now go try it out and have some fun and let me know what you think!


