I’ve been kind of obsessed with the simplicity, yet visual interest of the repeating black and white patterns in traditional mud cloth (remember my ornaments from last year?). Using the Mint, I was able to make a photo mat for my picture frame that is perfect to have up year round. The great thing about the stamps I made is their simplistic design can be used for a variety of purposes. Stamped mud cloth kitchen towels anyone?
Now, if you’ve been reading my blog for awhile or know me in person, you may be taken aback by the stark black and white of this project. Where is the color you ask? Well, that’s what accessories are for! Add a few eclectic pieces with subtle pops of color and you have a pretty awesome “shelfie”.
To the instructions!
- Silhouette Mint Stamp Kit
- Black Ink for the Silhouette Mint (comes with the started kit linked above)
- 3 – 45mm by 45mm square Silhouette Mint Stamp Sheet Set
- White photo mat (the frame and mat I used were both from an Ikea Ribba frame)
If you are new to using the Mint, you can view my post here where I go into more detail and reference a video I watched that helped me. But honestly, this is a very user friendly machine.
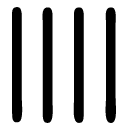
I started by creating three different designs that when put together would give a simple mud cloth pattern. The were 4 lines, a 4 by 4 grid of dots, and a triangle X shape. You can save the .png files for these below that you can then import into the Mint studio.
Once you have the designs imported, make a stamp for each of the three designs. When your stamps are all made and added to the sticky stamp mount, you are ready to begin.
You’ll want to start by loading black ink onto the three stamps. Just follow the design and add your ink, it will bubble up and sit on the stamp like this:
Then, after letting it sit for 4-5 minutes, it will look like this:
You can see how the ink on the design portion of the stamp was absorbed into the stamp. Go ahead and stamp the design on a piece of scrap paper a few times until it stamps clear and the extra ink is removed. Repeat with all three stamps. Now you’re ready to create your photo mat.
Start wherever you think best depending on the size and shape of your mat. I took the old tile laying technique and started in the center on each side and worked my way down and up from there.
Simply line up your stamp, press firmly, and remove. Continue by alternating the stamps and direction of the line stamp to create your own unique mud cloth pattern.
Because the photo mat has a lot of detail, I kept the center artwork very minimal with a black and white “hello” print.
What do you think? I love this technique! And now that I have my three stamps, I can create a mud cloth pattern on anything. I am seriously considering make a few napkins or kitchen towels or maybe even a place-mat. The possibilities really are endless!
*This post contains affiliate links which means that I get a small commission from the sale of the products I link to with no extra charge to you. It’s one way that I can help pay the bills and keep the crafty tutorials coming! Thanks the support!


November 12th, 2019 at 9:54 am
[…] DIY Mud Cloth from akailochiclife.com […]