


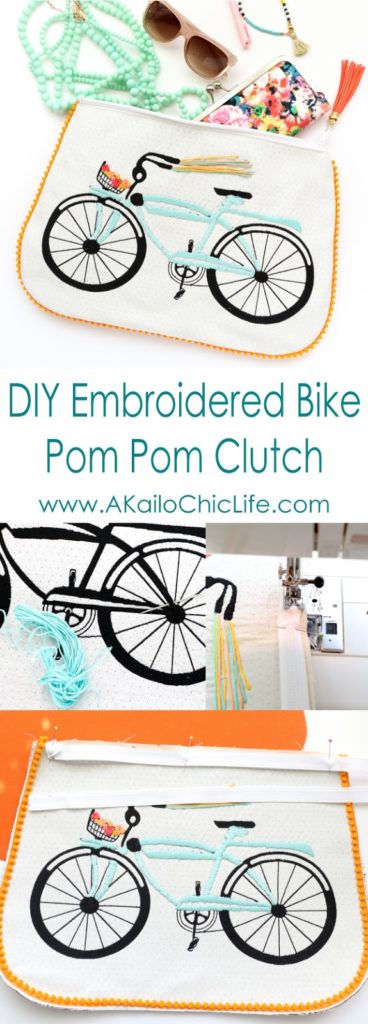
Hey everyone, I’m excited to
share this fun summer clutch tutorial with you today! Square by Design at Joann
Fabric and Craft Stores is a line of pre-cut and edged fabric with a woven design
in the center. They are perfect for many types of sewing projects including
pillows and tote bags. Today, I wanted to share how to turn their black and
white bicycle print into the cutest embroidered clutch with pom pom trim just in time for summer.

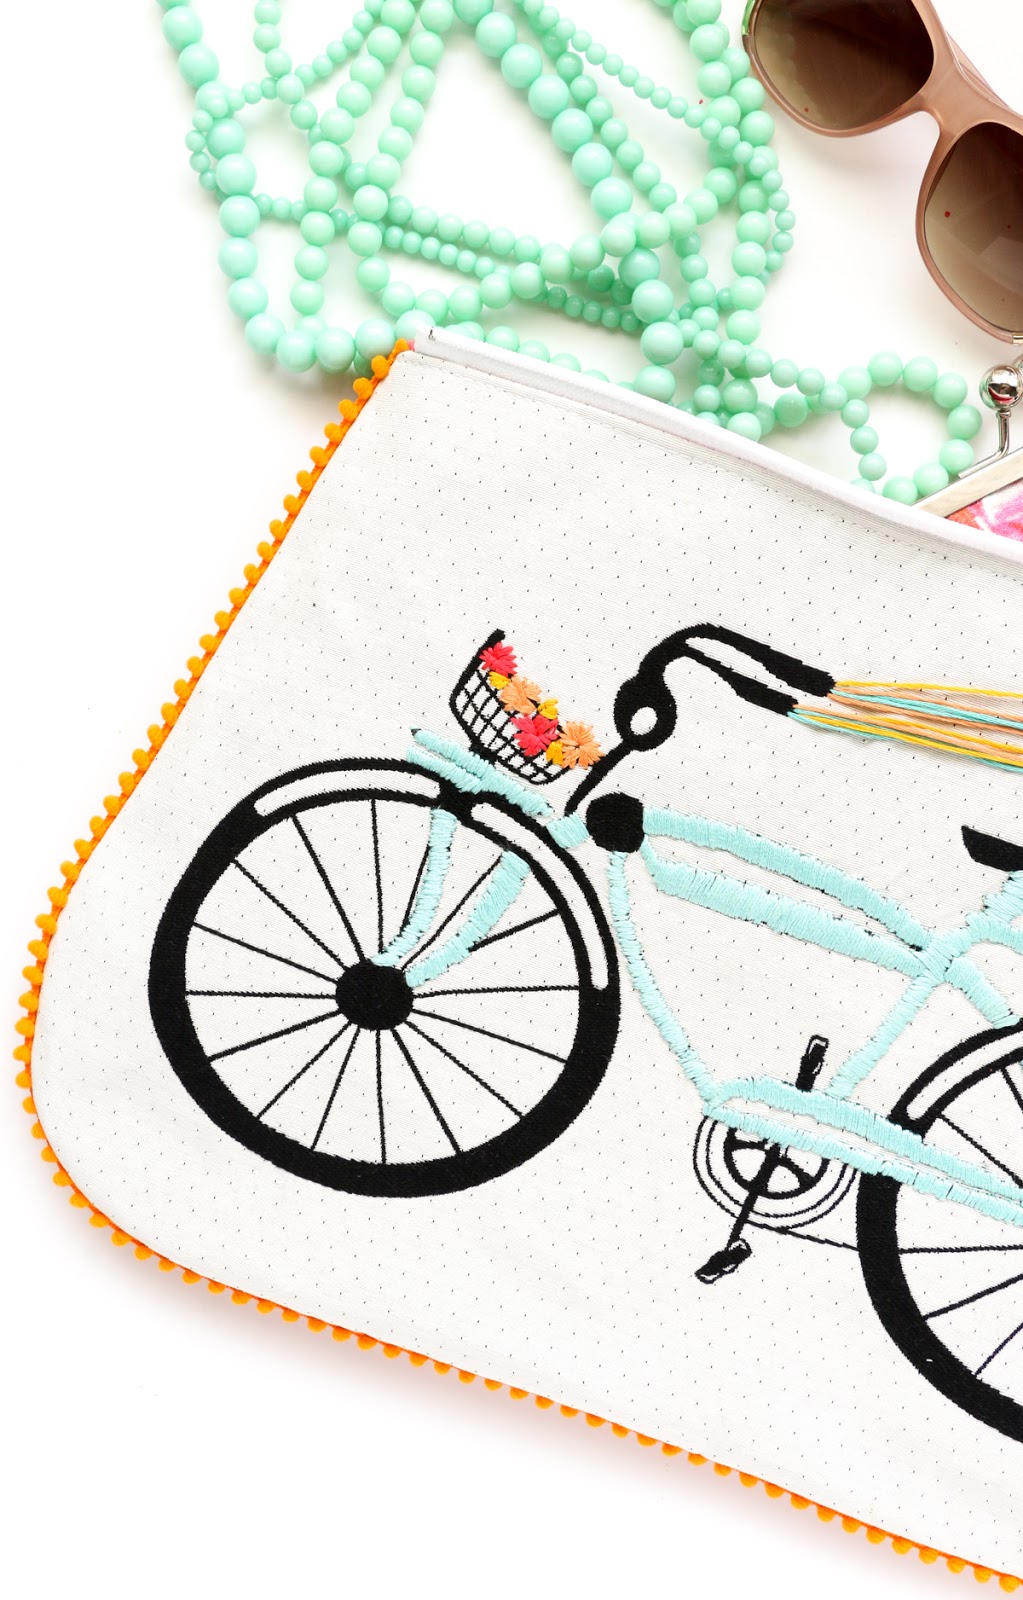

With some simple hand stitch embroidery, you can add your own colorful details to the bike print, while the pom pom trim brings a fun summery feel to the clutch. Follow along below for the picture heavy sewing tutorial.

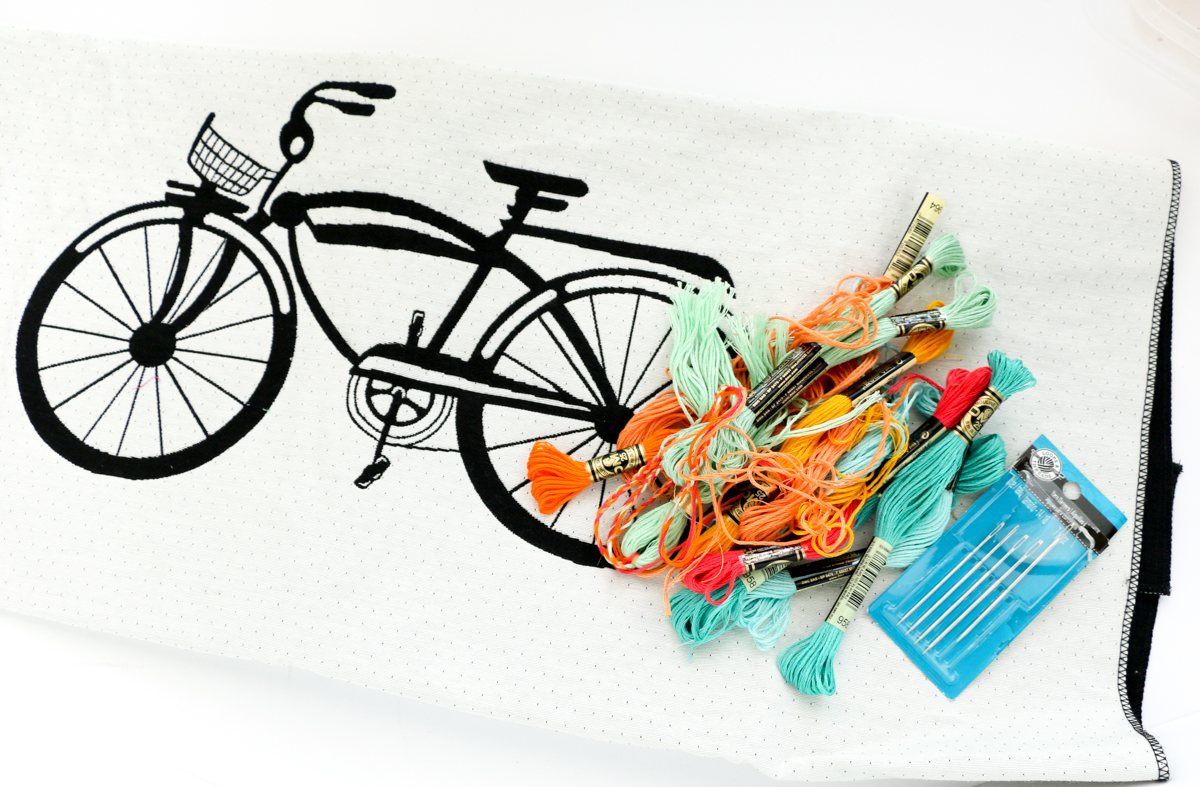
The Supplies:
- One piece of Square by Design fabric in the Bicycle print
- Embroidery floss in your choice of colors (I used 3 pieces for the main mint color of
the bike, and one piece of each other color) - Large
embroidery needle - Pom pom trim
- 1/4
yard Coordinating back fabric (I used an orange bottom weight) - 18″
white zipper - 1/4
yard plain duck canvas - 1 yard
Heat n Bond Lite - 1/4
yard lining (I used a quilting weight cotton) - scissors,
sewing machine, pins
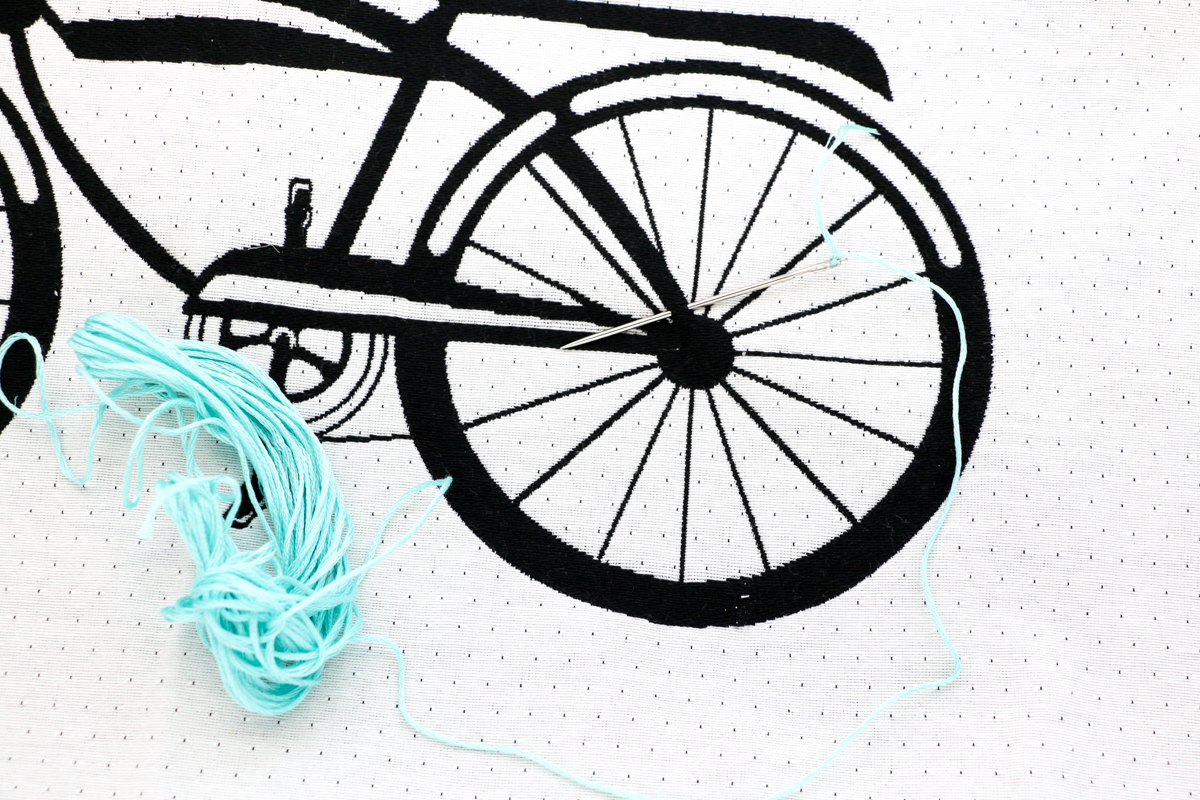
Begin by threading your hand sewing needle with a single
length of floss. Tie one end around the needle eye and put a knot in the bottom
of the floss piece. Start at the back of the fabric and push your needle
through to begin stitching around the main frame of the bike.
length of floss. Tie one end around the needle eye and put a knot in the bottom
of the floss piece. Start at the back of the fabric and push your needle
through to begin stitching around the main frame of the bike.
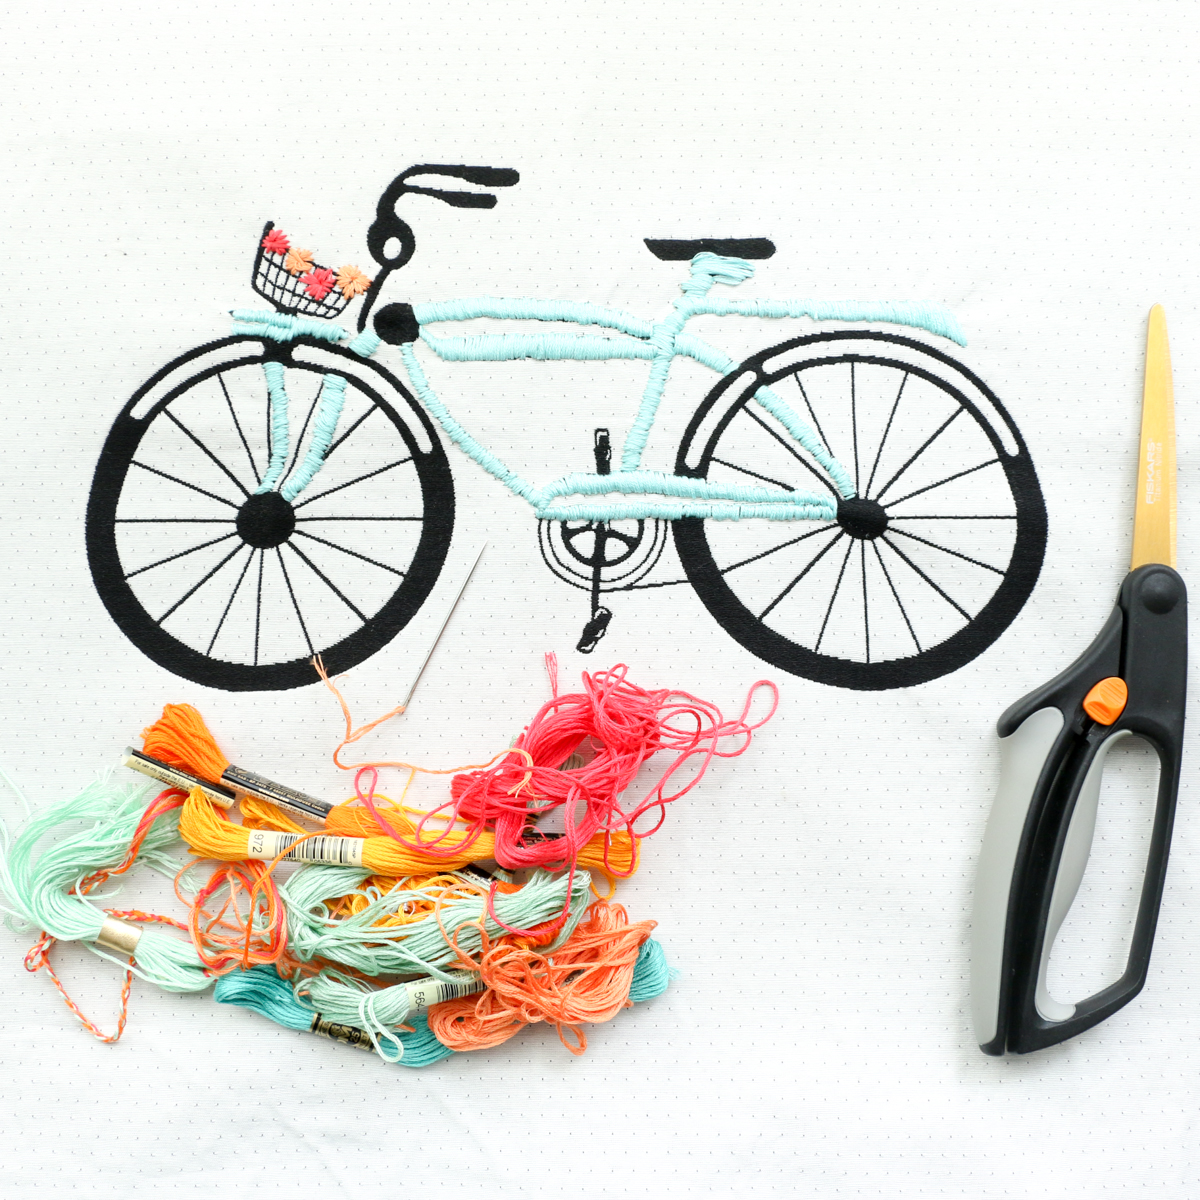
Continue stitching until you have the entire bike frame
covered in your embroidery floss. Next, switch up your colors to add flowers to
the bike basket and streamers to the handles.
covered in your embroidery floss. Next, switch up your colors to add flowers to
the bike basket and streamers to the handles.

Once you’ve finished embroidering the bike, it’s time to
make your clutch. You’ll want to cut a rectangle with rounded corners out of
the bike fabric, leaving about 1-2″ around the main bike image. Use this
piece as the pattern and cut out one piece of the back fabric, two pieces of
canvas, two pieces of lining, and 2 pieces of Heat n Bond.
make your clutch. You’ll want to cut a rectangle with rounded corners out of
the bike fabric, leaving about 1-2″ around the main bike image. Use this
piece as the pattern and cut out one piece of the back fabric, two pieces of
canvas, two pieces of lining, and 2 pieces of Heat n Bond.


Prep your pattern pieces by ironing the Heat n Bond onto the
canvas according to the directions that come with it. Once the Heat n Bond is
cooled, remove the paper backing. Iron the bike print with the front facing out
onto the canvas so that the Heat n Bond glue is sandwiched between the two
fabrics (Canvas and bike fabric). Repeat with the second piece of canvas and
the back fabric.

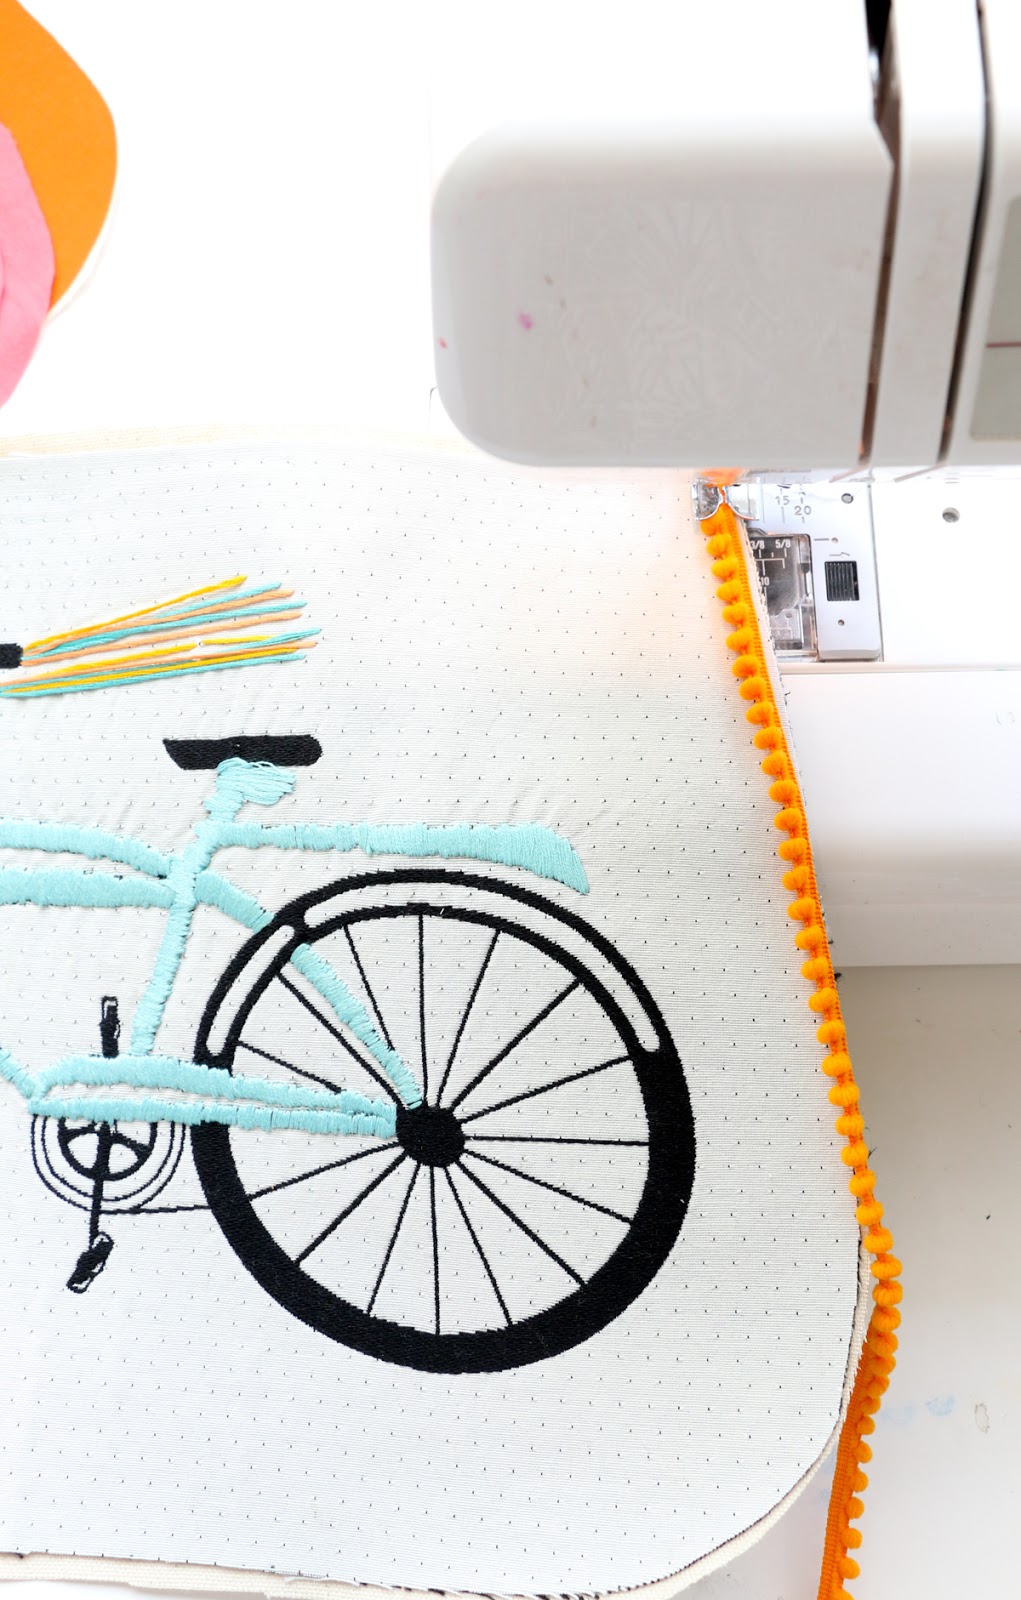
Now that all your pieces are prepped, start by sewing on the
pom pom trim about 1/4″ in from the edge of the bike fabric.
pom pom trim about 1/4″ in from the edge of the bike fabric.

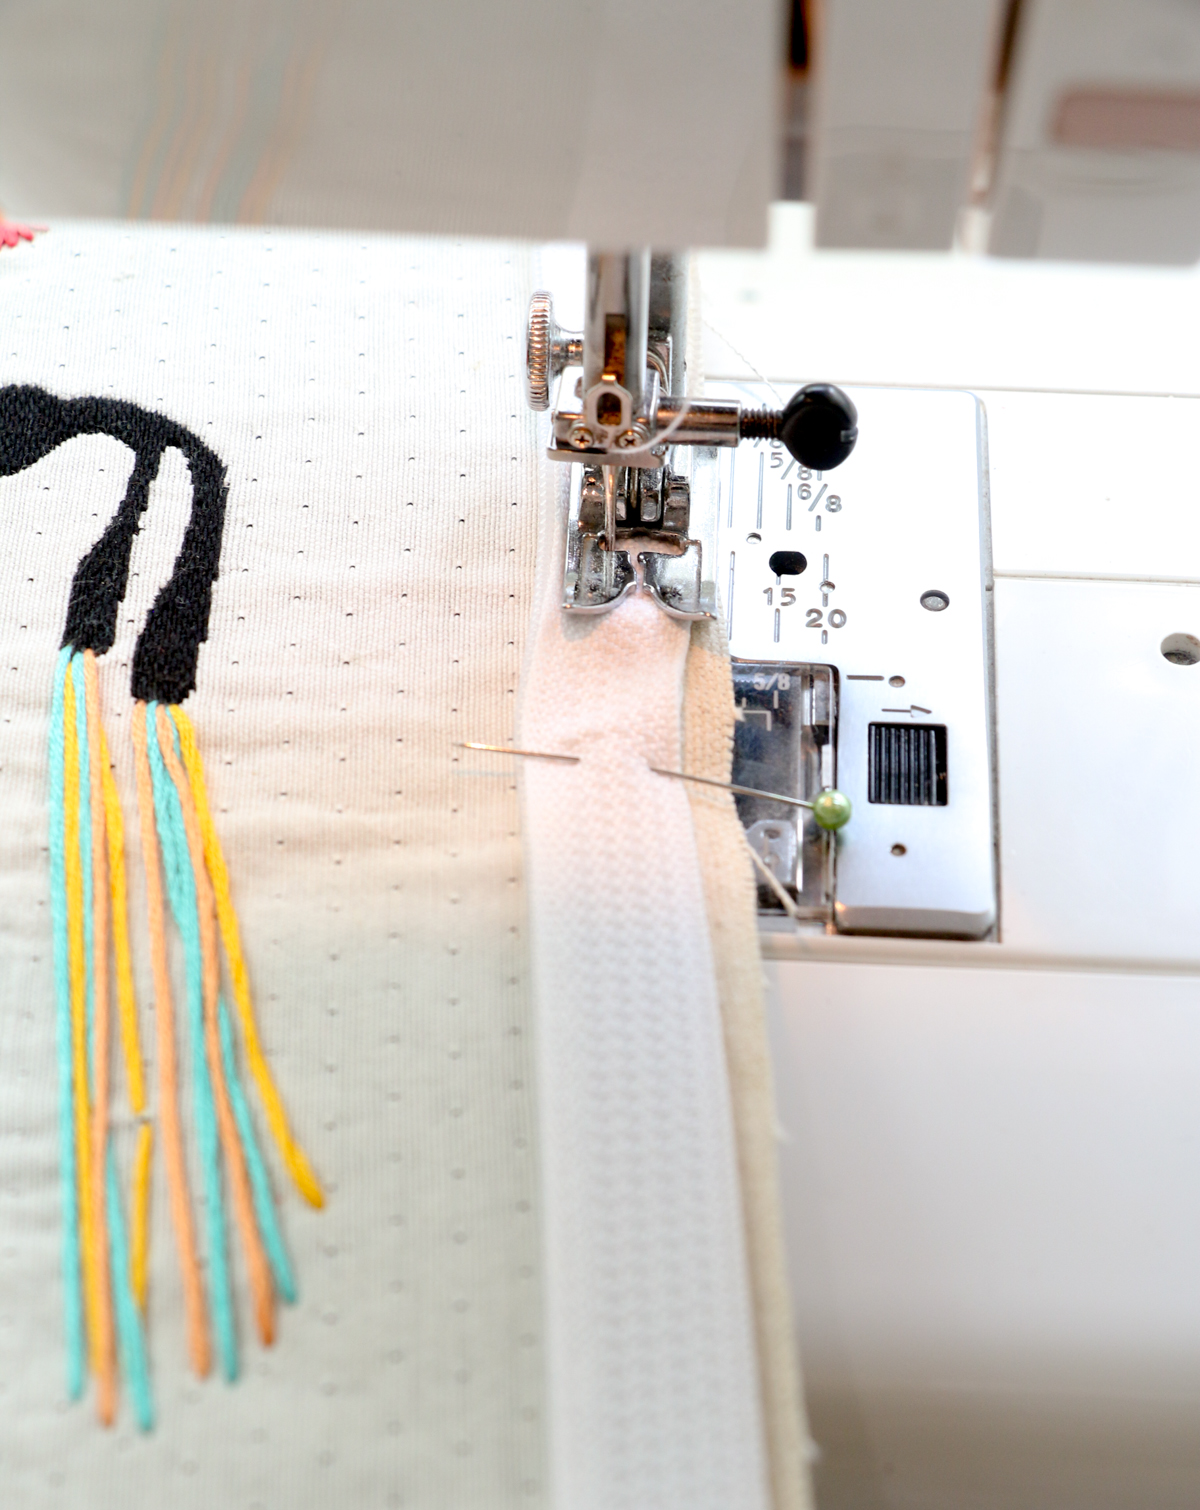
Next, pin your zipper on as seen above and stitch the first
side of the zipper onto the bike fabric.
side of the zipper onto the bike fabric.
Add one piece of your lining fabric on top of the sewn-on
zipper and sew it on. This will create a sandwich of bike fabric, zipper, and
lining.
zipper and sew it on. This will create a sandwich of bike fabric, zipper, and
lining.
Now, flip your lining fabric behind the bike fabric, so that
the zipper stands up and top stitch to secure the lining in place.
the zipper stands up and top stitch to secure the lining in place.


Repeat by zipping the zipper closed and pinning the other
side of the zipper to the back fabric and sew in place.
side of the zipper to the back fabric and sew in place.

Next, sew on your lining, flip it over and top stitch in
place.
place.

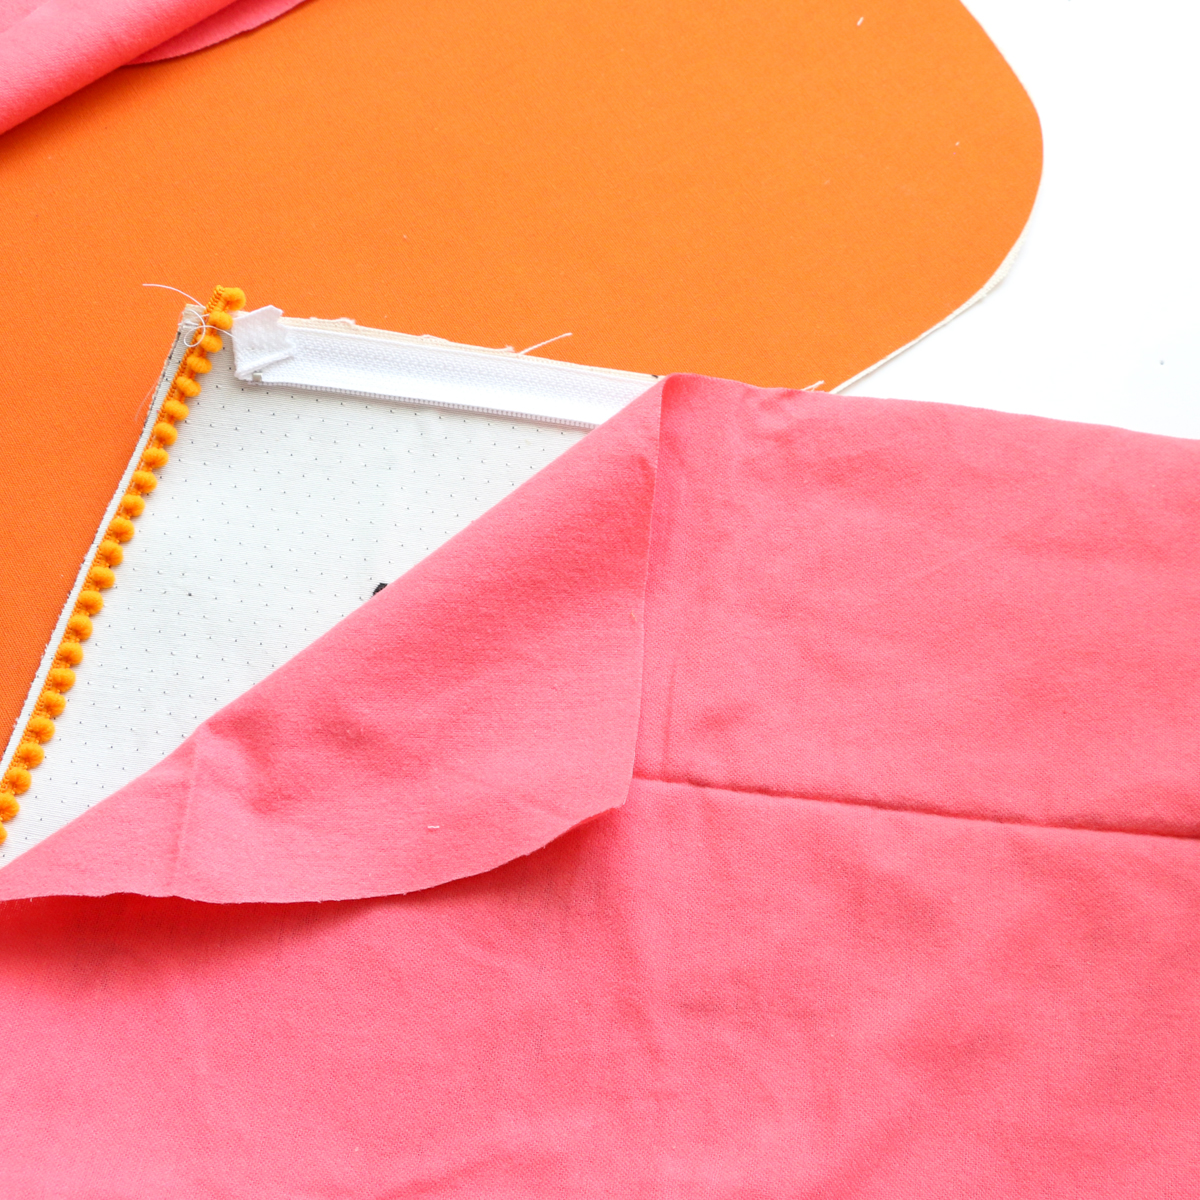
Flip your two pieces of exterior fabric so that they are
touching each other with right sides together, and the two pieces of lining are
touching each other with right sides together.
touching each other with right sides together, and the two pieces of lining are
touching each other with right sides together.
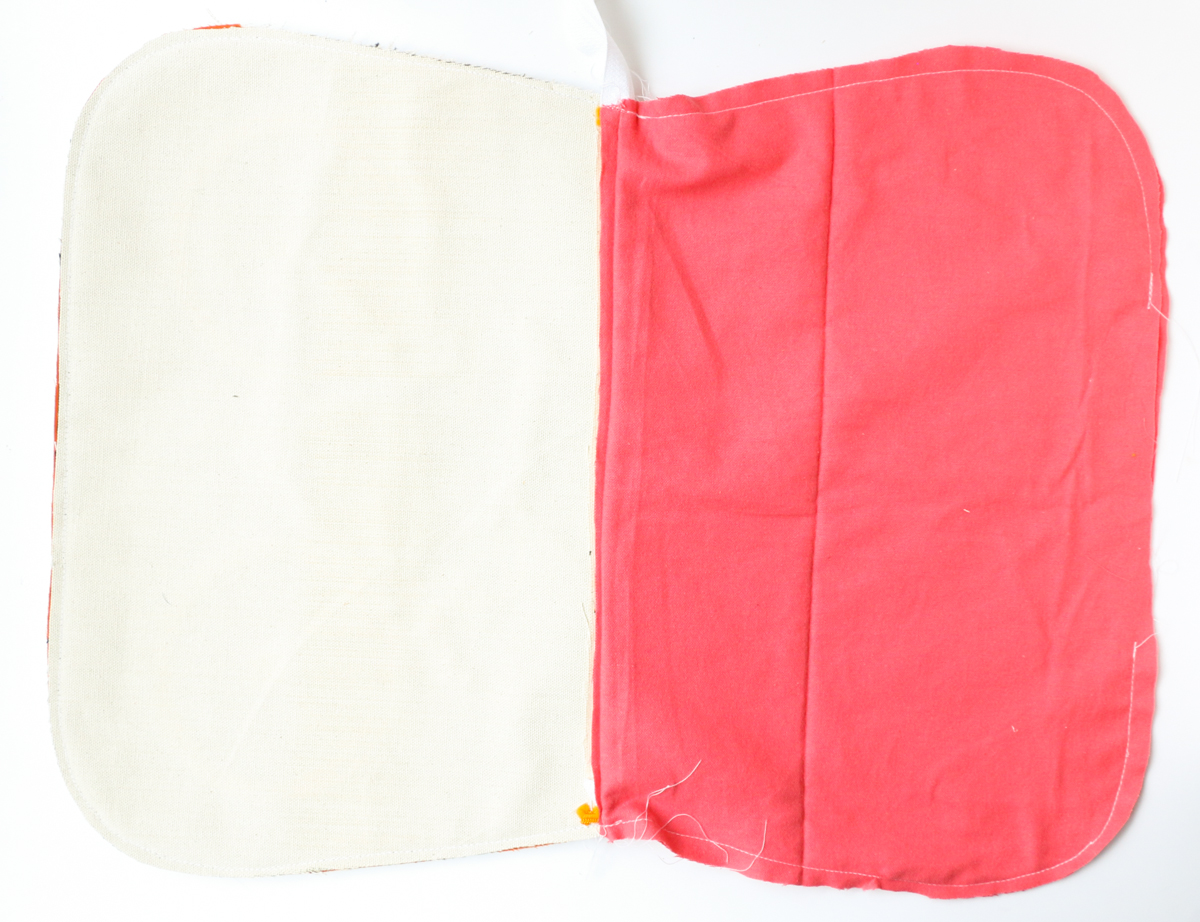
Sew the bag pieces together, leaving a 5″ gap in the
lining.
lining.

The last step is to simply turn the bag right-side-out
through the hole in the lining and then top stitch the hole closed. Iron the
bag flat and add a tassel for some sassle (okay, that may not be a real word).
through the hole in the lining and then top stitch the hole closed. Iron the
bag flat and add a tassel for some sassle (okay, that may not be a real word).
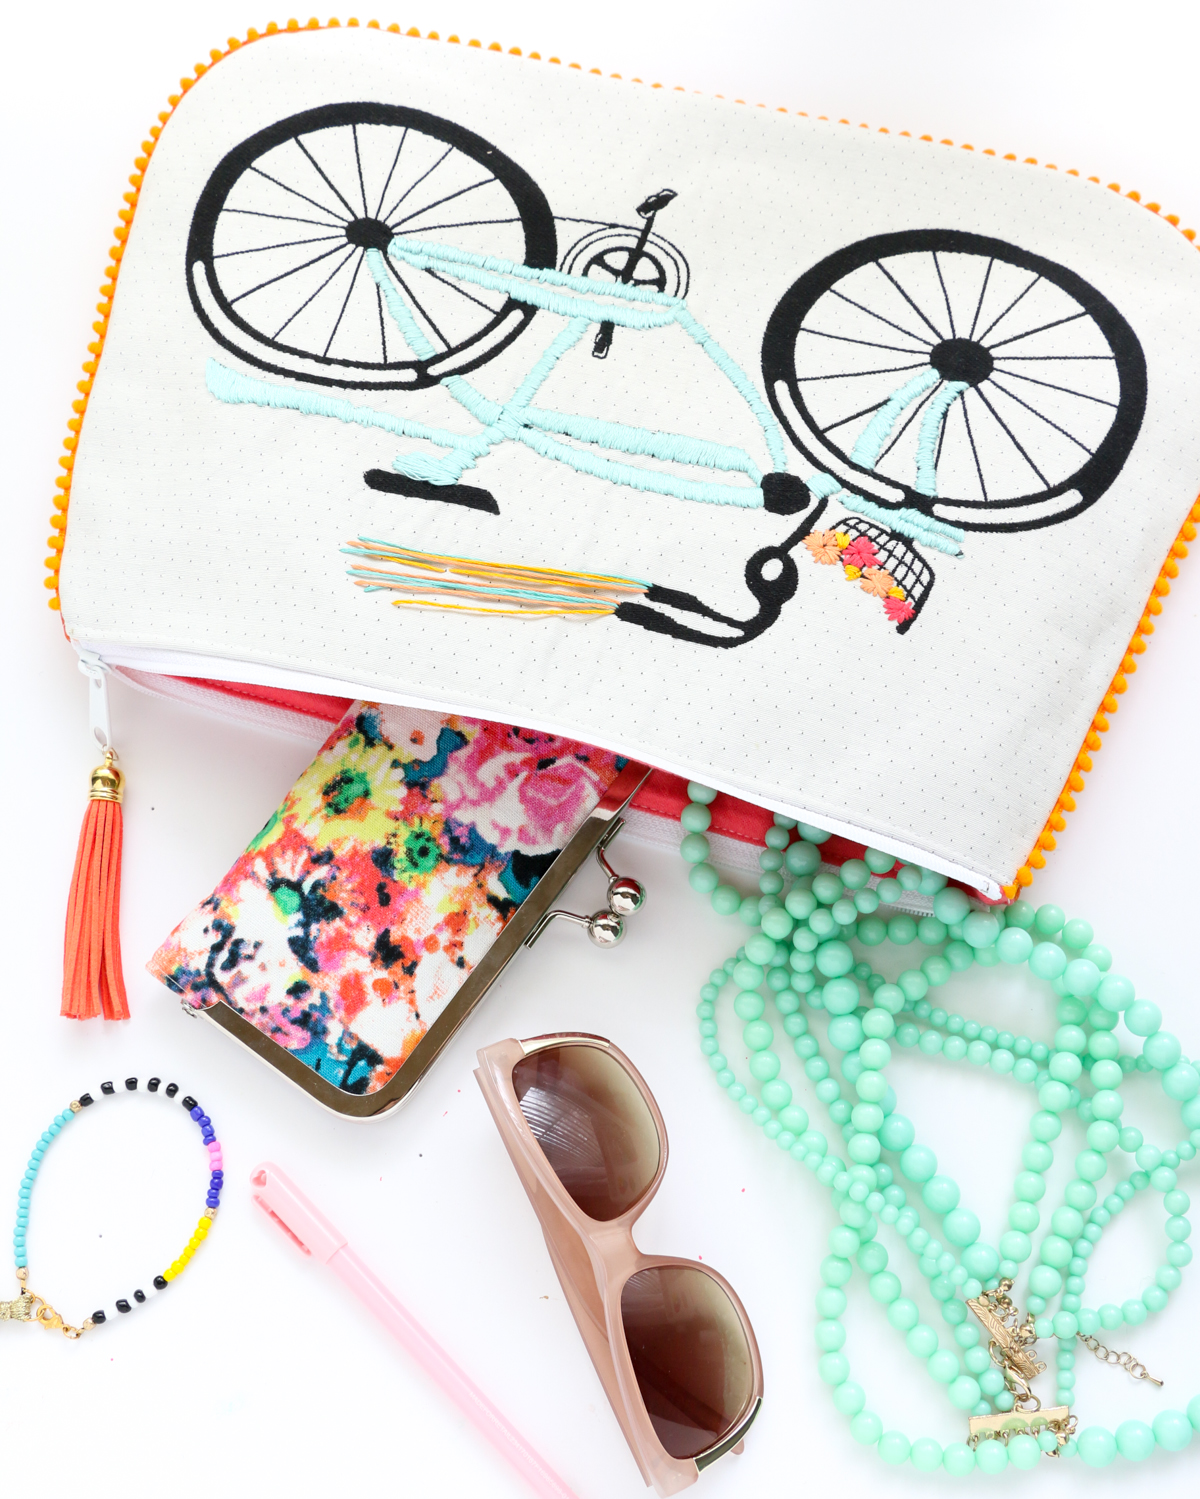

Whew! Congrats on making it to the finish! You’ve completed
your very own embroidered bike clutch just in time for some summer fun! You are
awesome! And if this seams (ha! See what I did there?) like too much work, you can always use plain printed fabric in place of the embroidered bike fabric to make your own large clutch using the method above.
your very own embroidered bike clutch just in time for some summer fun! You are
awesome! And if this seams (ha! See what I did there?) like too much work, you can always use plain printed fabric in place of the embroidered bike fabric to make your own large clutch using the method above.
Special thanks for Joann Fabric and Craft Stores for sponsoring this blog post and giving me the means to create awesome crafts and DIY’s for you!


May 31st, 2016 at 10:57 pm
Such an adorable clutch! I think I may have to make one soon!
June 2nd, 2016 at 1:34 pm
I must have one! Thanks for the directions!
http://www.sistersweetly.wordpress.con
June 5th, 2016 at 1:10 pm
I love this you have really inspired me.
June 18th, 2016 at 3:48 pm
This is so very pretty! Thanks for showing us how made it!