The post, DIY Fall Leaf Wall Hanging, is sponsored by Consumer Crafts. Thank you for supporting the brands that keep the crafty times going!
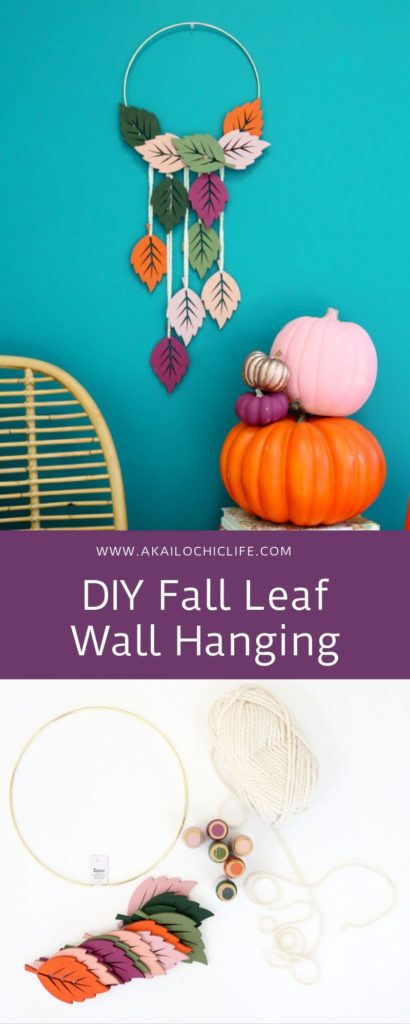
Pumpkins, and leaves, and warm cozy yarn weavings, oh my. This DIY Fall leaf wall hanging is a super simple afternoon project that will leave your home feeling all hygge and ready for fall. All you need is paint, wood leaves, yarn, and a macrame hoop. And just look how perfect it is with a few coordinating pumpkins stacked nearby!

Supplies needed to make your own fall DIY hanging room decor:

Begin your DIY hanging room decor by painting the front and backs of your wood leaves with the acrylic craft paint. Once dry, it is time to assemble your wall hanging. To start, cut pieces of yarn off in various lengths between 6″ and 24″. Thread these through the holes in the base of the leaf and then tie the ends in a knot and cut off the excess yarn. Next, thread the loop end of the yarn around the macrame hoop and put the leaf through the loop to attach the hanging leaf to the hoop. Repeat with the other leaves. Make sure to vary the length of the yarn pieces to give a variety of lengths to the hanging leaves.

Once you have 6-7 leaves hanging, use the remaining leaves to hot glue around the bottom edge of the macrame hoop.


Your DIY hanging room decor is now ready to display wherever you need a pop of fall color! If you are feeling extra ambitious, you can use a vinyl cutting machine to cut out gold glitter cardstock in the words FALL, AUTUMN, or HELLO FALL to hot glue across the top portion of the macrame hoop. Now show of hands, who else is ready for fall to come?!

December 20th, 2019 at 12:56 pm
[…] DIY Fall Leaf Wall Hanging from akailochiclife.com […]