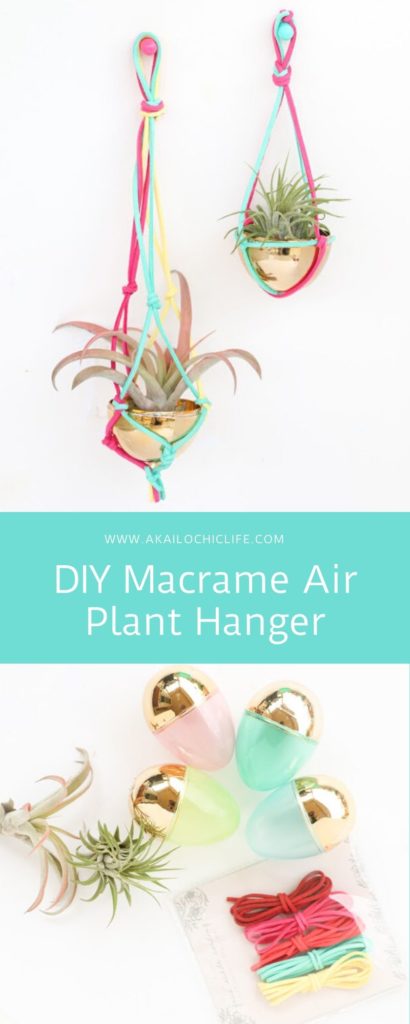
This was my first attempt at doing macrame, and while I started out with a simple tube knot, it was surprisingly simple. So I would definitely suggest giving this craft a go even if you are intimidated by macrame like I was. Follow along below for the full tutorial.
The Supplies:
- Plastic Easter Eggs (You can get these gold bottomed ones here)
- Faux Suede Cording (I purchased my pack in the Target Dollar Spot but here is an Amazon option)
- Air plants (I purchased mine at my local nursery, but I saw a few faux air plants at Target in their new Threshold home decor section too, and here are some on Amazon)
 Begin by choosing three colors of cording for your macrame hanger. You are also more than welcome to buy several packs of cording so that you have all the same color for your hanger, but you know how I like to mix colors!
Lay your three pieces of cording out together and then fold in half and create a loop knot at the top. This is the loop that you will use to hang your macrame planter when you are done.
Now go down 2″ from the top knot and knot the two matching colors together. Yellow to yellow, blue to blue, pink to pink. You will then have something a little like this:
Now move down another 1-2″ from the last knots you made and knot together the colors that are next to each other. One yellow to one pink, one pink to one blue, one blue to one yellow. Then repeat by moving down another 1″ and knotting the same colors back together. You will then have some thing that looks like this:
Now use a small piece of one of your other colors to tie a knot about 1″ from the bottom of the last set of knots.
Cut all the ends of the tie and the pieces of leftover cording hanging down. Insert the bottom piece of your plastic Easter egg into the bottom portion of the hanger just above that last knot you tied. Then place your air plant in the egg bottom. Since my air plant and the plastic egg were so light, I added a few metal washers inside the egg bottom to give the planter a little weight and help pull the suede cording taught.
For the smaller planter I just played around with the cording and knotting technique to create a different design. Starting the same way with a knot at the top of two pieces of cording, knot a separate piece of cording the diameter of the egg bottom around all the suede strands. Then insert your egg bottom and tie a knot at the bottom of the egg planter and cut off the extra suede.
I love these new mini macrame air plant hangers and they are the perfect addition to my colorful office. The best part is that each of these planters will cost you less than $2 plus the cost of the air plant (which I got for around $3).
What do you think? Tempted to try macrame now that you see how easy it is? Share your projects on social media using the tag #mykailochic. I can’t wait to see what you create!
*Note: Some of the links in this post are affiliate links
which means that I get a percent of the sale if you were to happen to
purchase something that I link to. The price is the same for you either
way, but I get a little commission that helps me pay for more supplies
to make even more awesome blog posts for you!


March 1st, 2016 at 11:21 am
I think that these are adorable; and I can't wait to make them. Thanks,Kara, for giving such great instructions; as I'm thinking of using this as a project for my Sunday School kids. I think these would make great gifts for Mother's Day.
July 15th, 2020 at 11:06 am
[…] stone assertion hooks could have the spa vibes flowing very quickly. (through Squirrelly Minds) DIY Air Plant Hanger: Say hi there to this weekend’s DIY. It is a fab (and straightforward!) strategy to carry […]
July 15th, 2020 at 11:23 am
[…] a small bathroom. Smooth stone hooks will flow quickly for spa vibrations. (via Squirrelly Minds) DIY air plant hanger: Welcome to this weekend's DIY. It's a fabulous (and simple!) Way to deliver plants to your […]
February 11th, 2021 at 7:15 am
[…] 11. Makramee-Luftpflanzgefäß […]
March 11th, 2021 at 9:22 am
[…] 11. Macrame Air Planter […]