


It has been a couple weeks since I last went into details about our front yard landscaping project. You can read more about it here and here. The last time I mentioned the front yard, we had just finished laying the edging and putting in plants and mulch around the top of our yard near the house and the pathway to our front door.

As I have mentioned this project has taken an exceptional amount of time for us due to all the rain we have had this month. It has left little time to work outside, but in the last week we were finally able to purchase and plant some native plants for the bottom planting bed next to the sidewalk as well as get the basalt stone delivered and placed around the plants. Here is a before view of the space.

And here it is after tilling with the landscape edging installed.

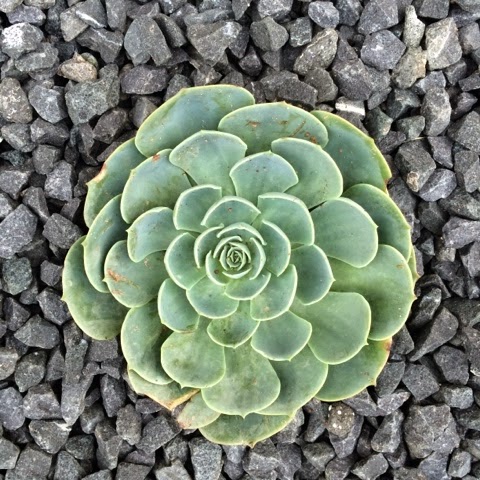
The first thing we did was purchase our plants. As I mentioned in the previous post, I wanted to go with native, drought resistant plants. I ended up choosing some of the following: Blue Agave, Red Yucca, Mexican Feather Grass, cold hardy succulents, a perennial pink Salvia, and some other native perennial that has yellow flowers. Once the plants were home, I laid them out in the pattern that I wanted while making sure to leave enough space for them to grow to their full height and width without getting overcrowded. Then came the planting.

Once the plants were all in, my husband and I decided to use blue painters tarp instead of landscape fabric to create a barrier between the soil and the rocks so that potential grass and weeds would hopefully be unable to sprout up. In previous landscape projects in both our front yard and backyard we have tried several methods to control the weeds and grass growth in our rock beds. The method that seems to have worked the best so far (we have still yet to see how the tarp holds up) was to till the area and let all the plant life die out, then to sprinkle corn meal gluten on the ground to prevent any seeds from germinating. Next we covered that area with cardboard and then commercial grade landscape fabric. Finally our decomposed granite was put on top. You would think with all that work and money, nothing would have been able to grow, but unfortunately there were a few weeds and grasses that have been able to get through all of those barriers. So this time, we decided to try plastic tarps (and can you believe they were substantially cheaper) and see if they would be able to keep the weeds at bay. I am sure our neighbors thought we were crazy after seeing this bright blue going in.

As we laid down the tarp, we secured it with metal landscaping stakes and were cut holes in the tarp for the plants to fit through. Here is the landscaping bed with all the plants and the tarp installed.

Next came the basalt stone (aka Texas Black). We had three yards of it delivered and we spent about an hour or two shoveling and hauling the rock into place around the plants. I wasn’t sure how the rock would cover the blue tarp, but surprisingly it worked really well. You can’t even see the blue, even where there is a steep slope the rock is staying in place.


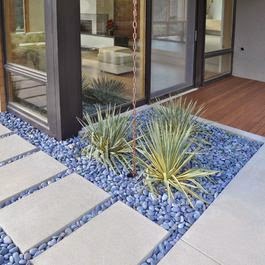
So there we have it we have finished the upper landscaping bed with native plants and mulch and the lower landscaping bed with native plants and basalt. The only thing left is to work on the new pathway from the lower sidewalk to our house. We hope to get large 2′ by 4′ sawn limestone pavers put in with the rest of the basalt around them sort of like this design from Austin Outdoor Design.
We just have to figure out how to get these large stones to our house and installed since the rock yard doesn’t deliver them and they weigh around 220 pounds each! Looks like we may be reaching out to some friends for some muscle help. With that said, I will be sure to share the finished project with you just as soon as the walkway is completed. But so far I am liking how the yard is turning out and I think after all is said and done, we will only have spent a little over $1000 on a project that would have cost close to $8000 to have professionally done (at least that is the quote I got for a similar front yard project last summer). So glad we DIY’ed this!


