


The Supplies:
- Maker’s Mix concrete mix (available at Joann Stores) or any other concrete mix
- Acrylic Craft Paint (I have also heard that powdered tempra paint
works well)
- Half Circle Silicone Mold
- Paper cup and plastic spoon
- Bottom of plastic Easter egg and a golf ball
I have seen several tutorials that say that you can’t mix acrylic paint with concrete or plaster, but I have found that you actually can in small amounts. Likely if you added too much it wouldn’t set correctly, but so far in my experimenting I haven’t had a problem with the concrete setting.
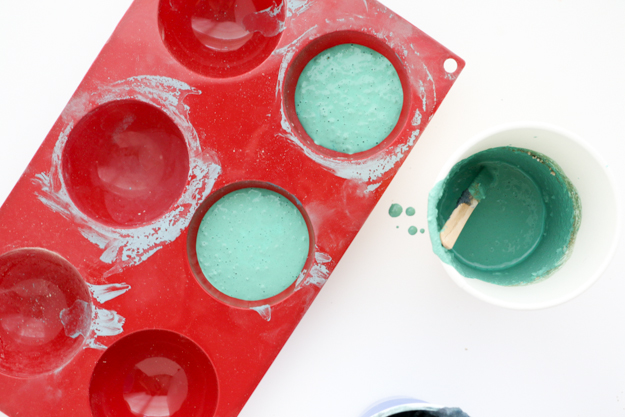
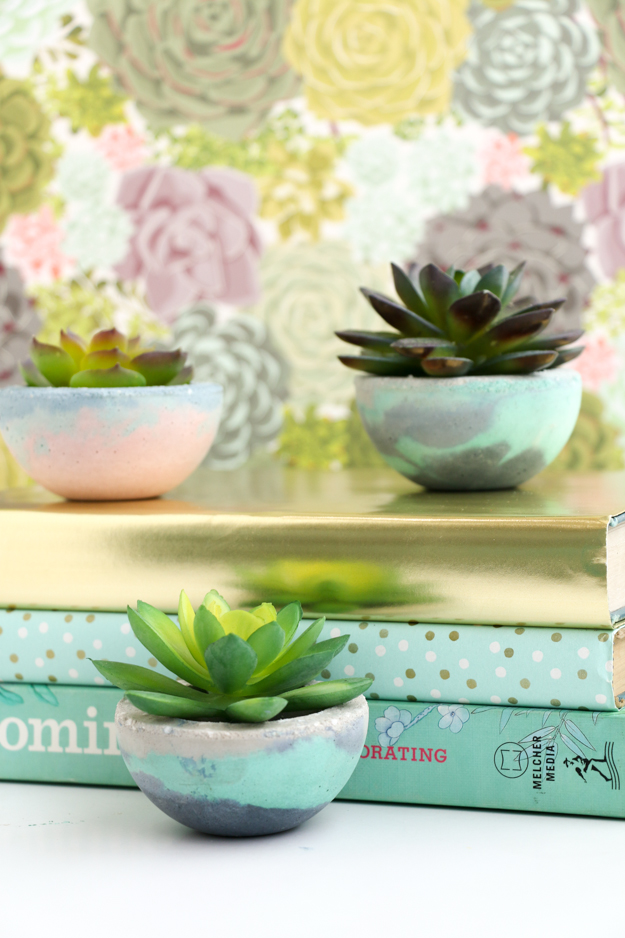
I began by choosing my paint colors. Since I was using a gray concrete, the colors that I mixed with the concrete mix wouldn’t be as vibrant and would darken slightly, so I went with shades of blue. I did try a bright pink and in turned into a light pinkish gray color, not bad, but not really what I was hoping for.
Once I had my colors (navy blue and turquoise), I started by mixing about 1/2 cup of powered concrete, about 1 TBSP of acrylic paint (I eyeballed this), and enough water to create a thick pancake batter consistency. This first color got added to my mold and then I quickly repeated the process with the next color of paint and poured it in the mold. Finally I finished with the plain gray concrete. Making sure to leave about a 1/4″ of the mold unfilled.

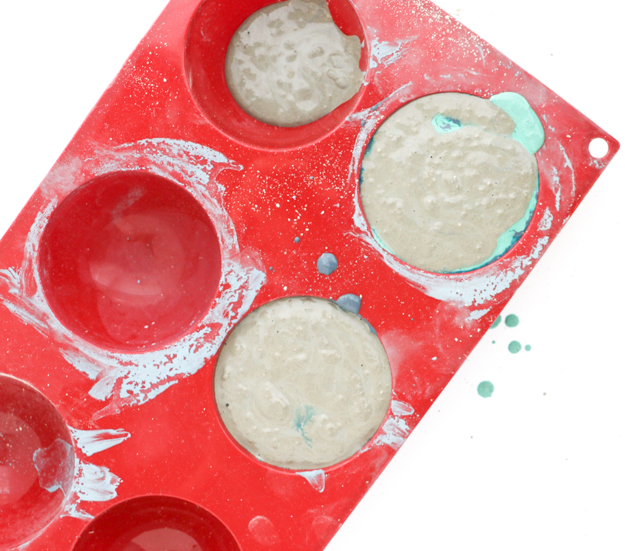
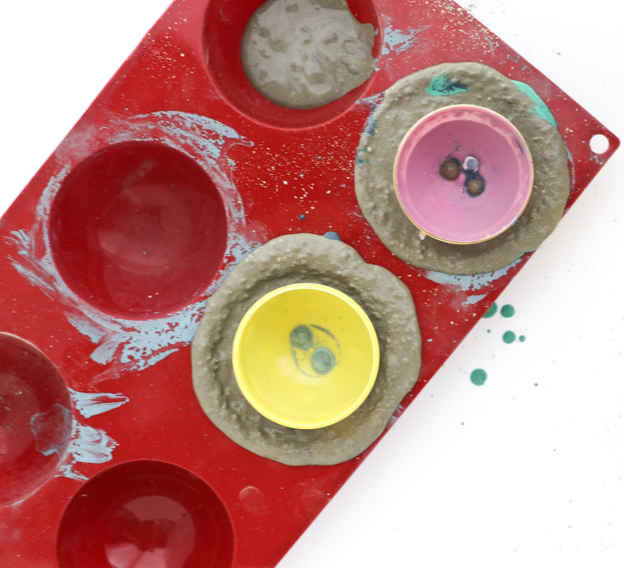
Now that my mold was filled, I gently swirled the colors of concrete together and placed my Easter egg bottom with a golf ball inside to weigh it down. As you can see above I did not follow my own advise and filled the mold a little too full. So I had to use my finger to gently remove the excess mix that spilled over the sides when I inserted my egg pieces.
Then it was time to let it dry. Once it had dried and cured overnight, I
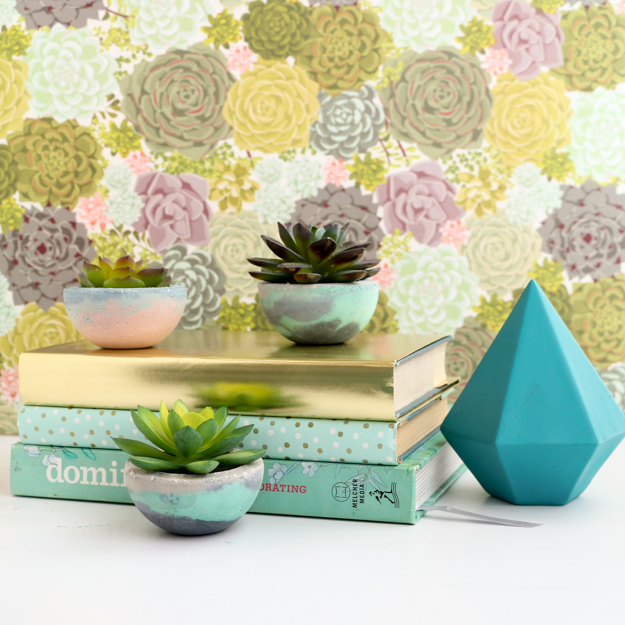
un-molded the concrete and planted with my mini succulents.
The next time I make these I plan to try to swirl the concrete together a
bit more to create more of a marbled look. But all in all, these mini planters
are still super cute and I love that I have found an easy way to color the
concrete and still get that industrial concrete look.


July 23rd, 2018 at 12:59 am
Thanks for the tutorial (even tho it was ages ago 🙂 , I’ve recently been playing with concrete and tried acrylic paint for colour as you have more choice 🙂 this is the first tutorial I’ve seen where someone else has tried it. I swirled mine into the mix and worked out great, I’d like more of a vibrant colour tho so I’m going to try the neon paints next.
April 23rd, 2021 at 9:20 pm
I love these. I want to get the supplies and make them now. Thanks so much for sharing.