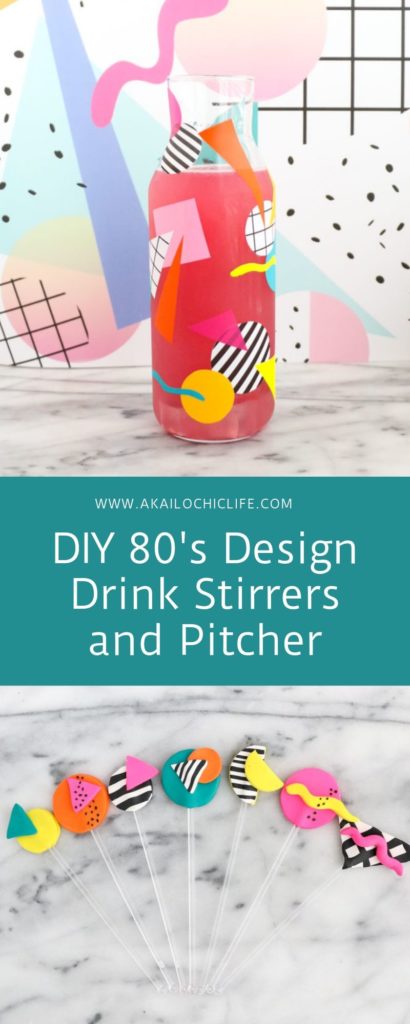
This post on DIY 80’s Design Drink Stirrers and Pitcher is sponsored by JOANN. Thank you so much for supporting the brands that keep the lights on and the crafts coming!
You all know I am currently obsessed with all things 80’s including the music and graphic patterns that were so popular back then. I even have my playlist set to 80’s pop all the time! I have had so much fun the last few months bringing a little of that 80’s nostalgia into my home in the form of planters and soap. But I am so obsessed with my latest project, I just can’t hide it anymore! I have partnered with JOANN to create DIY 80’s design drink stirrers and pitcher using polymer clay and adhesive vinyl. Not only is this project one of my new favorites, but I grabbed all the supplies at my local JOANN. Yay for one stop craft shopping!
Are they not the most fun thing to happen to happy hour?! I can’t wait to get some use out of these!
Materials:
–Polymer clay in black, white, pink, orange, yellow, and teal
–Acrylic or wood drink stirrers
-Oven safe baking sheet
–Small cookie cutters
–X-acto knife
–Adhesive vinyl
–Printable vinyl
-Scissors
-Printer
–This printable
–Acrylic clay rolling pin
–Glass pitcher
Drink Stirrers:
The key to making 80’s patterns is to mix solid colored geometric shapes with black and white patterns. To make the stripe black and white pattern, being by rolling out the black clay and the white clay into long log shapes that are about 1/16″ wide. Cut the logs into 3″ lengths and lay them next to each other repeating a black and white pattern.
Next, roll a rolling pin over the clay to join the logs and create your black and white stripe pattern. Then use a cookie cutter to cut out your circles or the x-acto knife to cut out a triangle.
For the crosshatch pattern, roll out white clay and then layer strips of black clay over the white clay in a crosshatch pattern. Roll the rolling pin over the clay to create one piece and then use your cookie cutters to cut out shapes.
For the drink stirrers, layer two pieces over and under the drink stirrer to encapsulate the stirrer end and then use the colored clay to add geometric details.
Repeat with other colors, shapes, and sizes to create unique 80’s patterned drink stirrers like those below. Then remove the stirrer and place the clay on a baking sheet and bake at 275F for 15 minutes to set the clay. Once set and removed from the oven, slip the drink stirrers back into the clay and they are ready to use.
Drink Pitcher:
Begin by printing out the black and white shape printable above onto printable vinyl. Now use this printout plus the colored adhesive vinyl to cut out circles, triangles, squares, and squiggles using your scissors. Then adhere them to your drink pitcher like stickers.
Once finished with your pitcher, your new 80’s style barware set is complete!
I am so in love with my new barware set and I love that the whole project was finished in just a few hours including baking time! That means after a quick stop by JOANN to pick up your craft supplies, you could be well on your way to your very own DIY 80’s design drink stirrers and pitcher set this afternoon. Now how’s that for a crafty good time?!


