This post, DIY Glittery Galaxy Christmas Tree and Garland, is sponsored by JOANN. Thank you for supporting the brands that keep the lights on and the crafting going strong!
There are only so many ways you can decorate a tree for the holidays, right? Wrong! The limit truly does not exist! This glittery galaxy tree just goes to show you that you are only limited to your imagination when it comes to tree decorating. I partnered with JOANN to show you how easy it is to create your own intergallactic Christmas tree and garland with just a little DIY action and some supplies from your favorite craft store, JOANN.
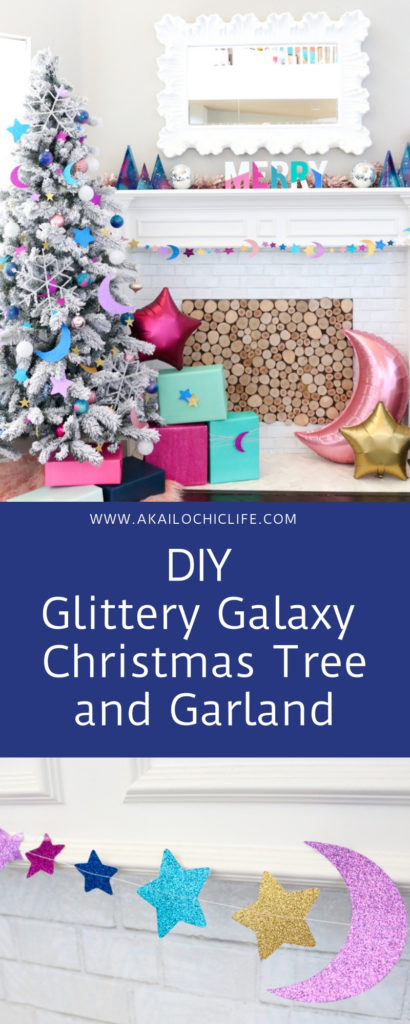
First up, let’s talk about the tree! I started with my favorite flocked green artificial tree and added snow frosted white ball ornaments and giant icicle snowflakes from JOANN. Then I added in DIY galaxy ornaments and cut out glittery stars and moons. both of which I will be sharing the tutorial for below. I love the snow frosted look of this tree and felt that it lent itself perfectly to the outer space theme. Plus, all the jewel toned colors really pop next to the white snow!
DIY Galaxy Ornaments
- Clear plastic ornament balls for crafting
- Spray paint in 3-4 shades of blue and purple
- Gold paint pen
- Dowel rods and a piece of scrap stryofoam or cardboard box
Begin by taking off the ornament caps and sticking the dowl rods into your cardboard box. Then turn your ornaments upside down over the dowels to keep them from rolling over when being painted.
Next, paint your ornaments in small bursts of spray paint color. Switch off colors and completely cover your ornaments with the different shades of spray paint. Let the ornaments dry, then come back with your paint pen and vigorously shake the pen over the ornaments to splatter them with gold “stars”. Once the gold paint is dry, place your ornament caps back on and hang them on your tree.
Stars and Moon Glittery Garland
- Glitter card stock in shades of blue, purple, and pink
- Cricut Maker
- This template
- Cutting mat
- Sewing machine
Begin by uploading the template to the Cricut design program and scaling it to 5″. Then cut the shapes from your glittery cardstock by choosing the glitter cardstock paper type when cutting.
Once cut, remove the shapes and using a sewing machine set on a long stitch length to sew the shapes together. You may also want to use a glue stick to glue a second star or moon on the back of each shape once sewn so that you get a glittery star or moon no matter how they rotate on the garland. Then simply tie the ends of the strings in loops and hang over your fireplace or around your tree. I used the same template to cut out larger 10″ moons and stars to add to the tree as ornaments too.
Once my garland and tree where complete, I added in a few galaxy painted acrylic trees that I made using the same spray paint technique as the ornaments, a few metallic star and moon balloons, and a colorblock MERRY sign from JOANN. The sign actually came in different colors, but I painted over the red M and the lime green R with DecoArt Americana Acrylic paint to get a color scheme that better fit my galaxy tree.
I am honestly so obsessed with how this DIY Glittery Galaxy Christmas Tree and Garland turned out! I love the glitter and gold and stars and moons. It’s such a fun new way to celebrate the holidays!


December 10th, 2018 at 8:33 am
[…] A Kailo Chic Life […]