


This post, DIY Rainbow Candy Cane Pillow, is sponsored by JOANN. The perfect place to get fabric for your sewing projects and so much more! Thank you for supporting the brands that keep me crafting up a storm.
Okay, so I realize Halloween just ended and you might not be quite ready to start crafting for Christmas. But as soon as Halloween over it is full on holiday mode over here. I love the Christmas season even more than I love Halloween, so get ready for tons of fun, colorful Christmas crafts. But first, the most epic giant DIY rainbow candy cane pillow. Because everthing is better in rainbow!
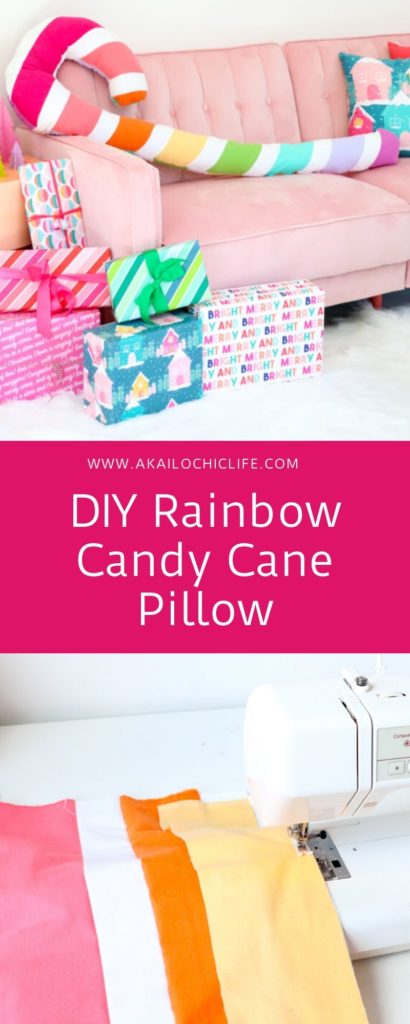
I love my local JOANN because they always have everything I need for all my sewing projects. They have a huge selection of home decor weight fabric in so many trendy patterns, plus apparel weight fabric and patterned quilting fabric. For this project however, I went with soft solid flannel because I wanted the pillow to be soft and cuddly. It was also a plus that JOANN had over 50 different colors of solid flannel to choose from so I could pick just the right colors for this pillow.

Look how perfectly the flannel colors match my colorful Christmas decor!
Now, I will say that this pillow does take a bit of sewing to make, but it can easily be made start to finish in about 2 hours. Which isn’t too bad for something that makes this big of a statement!
Materials to make your own DIY Rainbow Candy Cane Pillow:
- 1/3 yard of flannel in 8 colors (choose your favorite rainbow of colors)
- 2 yards of flannel in white
- 2 bags poly-fil (enough to fill two 20″ square pillows)
- Sewing machine
- Thread
- Scissors
- Cutting mat
- Rotary cutter
- Pencil (or chalk)

Begin by cutting your colored fabric into two 6″ wide strips each. Using a rotary cutter, mat, and ruler help this process go really quick, but you can also use a ruler and regular scissors to make the cuts. Since the pillow is just stripes of colors, there is no need to be super accurate or uniform with your cuts.

Next, cut the white flannel into 16 strips 4″ wide.

Next comes the part that takes the longest. You are going to essentially create a vertical stripe quilt with the fabric strips. Sew the first white strip to the dark pink with a 1/8″ seam. Then sew on the next white strip to the other side of the dark pink strip making sure to keep right sides together when sewing. Now add on the light pink strip to the last white strip. Continue in this fashion until you have all the colors sewn together with white strips in between.


When you have the first panel done, repeat the steps to make a second striped panel. Then turn the first panel ontop of the first with right sides together and sketch out a candy cane shape on the back of the top fabric.

To get a good thickness to your candy cane pillow, you will want to make sure the width of the candy cane is at least 8″.
Now, cut out your candy cane shape from both panels. Next, sew the panels together (you can pin them together before sewing if needed), leaving a 6″ gap along one side of the candy cane pillow.

Turn the fabric right side out through the hole and then stuff it with the Poly-Fil. Once filled, use the sewing machine to turn in the hole seams and top stitch the pillow closed.


The finished pillow is super cute and perfect to decorate your sofa for Christmas. Not only that, but the curl of the candy cane top is perfect for wrapping around your neck like one of those airplane pillows! Then you can curl up with the length of the candy cane and have it act like a body pillow. It really is the perfect snuggling shape. And because we used flannel, it is soft to the touch too!
Once you head to JOANN and get the fabric to make your own, be sure to tag me in your creations on social @kailochic so that I can see what colors you make your DIY rainbow candy cane pillow!


November 7th, 2019 at 7:32 am
[…] See The Original Article For Instructions […]