This post, DIY Patterned Ornaments with Printable Vinyl, is sponsored by JOANN – the place to find all the supplies you need for any craft project on your list! Thank you so much for supporting the brands that keep me crafting up a storm!
I am so excited that it is officially the holiday season. It’s my favorite time of year and I love crafting and creating decor for both my Christmas tree and my home. Today’s project is perfect for you other color and pattern lovers out there. These DIY patterned ornaments with printable vinyl are perfect to use as gift tags for your holiday gifts, and can be customized with your favorite holiday patterns and color palette too! I used my Cricut Wild Rose Explore Air 2 bundle and blank wood ornaments from JOANN to create these patterned ornaments in under 30 minutes.


I tried to keep my patterns simple for this project, but how fun would these be with nordic winter prints or abstract art prints?
Materials to make your own DIY Patterned Ornaments with Printable Vinyl:
- Cricut printable vinyl
- Cricut Explore Air 2 Wild Rose
- Ink Jet printer
- Flat wood ornaments (found in store in the unfinished wood section)
- White acrylic paint (optional)
- Gold paint pen

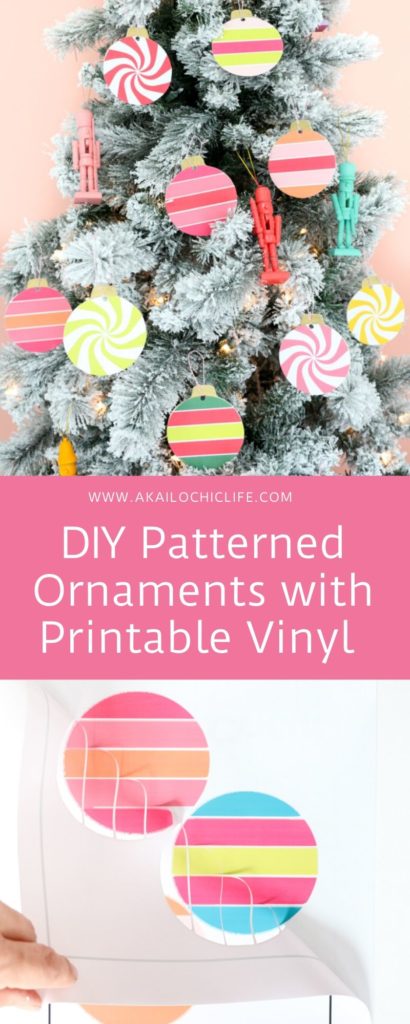
Begin by printing out your patterns on the printable vinyl. While you can use the print and cut feature on the Cricut, I found it easier to print a whole page of the pattern and then use the Cricut Explore Air 2 to cut out the round shapes only. You’ll need to use the print-to-cut feature and upload a .jpg of the sized circles with the pattern if you want a more complex pattern like the candy swirl that can’t be printed as a whole page. Then, print it out with the registration marks and then have the Cricut cut out the pattern.

As you can see above, I printed out the stripes as a print to cut. The printer added added a black registration line around the circle pieces to let the Cricut machine know where the pattern was when it was time to cut.

After printing, press the printable vinyl on the cutting mat and feed it into the machine. Then cut out the shapes to match your wood ornaments. Then, to get the size I needed to cut for my round ornaments, I measured the circle. Next, peel away the negative space of the vinyl to reveal the pattern pieces.

I gave my ornaments a coat of white paint so that the wood wouldn’t show through the stripes. If you have a fully cut out pattern with no negative space, then you can skip this step!
Once the paint is dry, transfer your printed and cut vinyl onto the ornaments.


Finally, paint the tops of the ornaments with the gold paint pen. This really makes them look like ornaments! Then add an ornament hook or piece of twine and hang them on your tree.

You can also repeat these steps for the backs of the ornaments so that they are patterned on each side! No need to worry about them flipping on the tree.
Don’t they look so pretty hung up on the tree? Colorful ornaments are the best! Plus, if you add a few stickers, they make the perfect gift tags too! I just love easy and versatile crafts like these.