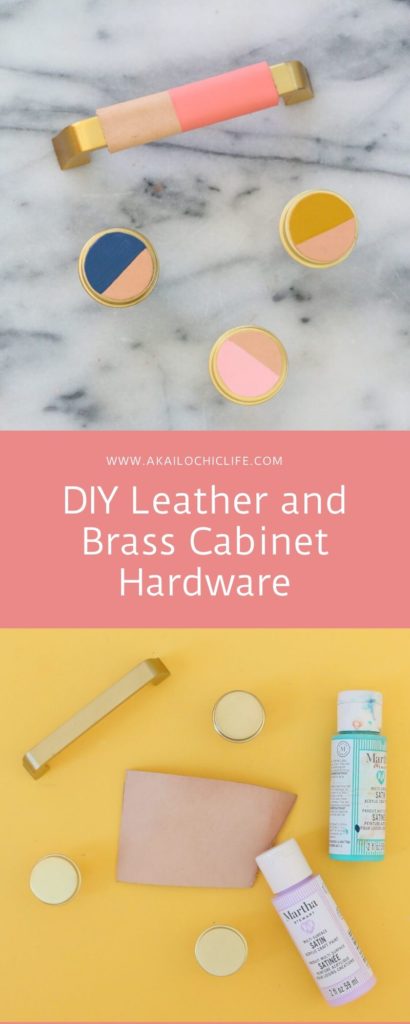
Several of you noticed and commented on the hardware I used on my vanity makeover for my studio bathroom. Of course they were a DIY, and I promised I would put together a tutorial for them ASAP. Today I am going to share a few ways to create DIY leather and brass cabinet hardware using off the shelf pulls and knobs and a few craft supplies.
Who knew such a simple project could create such a stunning piece of hardware?
Definitely not me when I started this project.
But wow!
They are gorgeous!


Here they are in action. Simple but stunning!
Materials to make your own DIY Leather and Brass Cabinet Hardware:
- Brass knobs or pulls (I picked these up at my local Home Depot for $3-$4 but here are Amazon options)
- Tan craft leather (you can find sheets at your local craft store or at a specialty leather shop, or here on Amazon)
- Beacon Quick Grab glue
- Acrylic multi surface craft paint
- Clamps

For the knobs, simply trace the knob top on the underside of the leather and cut out with scissors just slightly in from the drawn line. This will allow the brass from the knob to create a border around the leather piece once glued on.

At this point you can leave the leather as is and simply glue it on to the top of the knob, or you can paint it with color on half or the whole surface of the leather. Then glue it on to the knob with the quick grab glue.
For the pulls, cut a strip of leather that fits just in from the sides of the pull to allow some of the brass to show on each side, and long enough to wrap around the pull and overlap slightly in the back. Next, paint the leather with your acrylic craft paint as desired.

Then use the quick grab glue to glue the leather onto the pull and over lap the leather in the back. Use the clamps to clamp the leather in place for 10 minutes while the glue dries.

Once dry, the pulls and knobs are ready to use to adorn your cabinetry!


