


This post is sponsored by Joann Fabric and Craft Stores. All opinions and ideas are my own. Thanks for supporting our sponsors!
I must admit that I am a bit of a project non-finisher. I
get these grand plans to do a project, then end up getting bored half way
through and start on something new. So when Joann Fabric and Craft stores asked
me to recover two chair cushions, I was pumped to finally finish a chair
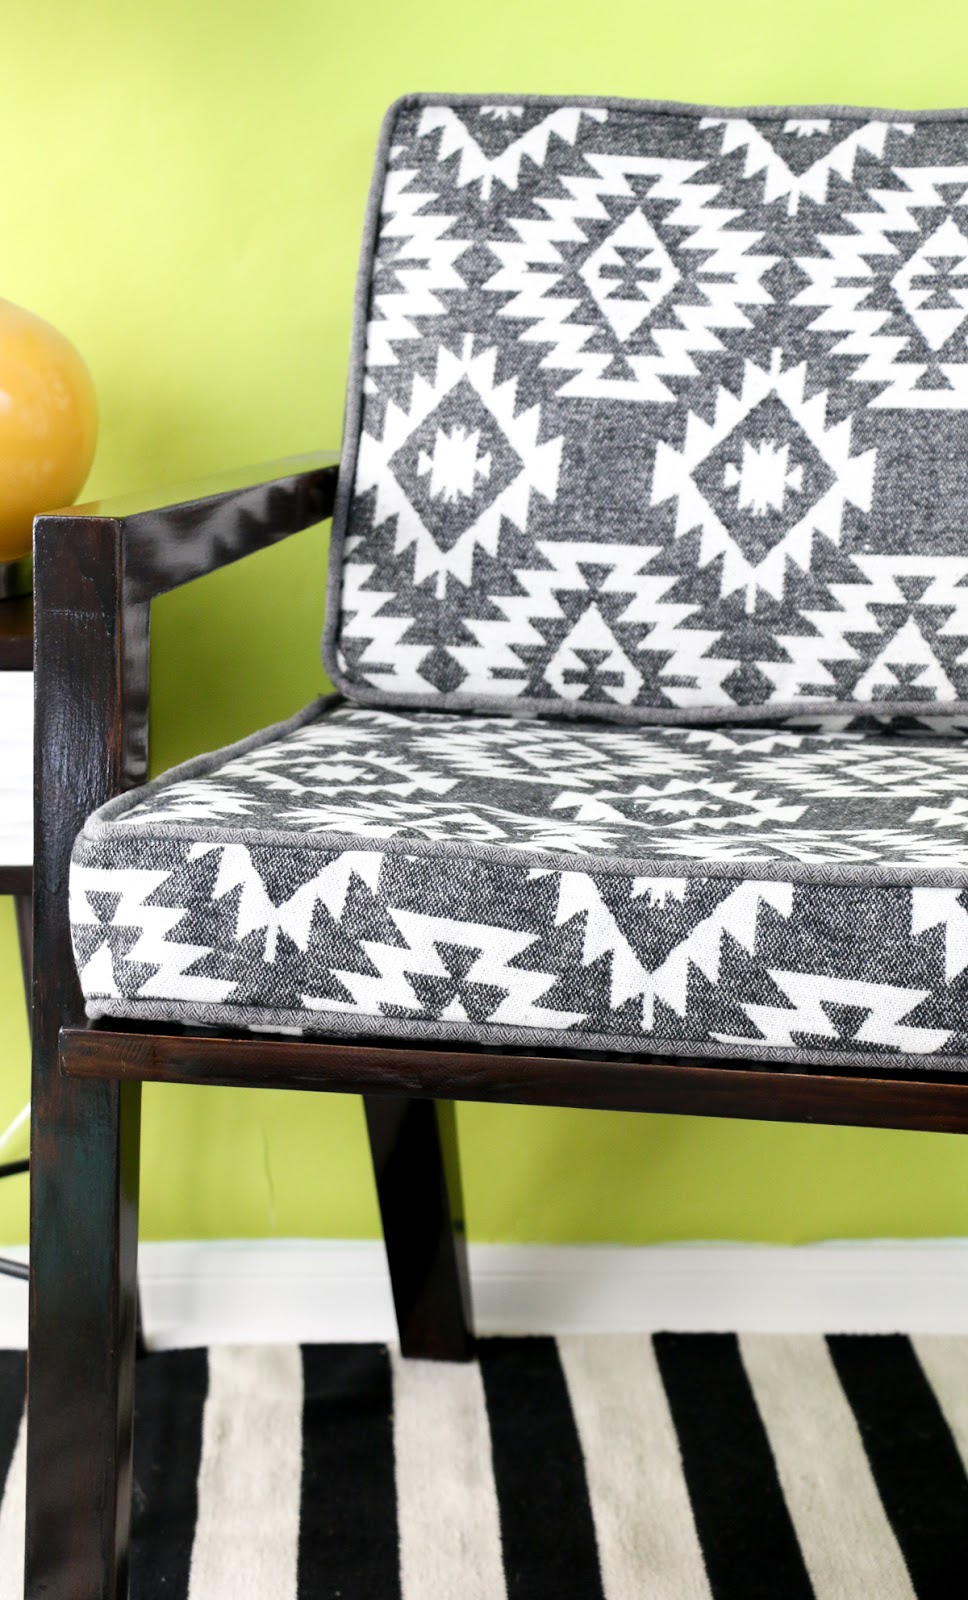
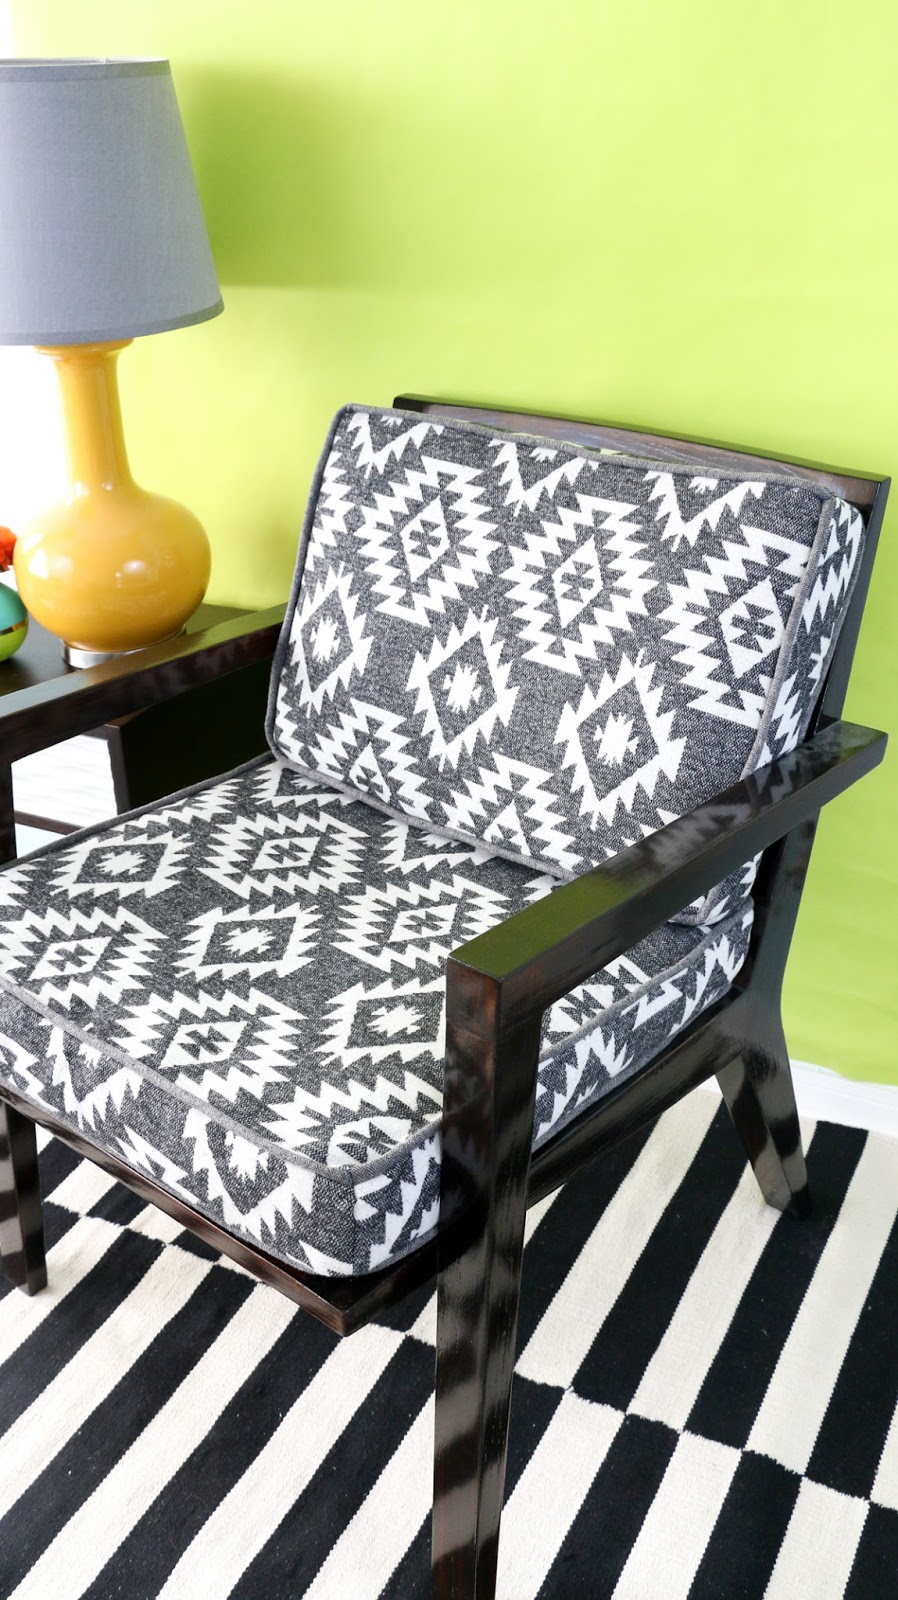
project I have had “in progress” for literally years. Today I will share how I recovered two cushions from my Craigslist chair find
using an awesome gray tribal print with DIY coordinating gray tweed piping, so
that you can get motivated and finally recover that chair you have had sitting
in the corner for years too!
get these grand plans to do a project, then end up getting bored half way
through and start on something new. So when Joann Fabric and Craft stores asked
me to recover two chair cushions, I was pumped to finally finish a chair
project I have had “in progress” for literally years. Today I will share how I recovered two cushions from my Craigslist chair find
using an awesome gray tribal print with DIY coordinating gray tweed piping, so
that you can get motivated and finally recover that chair you have had sitting
in the corner for years too!

While recovering a chair cushion complete with piping detail
may seem daunting, if you have moderate sewing skills (i.e. can sew a straight
line and have made a simple pillow before), then should have no problem
tackling this task.
may seem daunting, if you have moderate sewing skills (i.e. can sew a straight
line and have made a simple pillow before), then should have no problem
tackling this task.
Begin by measuring the pillows you plan on recovering. I
measured the longest side of each pillow then added them together and added
another 1/2 yard (for the side pieces) to get my final yardage requirements.
measured the longest side of each pillow then added them together and added
another 1/2 yard (for the side pieces) to get my final yardage requirements.
I ended up needing just shy of 2 yards of the main fabric (it is
best to go with a heavy weight material for the main cushions), 1/2 yard of fabric
for the DIY piping (I used a gray tweed), and 10 yards of 1/4″
cording to complete both of my pillows.
best to go with a heavy weight material for the main cushions), 1/2 yard of fabric
for the DIY piping (I used a gray tweed), and 10 yards of 1/4″
cording to complete both of my pillows.

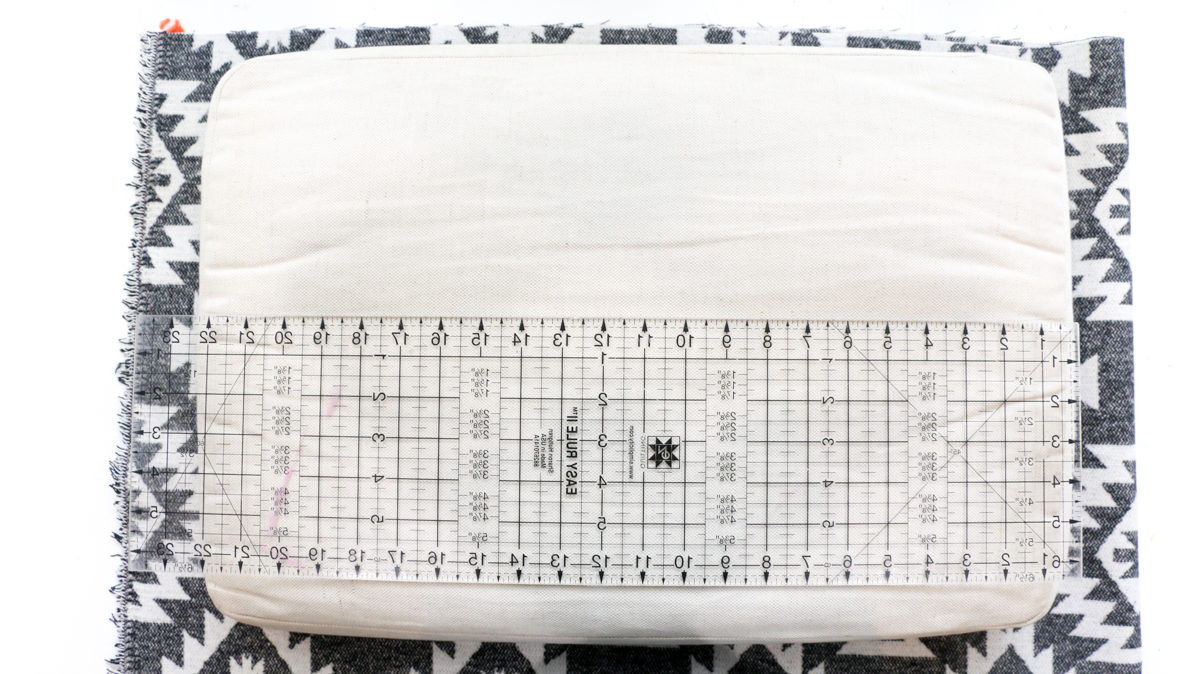
Once I had all my supplies, I began by measuring my pillows
and adding 1/2″ to each length and width and cutting the main fabric in
this size. For example, my pillow measured 22.5″ by 17.5″, so I cut
two pieces (one for the top and one for the bottom of the cushion) at 23″
by 18″. This gave me a 1/4″ seam allowance.
and adding 1/2″ to each length and width and cutting the main fabric in
this size. For example, my pillow measured 22.5″ by 17.5″, so I cut
two pieces (one for the top and one for the bottom of the cushion) at 23″
by 18″. This gave me a 1/4″ seam allowance.
You will also want to cut out your side pieces if your
pillows are boxy like mine. Again I measured the length and width and added
1/2″ to each measurement when cutting the fabric. I ended up needing two
long strips per pillow, so I took my total length and divided it in two and
then cut two pieces with this length plus the 1/2″ seam allowance. Then I
sewed the ends of the pieces together to create a long strip that was 1/2″
longer than I needed to go all the way around the edge of the pillow.
The final cut will be the material that you will make into
the piping. You will want to cut 2″ strips of the piping fabric and then
sew all the ends together to create a super long continuous strip of material.
I needed 10 yards, so I stopped when my piping fabric strip was roughly 10+
yards.
the piping. You will want to cut 2″ strips of the piping fabric and then
sew all the ends together to create a super long continuous strip of material.
I needed 10 yards, so I stopped when my piping fabric strip was roughly 10+
yards.

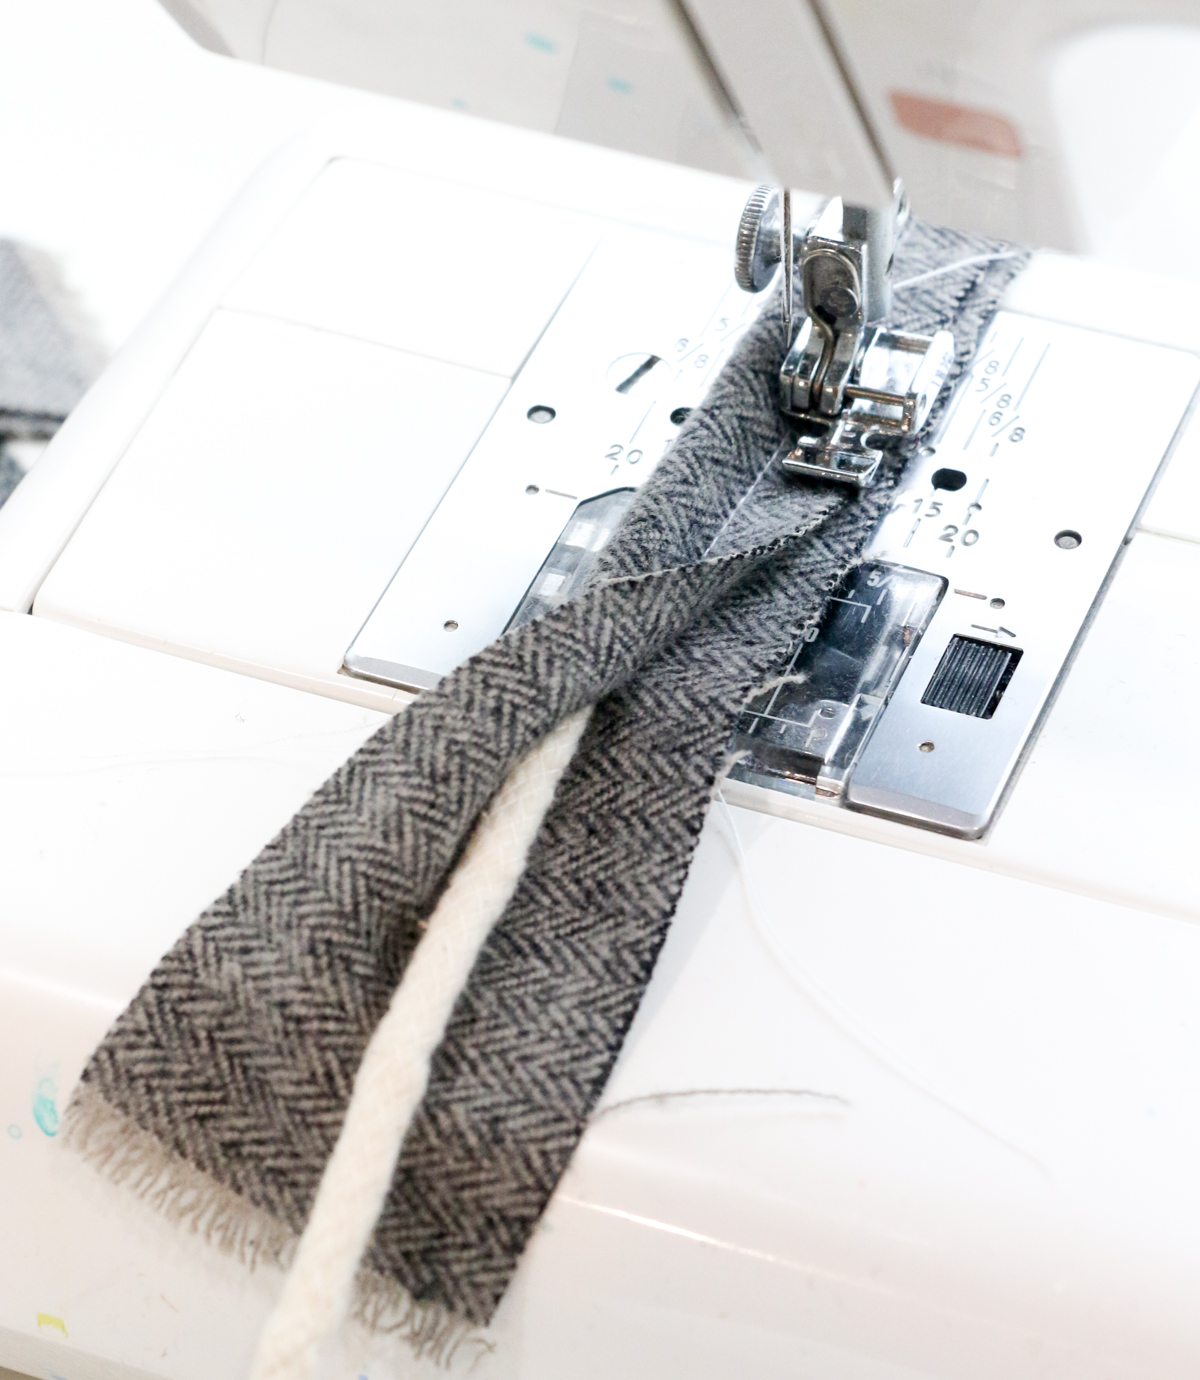
Now that all your supplies are cut, it is time to make your
piping. Add your cording to the middle of your piping fabric strip and fold
over the fabric to create a casing for the cording. Use a zipper or cording
foot with the needle moved as close to the cording as possible and baste
stitch (on the longest stitch setting) the fabric to create your piping.
Continue until all of your cording is covered.

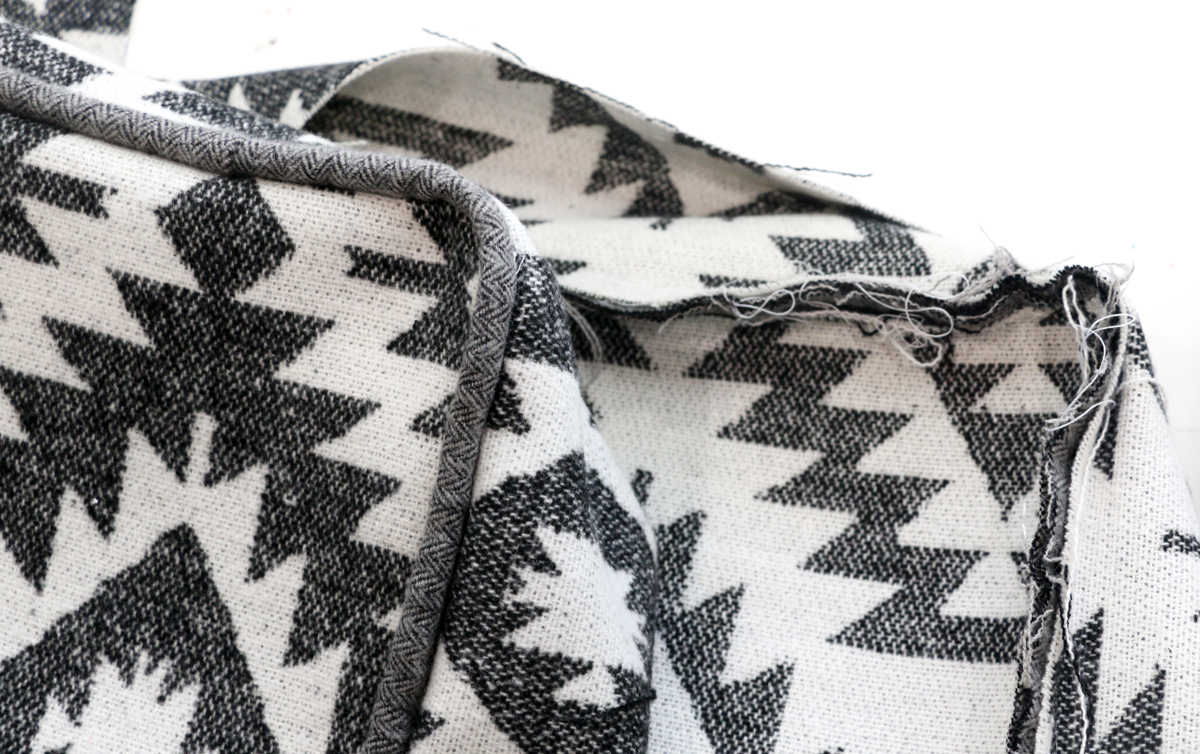
Now it is time to sew your pillow covers. Begin by pinning
the piping in-between the top cushion fabric and the side cushion fabric. You
want to make sure the piping is facing inwards like so:
the piping in-between the top cushion fabric and the side cushion fabric. You
want to make sure the piping is facing inwards like so:

Work your way around the cushion pining the pieces together
and then (still using the zipper or cording foot), stitch around the pinned
edge. When you get to the end, you can sew your side pieces together to
complete the edge. Now repeat the process with the bottom fabric while leaving
one edge fully open so you can insert your pillow.
and then (still using the zipper or cording foot), stitch around the pinned
edge. When you get to the end, you can sew your side pieces together to
complete the edge. Now repeat the process with the bottom fabric while leaving
one edge fully open so you can insert your pillow.

Once you have sewn all but one side, turn the case right
side out and inert your chair cushion. Then use a needle and thread to whip
stitch the opening closed. Repeat with the other cushion for the back of the
chair and you’re done!
side out and inert your chair cushion. Then use a needle and thread to whip
stitch the opening closed. Repeat with the other cushion for the back of the
chair and you’re done!
I was originally going to try a gold piping, but I felt the
gray tweed coordinated better with the main fabric. But feel free to mix it up
by choosing a bright solid color for the piping to give your chair and little
flair.
gray tweed coordinated better with the main fabric. But feel free to mix it up
by choosing a bright solid color for the piping to give your chair and little
flair.
I hope you all now feel inspired to try your hand at
recovering that chair or bench cushion that has gotten dingy or is just out of
date. I have to say, while I was dreading sewing the new covers for the longest
time, I am SO happy with the results. Now I am itching to try my hand at making
a few more pillows with piping detail!
recovering that chair or bench cushion that has gotten dingy or is just out of
date. I have to say, while I was dreading sewing the new covers for the longest
time, I am SO happy with the results. Now I am itching to try my hand at making
a few more pillows with piping detail!


