This post, Colorful Playroom Refresh and DIY Striped Wall, is sponsored by Ace Hardware. Thank you for for supporting the brands that keep the crafts coming! All ideas and opinions are my own.

Guys! I am so excited to share my colorful playroom refresh and DIY striped wall with you all today! We moved into our house 4.5 years ago. Aside from moving toys and furniture around, the upstairs playroom hasn’t been touched since we moved in. It was always a space I wanted to decorate, but since its main function is to house toys and the room is usually a mess, I put off doing anything up there. That’s where Ace Hardware comes in! They challenged me to redo the space with paint tools from the Paint Studio and their Clark+Kensington paint line. Because it is durable and so easy to wash, this paint is perfect for a playroom. I was up for the challenge! I quickly started brainstorming ideas for how I wanted to refresh the room.
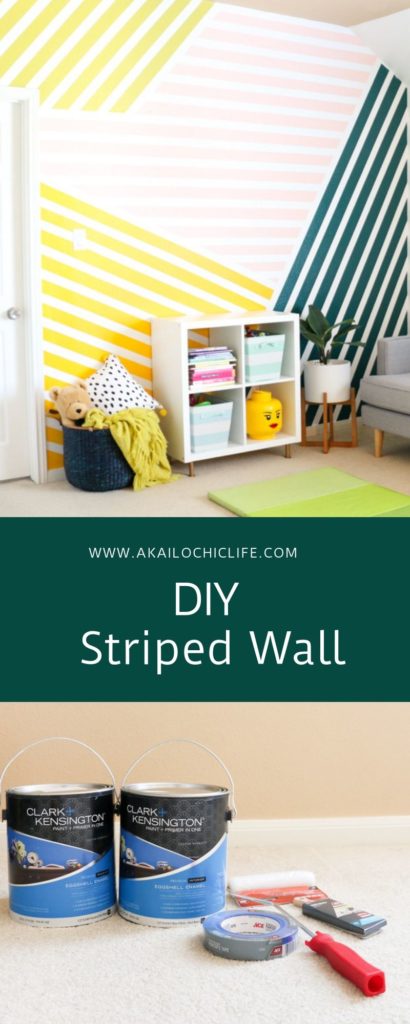
It would be easy to just paint the walls a solid color, but I really wanted to create a fun and colorful focal wall. This is a playroom after all! So I decided to paint stripes of various colors and angles to add some dimension to the space. Stripes are one of the easiest murals to do for beginners, so I figured I should give it a go.

Planning for Creating my Colorful Playroom Refresh and DIY Striped Wall
Let’s start at the beginning. This is the room before the painting process. All of the walls (and ceilings!) were beige when we moved in. My first step was to paint all those beige walls a nice crisp white. I used a white base by Clark + Kensington in an eggshell finish for this step. I also was sure to grab all the supplies I needed to complete my painting project while at Ace Hardware, including my favorite short-handled angled brush, roller, and painter’s tape. What’s nice is that Ace has everything you need for your paint project, and if you don’t get everything in one trip, with Ace’s Extra Mile Promise you can purchase the items over the phone and they offer free delivery straight to your door.
The Priming Process
I began the painting process by using a short-handled angled brush to cut in the trim and ceiling, then came back and rolled on the paint. It took three coats to completely cover the beige.


Creating the Design
Once the walls were a nice crisp white, I used 2″ painters tape to tape off lines 2″ apart in sections going in different directions.

Adding the Color
Once the tape was on the walls, I rolled over the tape with another coat of white. We have slightly textured walls, so I wanted to make sure the colored paint wouldn’t bleed through the texture. A coat of white paint helped seal the edges of the paint so that I could get even paint lines. Once the white coat was dry, I started rolling on the colors. I used Clark+Kensington in some fun bright colors: Illuminated Orange (16D-4), Marine Green (30B-7), and Peanut Butter (11A-3) in eggshell. After painting a few stripes, I wanted one more color in the mix and so I mixed 4 parts Illuminated Orange, 1 part White, and 1 part Marine Green to create a bright avocado green for the last set of stripes.

The Results
Once the paint was dry, I removed the painters tape and used a small craft brush to touch up any areas that bled. Luckily that part was minimal since I did the coat of white first. I didn’t want to carry the stripes through the whole space because I felt that would be overwhelming, so instead I kept the other walls white but added boxes of color that I then hung art work inside. It was the perfect amount of color to tie the wall into the stripe wall, but still simple enough not to overwhelm the room.

Now that you see how simple it is to make your own focal stripe wall, let’s get to the good stuff of all the before and after photos, shall we?
Before and After


Isn’t it amazing what a little paint and a few days of DIY action can do?! I think this colorful playroom refresh and DIY striped wall may just be one of my favorite home projects to date. I love quick refreshes, don’t you?