


This post on my DIY color blocked bar is sponsored by Krylon® Brand. All ideas and opinions are my own. Thank you for supporting the brands that keep the lights on and the craftiness flowing.
Honestly, I can’t even remember where I saw the inspiration for this DIY bar, but I remember the curved rainbow-esque bar exactly because it stopped me in my scrolling tracks. I knew right then and there that I needed to find a way to recreate the bar for my own. So I partnered with Krylon® Brand spray paint to turn my dream bar into a reality. A little woodworking and spray painting was all it took to create this amazing DIY color blocked bar. And of course a new bar means party time, so I blew up some balloons and plan to have my friends over for a little Galentine’s Day cactus themed celebration.

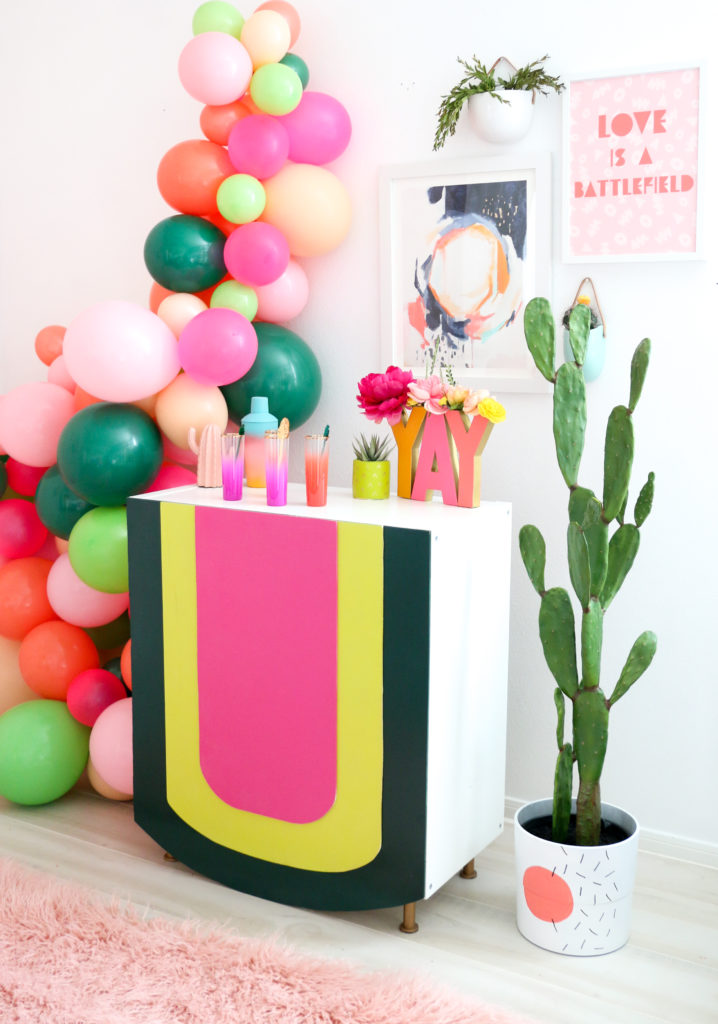
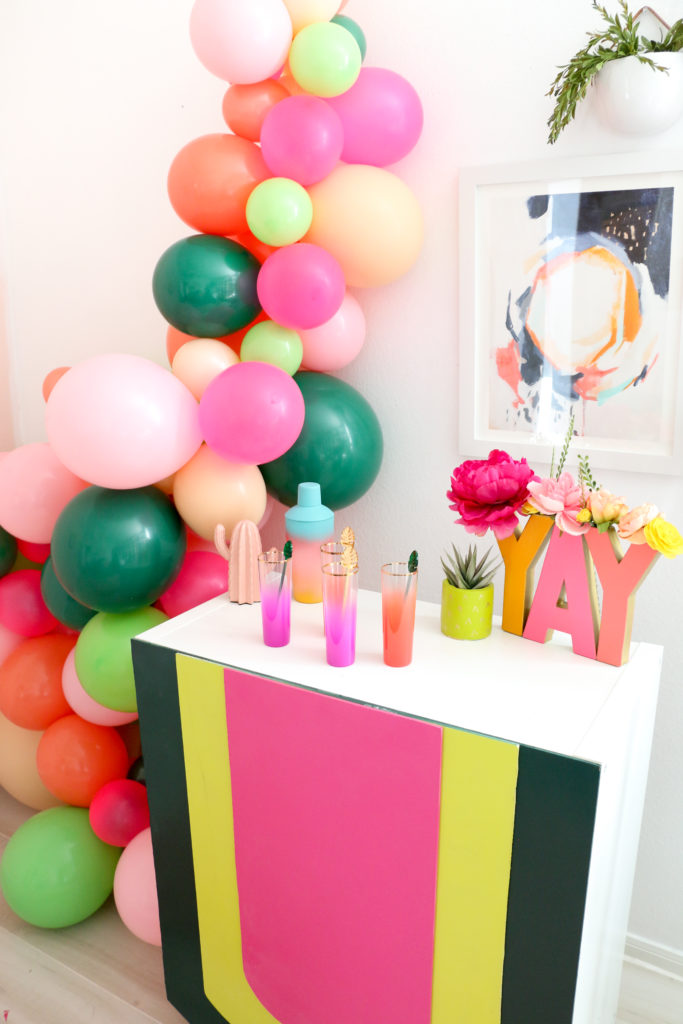
Isn’t she pretty?!
I used a 2×2 shelving unit with gold legs as the base for the bar and created a panel out of birch plywood for the front to turn the shelf into a free standing bar with storage in the back for all the bar essentials.
Make Time: about 3 days
MATERIALS:
- Two 4×4 birch plywood panels
- Jig saw
- 1 can of Krylon® ColorMaster Paint + Primer – Satin Hunter Green
- 1 can of Krylon® ColorMaster Paint + Primer – Gloss Citrus Green
- 1 can of Krylon® Short Cuts Aerosol – Gloss Hot Pink
- Square shelving unit with legs
- Wood glue
- Sanding sponge

I began by measuring my shelving unit and drawing the same square on my first piece of plywood. Then, I measured the distance from the end of the shelving unit to the ground and added the line to represent the floor on my plywood beneath the square that represented the shelf itself. Next, I freehand drew a curve from one side of the sketched square to the other while bringing the middle section of the curve down to the floor line. This gave me my large curve piece. I then used my jig saw to cut out this curved piece from the plywood. If you don’t have power tools, you can modify the unit by just using squares and forgoing the curve. That way you can get the fine folks at the hardware store to cut the wood to size for you.
Once you have your largest curved panel, you need to create the next two smaller sizes. I did this by drawing a square 4″ smaller than the measurements of the shelving unit on each of three sides. I wanted to have the panels all align on the top, so I left the top height the same. I then drew another curve for this middle panel to run parallel to the curve on the large panel. Now it was time to cut out the second panel with the jig saw.
Finally, I repeated this step with the smallest panel again coming in 4″ on three sides. Once all three panels were cut, I used a sanding brick to sand the curves to get them smooth.

Now it is time for the spray paint! I used one can each of Krylon® Brand ColorMaster Paint + Primer in Satin Hunter Green and Gloss Citrus Green as well as Krylon® Brand Short Cuts Aerosol in Gloss Hot Pink. I took my panels outside and placed them on scrap cardboard. It is best to do all your spray painting in a well ventilated area on a protected surface, and be sure to read the labels on the spray paint for all safety and application instructions first. Then I gave them a light coat of spray paint.

Once the first coat of paint dried for 15 minutes, I came back and did a second coat. I let that coat dry another 15 minutes and added the third coat of spray paint to all the panels.


After the final coat was on, I left the panels outside on my covered porch overnight to fully dry. The next day I used wood glue to attach the panels to each other. Since I was using lightweight 1/4″ plywood, I didn’t need to use any nails to secure the panels.

Once the panels were attached with the wood glue, I used clamps to hold them in place while the glue dried overnight. Then, I used the same wood glue to attach the large panel to the shelving unit (keeping the glue only around the sides of the panel where it would meet the shelving unit). I tipped the shelving unit on its side to add the panel and then used books to weigh the panel down while the glue dried. Once the glue dried for 24 hours, the bar was ready to use.


All that was left to do once the bar was built was to add all the glassware and spirits to the shelves on the backside, add a few balloons and a few cacti and invite the girls over for a drink!


