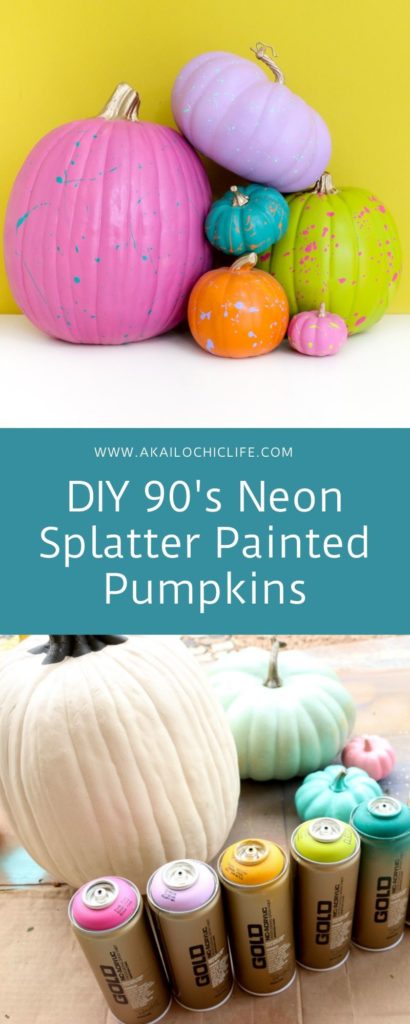
A few years ago, I made some gold splatter painted colorful pumpkins. They have been one of my more popular pumpkin projects! This year, with my obsession with neon and the 90’s, I figured I would give those splattered pumpkins an upgrade. This pumpkin craft is extremely simple and so much fun for every age to help make. And don’t these bright vibrant colors of the DIY 90’s neon splatter painted pumpkins just make you smile?!

These are definitely a vibrant take on Halloween and fall. Add a few spider webs and black plastic spiders or a few black paper bats and you have a very 90’s take on colorful Halloween decorations!
Materials to make your own DIY 90’s Neon Splatter Painted Pumpkins:
- Faux pumpkins from the craft store
- Montana gold spray paint in your choice of colors
- Acrylic craft paint in coordinating colors
- Paint brushes

Begin by spray painting the pumpkins with the spray paint outdoors in a well ventillated area. When the paint is dry, water down the acrylic craft paint in a small bowl or paper cup. This should be in a 3 parts paint to 1 part water ratio. Next, mix the paint and water, dip the brush in paint, and flick it at the pumpkins to splatter them. This step is best done outdoors as well.
Once the pumpkins are splattered to your liking, let the paint dry, then paint the stems gold if desired. At this point you can leave the pumpkins as is or add in those spiders and bats for a nice contrast and a little Halloween flair.

If you want, you can also go with all the colors of paint on all the pumpkins. but I liked the color blocking splatter painted look, so I just stuck to two colors per pumpkin. But I bet a rainbow of splatters on a white pumpkin would look pretty fly too!

September 4th, 2020 at 11:40 am
[…] A Kailo Chic Life […]